

Creative Team Member, Beverly, shares her Still Life Tutorial in Adobe Photoshop.
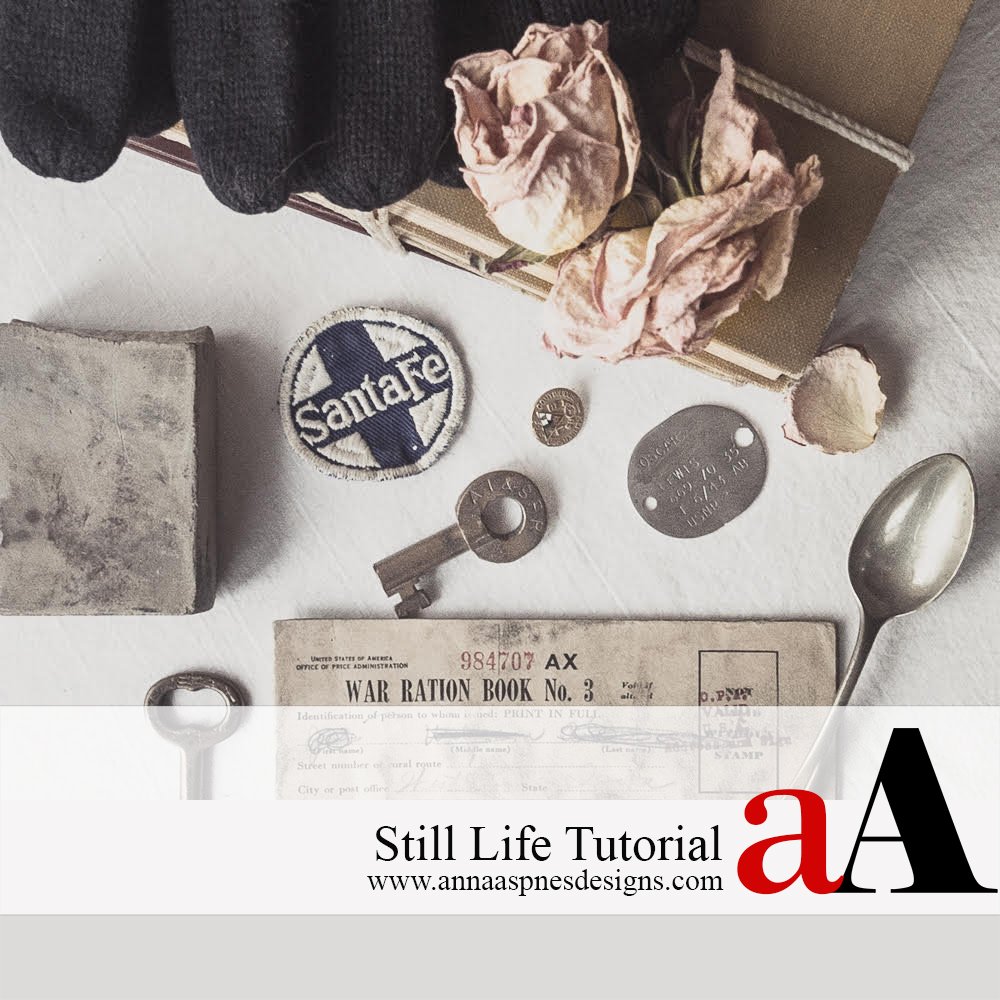
Still Life Tutorial
A still life photography practice offers the ease of having items already on hand to create a scene.
For example, I love to grow flowers, periannuals in particular. I often readily have fresh blooming flowers to pick, and can arrange them loose, or in bottles, on a table top while I enjoy the quiet moment of capturing the beauty.
A still scene with personal and treasured mementos can make a lovely addition to a heritage page, or an artsy page using Anna’s digital supplies.
In January 2012 I began a year long class learning to create still life images, and took a 7 year journey through 2018. My annual Victoria Magazine subscription started it all for me, with their beautiful works of photography, vignettes, still life treasures, moody light, table settings and dreamy rooms and gardens. My very first attempt at creating a still life was inspired by an image I saw in one of the 2011 issues; taken July 2011, before I knew anything about creating still life, I’d never heard of textures, or digital products.

The best part about still life is how personal it becomes, choosing your own garden flowers, using your family mementos and other treasures.
Below is a link to my Still Life Example Pinterest board where you can view some of my stills as well as find inspiration.
https://www.pinterest.com/
The below photo is from a 2014 Still Life class…memories of my dad; edited in Adobe LR and Kim Klassen preset.

1. Planning
Spend some time thinking about what items are in your home, garden or other places, that you love.
Anything from heritage pieces handed down to you from special relatives, to a favorite corner in your home – Search your cabinets, hutches, closets, drawers, collection boxes.
- Gather a few things together, and find similarities and contrasting items and put them in a container, so you have the items handy to begin a shoot when the mood comes along, or you discover a need to add a special something to your heritage page to complete the story.
- You might have a pair of baby shoes from your mother, grandmother, or a baby sweater. Keys from your dad’s old special car. These things all make wonderful items to begin a still scene. Include a photo of your dad with the keys, and a flower (his favorite).
- Choose 1,3, or 5 items (use odd numbers) to start with.
The below photo is of my grandmother’s silver and a sprig of clematis vine on linen created in a 2015 Still Life class.
 2. Preparation
Below are a few table top or make-shift table top ideas.
- Any small table top, or flat surface will work. The surface can be covered with any fabric or paper of your choice, or use the surface as is.
- Brown paper, gift wrap paper, maps/atlas
- Worn/used cookie sheet
- Old boards/doors/wood flooring
- Chair seat (level)
3. Setup
Set up your table, tray or flat surface near a window with good side light.
- Arrange the items. Use layers of fabric, dishes, to vary the depth. Use different heights to vary the visual interest. (look through the Pinterest board to gain inspiration and ideas).
- When you set up a surface on the floor, you can easily create a “top down” or “flat lay” scene. A secret to flat lay, is keep the height even. Items too tall will be the only thing in focus, and that may not be what you are going for.
- Shoot from the front, straight on, or on angles.
- Move around the scene, shooting multiple angles, watch the light, how the items look through the lens.
- Now, try rearranging the items for a different look, and take more photos.
- Take a lot of pictures. It takes time to “warm up” to a scene and the “feel” of it. My best shots are normally at the end of my shoot.
I hope you’ve been inspired and will give this a try. Find a nicely lit area in your home, on your porch. Set up a little table and scene to tell a story, shoot and view in your choice of editing software. Next time we will take the photo on an editing journey, and later will make an artsy layout using Anna’s Digital Products and still life images. If you have questions, please in comments.
Post your digital artistry and artsy digital scrapbooking pages in The Gallery, and if you liked this Still Life Tutorial, please consider sharing it using the social media buttons below.


This is excellent! Thank you for the planning information. Looking forward to trying to improve my still life photography with your help.
Thank you very much Adryane! I look forward to seeing your still life photography in your creative pages.
Yes!
First of all, your photographs are simply stunning. I loved reading about your planning, prep and setup. Thank you for this insightful post. You inspire me to gather items, of my daughter, (when she was a baby) to make stills, for an album, for my soon-to-be first grandchild. Thank you for literally making me think outside-the-box! 🙂
Inspiring is what we’re all bout here 🙂
Thank you Denise, for your very kind words! I’m excited to know you have gained some inspiration and insight into making memorable still life pieces to use in your albums.
Beverly, your photography is truly exquisite! Great photography captures the light and you do that so well! Thanks for these amazing examples, tips, and Pinterest link!
Totally agree Marnie.
Marnie, you always encourage me with your genuine kindness! I appreciate them, and I hope you enjoy the Pinterest link, and make a few stills yourself.
Very interesting article Beverley, I would like to do all this,
I followed your links, everything I like, congratulations for your advice and your ideas
you have a lot of talent.
thank you for sharing all this with us.
Yes!
Thank you so very much Pruleau! I’m thrilled you enjoyed the information, ideas, and the Pinterest board. I look forward to seeing what you’ll create yourself.