
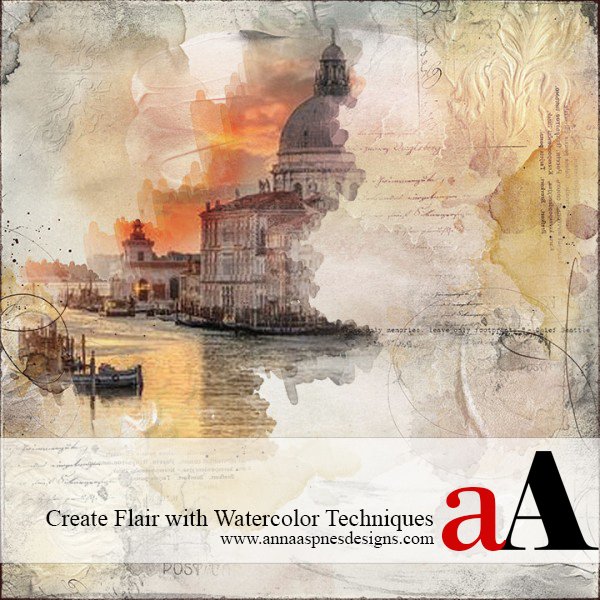
Creative Team Member, Ann shares her favorite techniques for adding creative flair to composite images with watercolor techniques.
Part 1. Mask A Photo
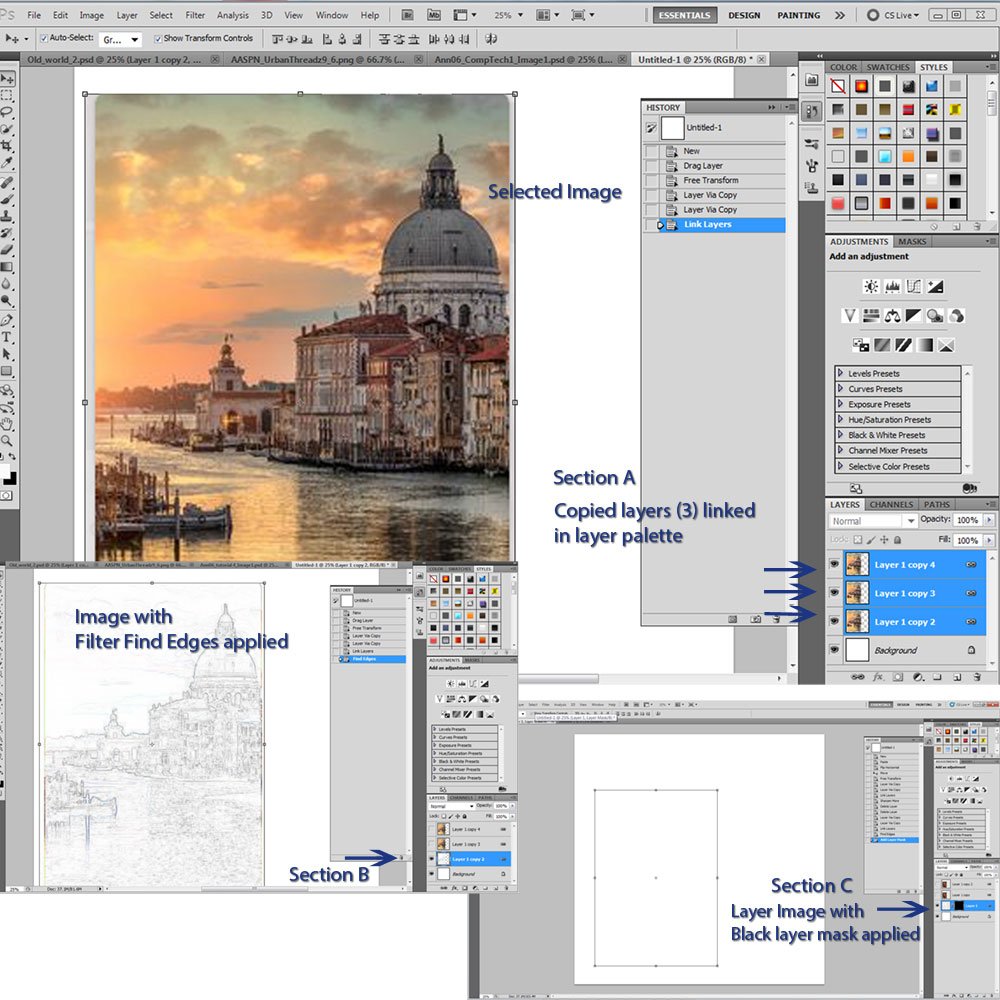
Create Foundation. Open and move an image of your choice onto a new 300 DPI 12 X 12 layout. For best results, select an image with a lot of detail. Duplicate the photo twice by pressing the COMMAND/CTRL + J buttons on your keyboard. This will yield 3 identical copies of the same image.
Note. You will use the top copy as a reference only throughout the duration of the creation process.
Link the three photo layers together by selecting all 3 layers in the Layers palette and clicking on the chain icon. Turn off the visibility of the second 2 layers for use later in the process by clicking on the eye icon next to each layer (see section A on Image 1).
Apply Filters. Select the remaining visible layer of your photo by clicking on the layer in the Layers Palette. Go to Filter> Sharpen Filter> Sharpen Edges, then apply Filter> Stylize>Find Edges. This will render the image as a pencil sketch (see section B on Image 2).
Mask Photo Layer. Apply a layer mask to the photo layer by pressing the ALT key and clicking the Layer Mask icon in the Layers Palette. The image on this layer will disappear from view to yield a blank page (see section C on Image 3). Notice the black thumb that appears next to the photo layer in the Layers palette.
Part 2. Create a Watercolor Effect
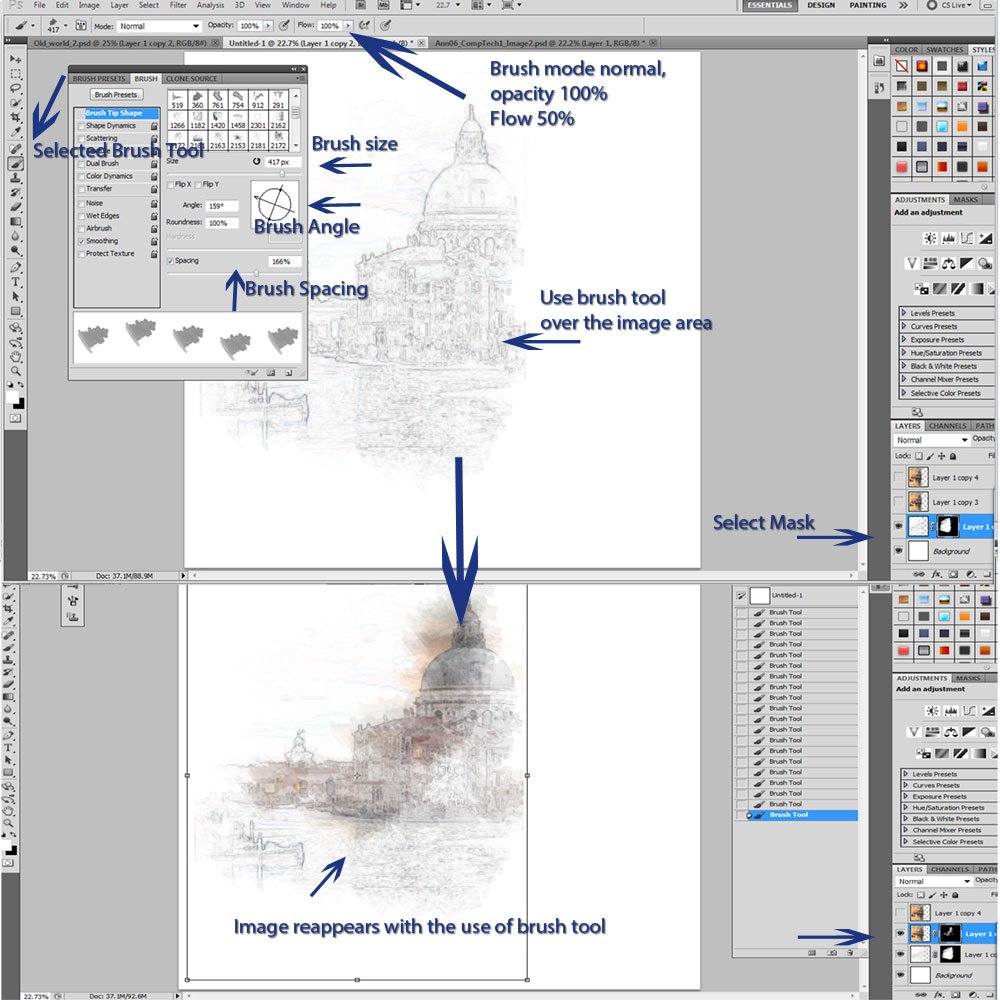
Brush Values/Presets. Select the Paint Brush Tool from the Tools Palette and choose a distressing brush with a significant surface. Consider adjusting the various settings in the Options Bar to alter the intensity of the brush, such as 1) Mode = Normal, 2) Opacity = 100%, and 3) Flow = 50% – 100%. You will also need to experiment with different Brush Presets in the Brushes palette to yield best results. For example 1) Spacing = 164%, 2) Sizing = 425, 3) Angle = 0 degrees.
Re-Introduce the Sketch. Be sure to set the Foreground and Background colors back to the default. Click on the layer mask and stamp the brush over the photo layer to reveal the areas of the masked image.
Part 3. Recolor the Sketch.
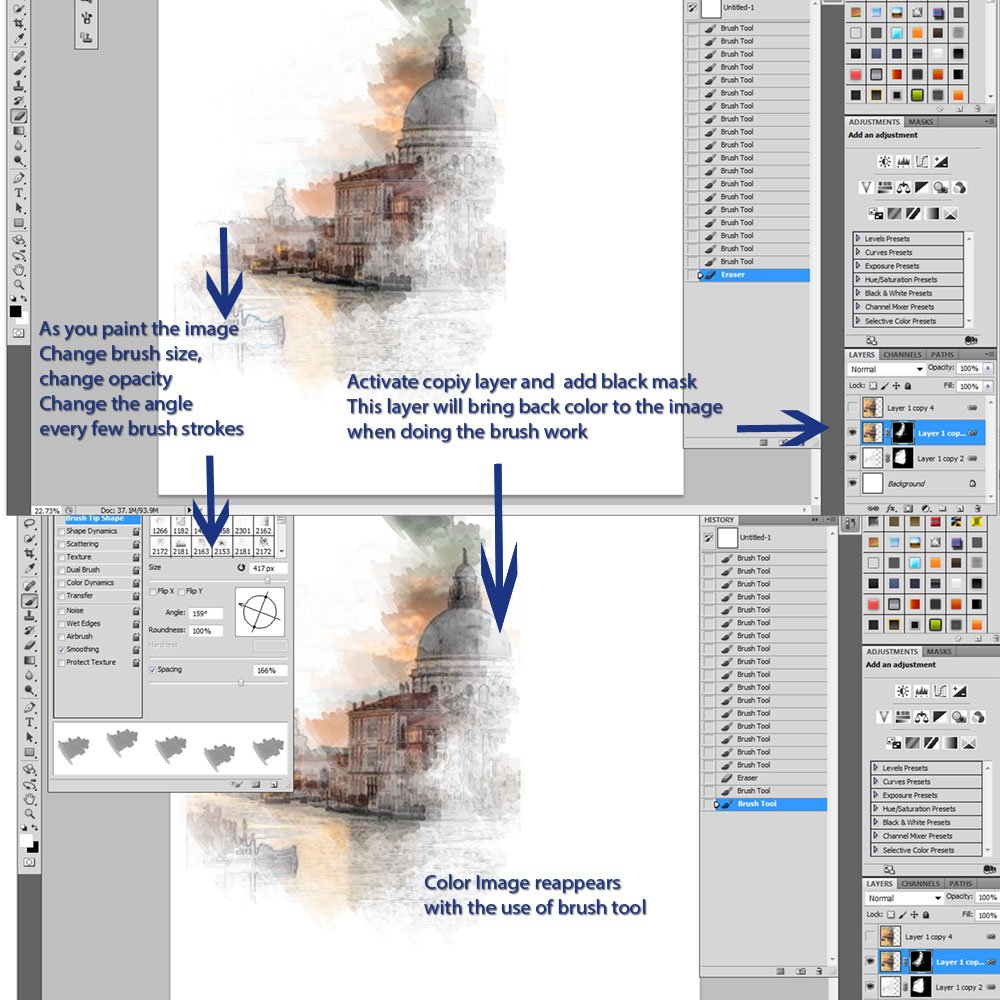
Add Layer Mask. Activate the visibility of the next layer in the Layers Palette and add a Layer Mask to the layer as above.
Brush Values/Presets. Select a large brush with low opacity and large spacing. Suggested Brush Values: 1) Mode = Normal, 2) Opacity = 25 %, 3) Flow = 50% – 100%. Then 1) Spacing = 164%, 2) Sizing = 425, 3) Angle = 0 degrees. Stamp the brush 2-3 times in the same area, then increase the opacity to 30%, reduce the size of the brush and adjust the angle. As a rule of thumb, the bigger the brush, the lower the opacity.
You can also change the direction and the spacing of the brush to create varied brush strokes or impressions with differing opacity. Try to limit yourself to one or two brushes for this technique.
Repetition. Repeat this process increasing the opacity and reducing the size of the brush as needed to render the desired result. Imagine that you are painting with your brush. Areas that need stronger color will require stamping with a brush that has a greater opacity value.
Part 4. Increase Intensity.
Note: this step is optional and dependent on whether your chosen image will benefit from a boost in intensity.
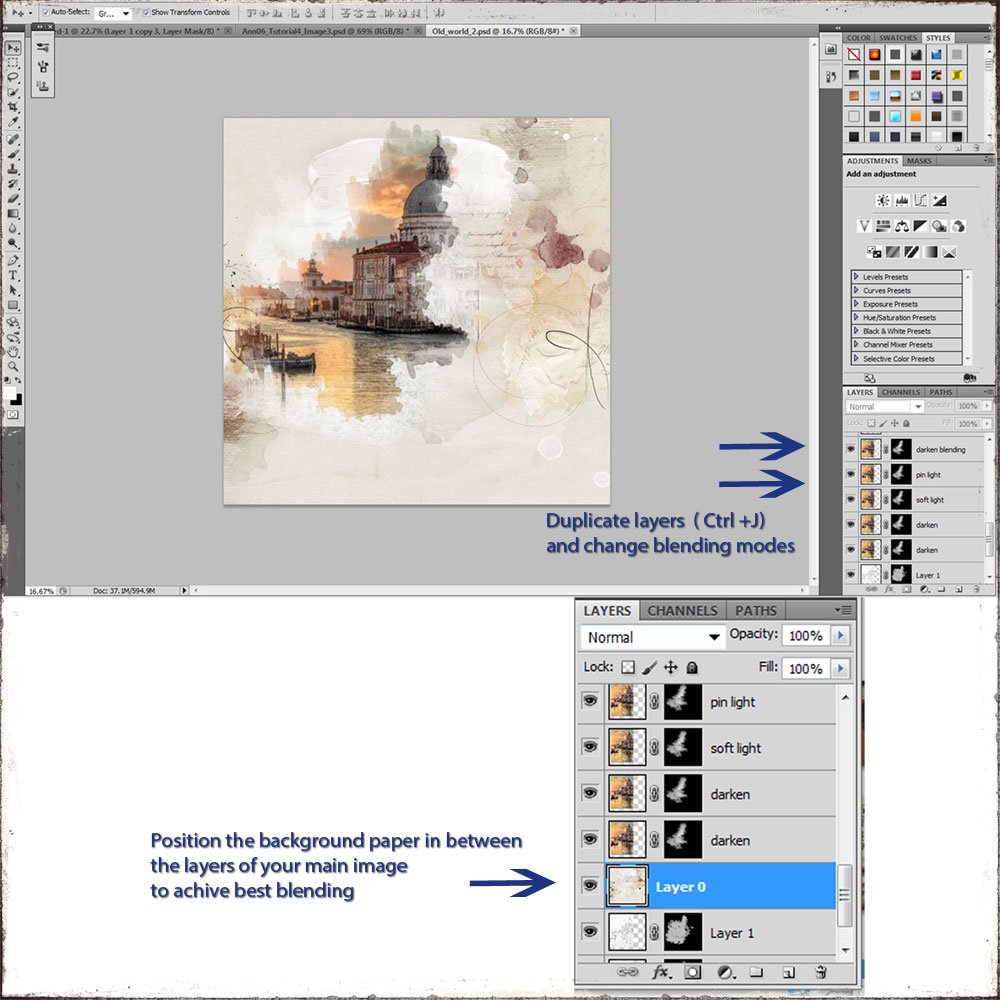
Duplicate the Masked Layer. Duplicate the layer using COMMAND/CTRL + J as many times as needed. In this case the top colored layer was duplicated many times and different Blending Modes were applied at each layer( darken, soft light, darken and pink light as an example).
Part 5. Create Background Using Artplay Palette Old World.
Add an ArtsyPaper of choice from ArtPlay Palette Old World below the layer of your focal image in the layers stack. To facilitate the blending of the image against the background, use a color that is similar to the color scheme, experiment with color choices until a visual balance is achieved.
Part 6. Add Texture and Color.
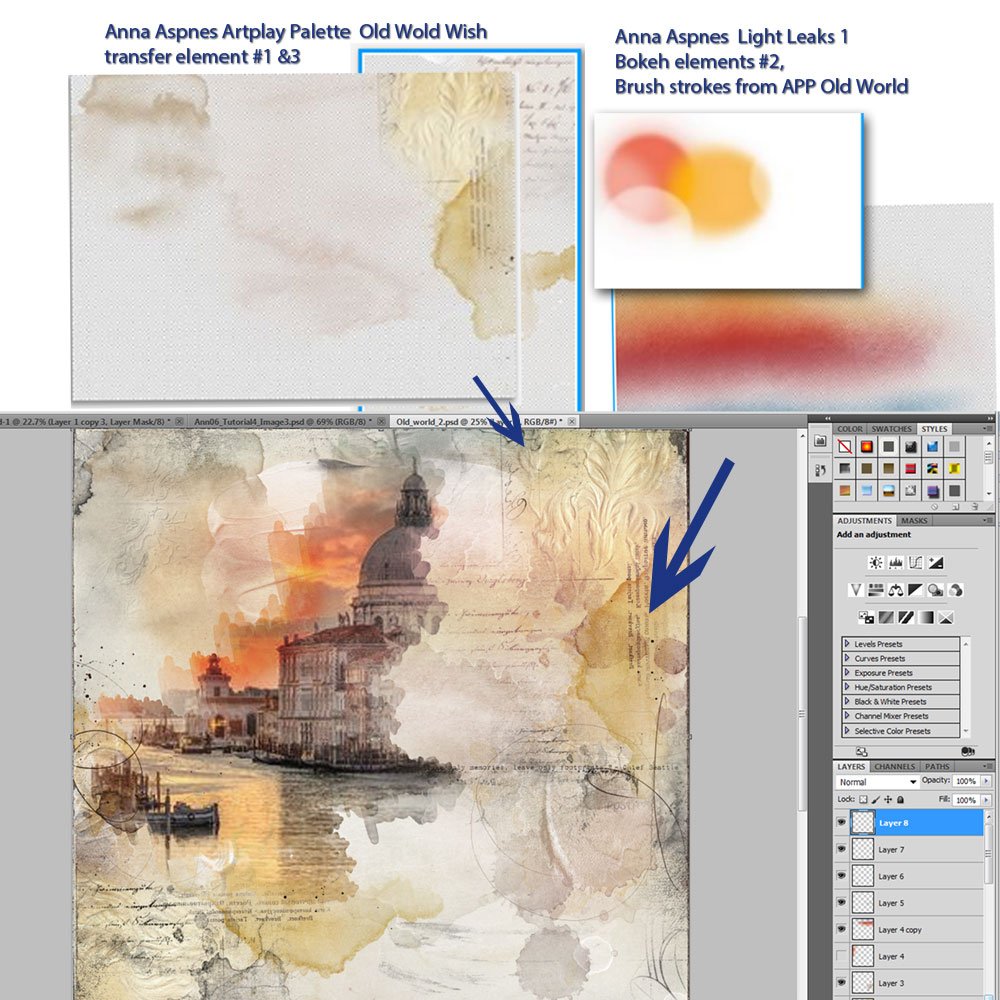
Add Transfers. Open a selection of transfers from the ArtPlay Palette Old World and arrange on your layout. Transfers and Overlays add easily blended texture, color and dimension to any composition. Experiment with Light Leaks and Bokeh Elements behind the focal image. Complete the layout with a few brush strokes using the Brushes from the same ArtPlay Palette Old World.
Want to create more DigitalART using Ann’s Composite Techniques? Check out Ann’s tutorial here.


12 Responses
Anna, this is wonderful! So clear and easy to follow. However, I noticed that the text jumps from “Part 5” to “Part 7.” Is Part 6 missing?
It’s an typo Kay! We’ve changed 7 to 6. Thanks for catching that and happy you enjoyed the tutorial.
This is a fabulous tutorial with each step so wondrously displayed. I was looking at a layout at TDC where Honor this moment layout just pulls you into her tutorial results. Beautiful layout. Thank you for all these informative and enriching tutorials. Hugs. Grambie
Thanks for the kind words Shirley! Always happy to inspire you.
What a beautiful photo you started with. Thanks so much for the tutorial. Love it.
I am sad. I think this is not for Elements. I am stuck on the filter in part one. Can not find anything that makes a pencil sketch.
Hi Terri, Ann’s techniques take full advantage of the tools available in the full version of Photoshop. Experiment with some of the other sketch style filters available in Elements and make modifications as needed 🙂
Thanks, I found another tutorial for pencil sketch in Elements, so I am back on track working through this tutorial. I just love the results!
Cool beans. Willing to share?
The tutorial is by Nann Dalton Digital Scrapper February 6, 2015 called Sketchy Photos. http://www.digitalscrapper.com/blog/sketchy-photos-01/
She also has a Pastel Sketchy Photos February 13, 2015 http://www.digitalscrapper.com/blog/sketchy-pastel-photos/
Awesome. Thanks for sharing – A great resource for Elements users 🙂