was successfully added to your cart.

Cart

Tutorials

Frame Focus and Extraction

By Thursday, June 9, 2016 (MDT) No Comments

Creative Team Member, Linda Davis, shares a tutorial on Frame Focus and Extraction, i.e. how to focus the eye with a frame in Adobe Photoshop.

This is an excerpt of a post on her blog. You can find the full post here.

Frame Focus and Extraction

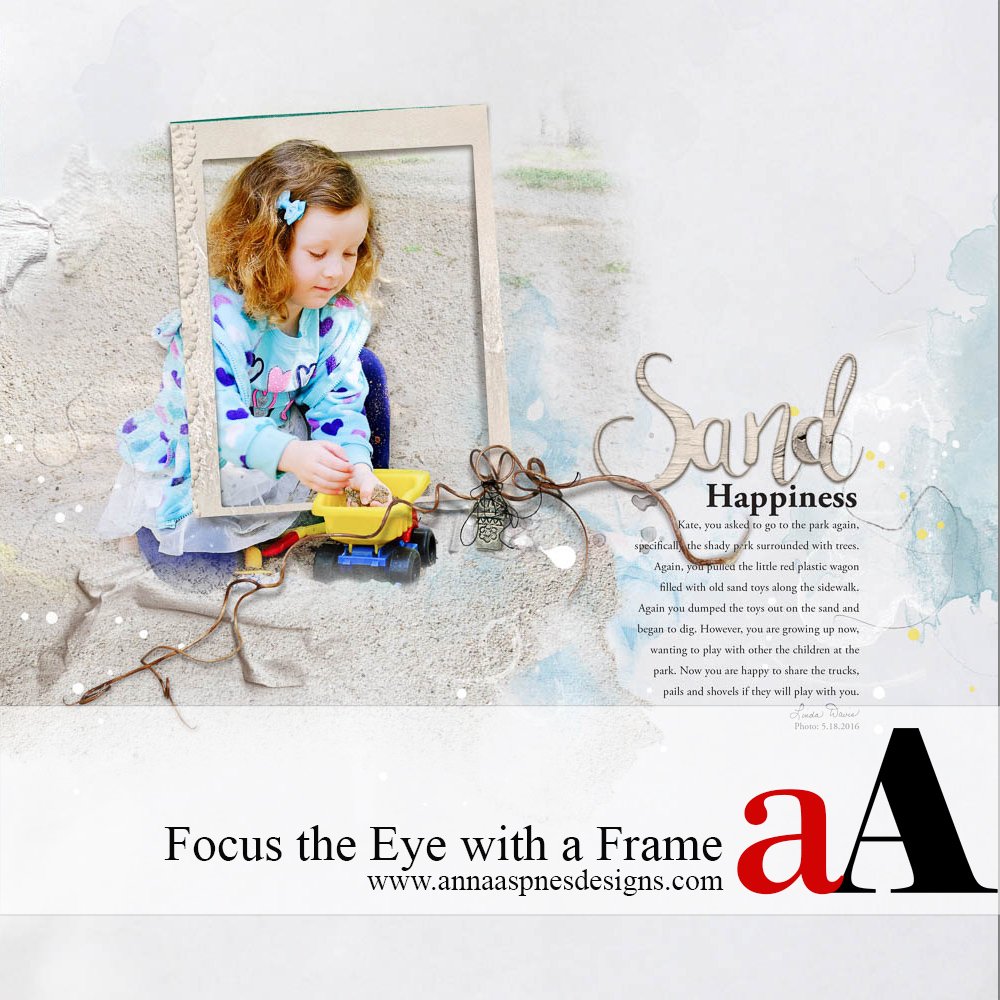
Framing helps focus the eye on what is important on a page, in this case my granddaughter as she played in the sand with the toy truck. Below are highlights of the steps that I followed to create this page as I worked the new MultiMedia Frames No. 3.

Frame Focus and Extraction

1. Drag the layers of 3.psd from MultiMedia Frames No. 3 onto a new document. Clip the photo to the FotoBlendz mask and a copy of the photo to the stain layer. Add preferred Adjustment Layers as needed to correct photo exposure. Clip SolidPaper6.jpg from ArtPlay Palette Swell to each photo layer using the clipping mask function in Adobe Photoshop (CTRL/CMD + ALT /OPT + G) and Elements (CTRL/CMD + OPT) and apply a Normal Blending Mode at 50% Opacity. Mask out what you do not want covered with sand using a Layer Mask technique of choice.

 Note. I extracted my granddaughter from another copy of the photo layer and placed it below the SolidPaper6.jpg layer because I thought the appearance and shadowing looked better in that order. I also created a copy of the extraction’s mask for the paper. The order of layers in the Layers panel will depend on how each of the layers blend together.
 Frame Focus and Extraction 
2. Place Transfer7.png from ArtPlay Palette Swell below the .psd format MultiMedia Frames No. 3  layers. Duplicate the photo layer and place that below the transfer. Apply a Layer Mask to the photo and blend into the SolidPaper.2.jpg background paper, using AnnaBlendz Artsy No. 7 brushes. Clip a copy of SolidPaper6.jpg at 50% opacity to the photo layer and mask as preferred. Stamp Brush3.png from Oasis No. 2 on a new layer below in a color that coordinates with your photo.
 
Frame Focus and Extraction
 
3. Place another copy of the extraction plus Layer Mask layer, along with any Adjustment Layers, above the frame in the Layers panel. Use a round brush to adjust the Layer Mask applied to the extract layer to reveal and/or hide areas covering the frame. Attach a Layer Mask to the frame’s shadow to lighten as needed. Notice how the eye is drawn to the image through the method of frame focus and extraction.
Note. At this point, I used the Clone Stamp to remove the distracting price sticker on the little yellow truck.
 
Frame Focus and Extraction
 
4. Add Overlay2.png, Overlay3.png and the ArtStroke from the ArtPlay Palette Swell to embellish the background. Place WoodWord2.png from Beach WordART Mix 1 and add a subtitle as shown on preview of this particular collection. Change the elements included with the frame as needed. In this case, I substituted the branch and sand pail charm from  ArtPlay Palette Swell and tied both down with 3.png from ButtonThreadz 2. Use the Text tool from the Tools panel to add your personal journaling.
 
Frame Focus and Extraction
 

More about Frame Focus and Extraction. By using a frame on my page, I have focused on my granddaughter and hidden what was distracting in my photo. You might be wondering why I didn’t simply erase portions of the frame to achieve the out of bounds effect. One reason I prefer working with an extraction is because that allows me the option to add shadows to part of the photo and create more depth on my pages. As I explained in previous posts, Inspiration and Changing Focus and a Tip for Extractions, the effects created with shadows are not possible by erasing parts of a frame or blending.

I am not especially fast at creating my pages, but I finished this page in under two hours even with the extraction. Practice helps, especially if you know the different tools in Photoshop or PSE that are available for extractions.

Knowing how to extract from a photo, the selection tools available as well as how to refine extraction edges makes what appears difficult really very easy. Anna is offering a new course, ExtractTHIS LIVE, which is available at a 50% discount if you also sign up for Flipping Clipping LIVE. Register for both classes here.

I don’t think that there is one best way to extract from a photo. My process depends on the photo, what I am trying to achieve and my comfort level with different options. Anna’s class is a wonderful opportunity for me to continue to refine my skills, especially important to me as extractions are definitely characteristic of my current style.

Frame Focus and Extraction
Click on the above photos for additional process notes and supplies used.
Print Friendly, PDF & Email

Download 100s FREE
$160 VALUE
DIGITALART MEGAPACK + Class

When you join the aA community, you’ll receive regular emails providing inspiration, special offers and product updates.

Anna Aspnes

Author Anna Aspnes

More posts by Anna Aspnes

Leave a Reply

anna aspnes newsletter
Don’t miss all the freebies
Get your FREE
DigitalART MegaPack + Class