

 aA Creative Team Member, Heather, demonstrates how to Create Visual Triangles with Digital Scrapbooking Elements.
1. Create a Foundation. Create a new 300 DPI layout. Open and Drag an ArtsyPaper of Choice onto your layout. Place a FotoBlendz Clipping Mask onto your layout. Place your photo above the Clipping Mask and clip your photo to the Mask (Ctrl+Alt+G).
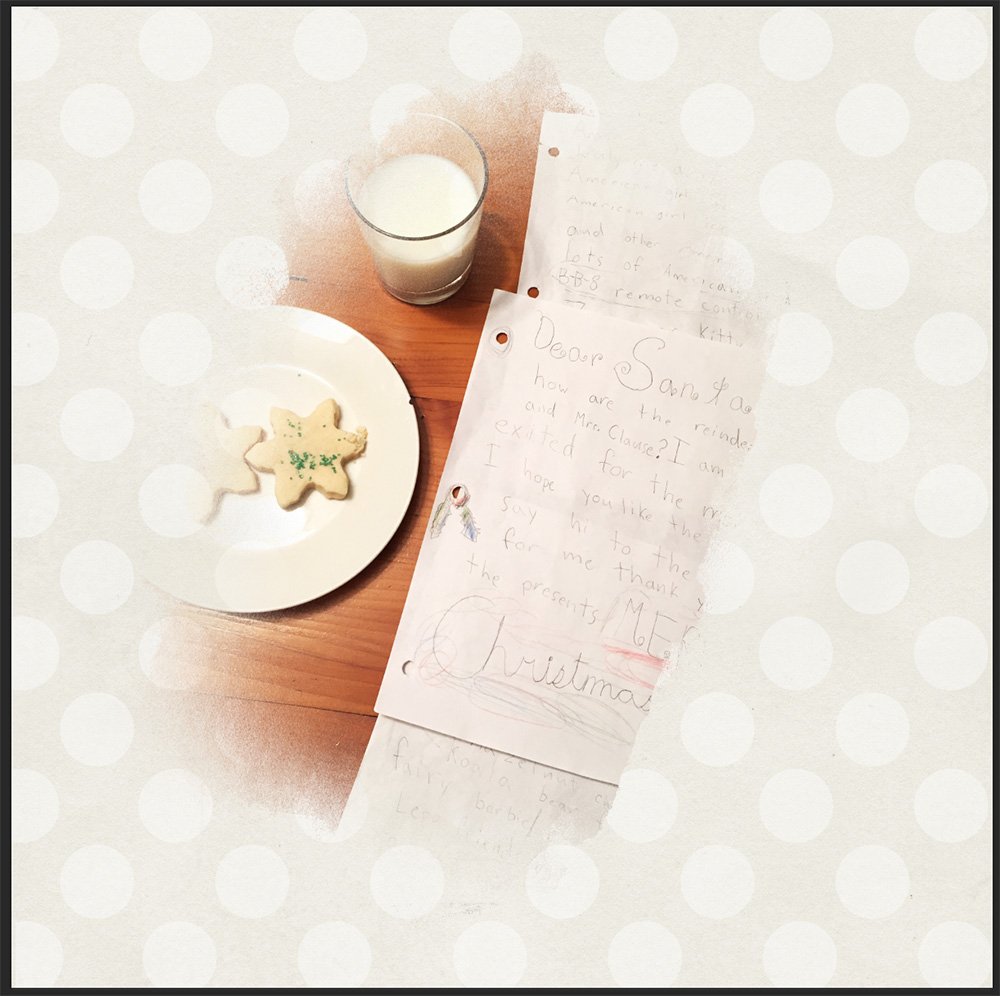
2. Add Transfers. Place Transfers around your photo to conceal the edges of the blended image and build complexity in the composite. You can place them above or below the masked photo depending on the desired look. I placed mine around the image so that the red in each of the transfers creates an invisible triangle. Experiment with Blending Modes until you have the desired look.

3. Create Balance with Elements. Add several Elements to your page, placing them around the transfers to create balance and support the Visual Triangle design.

Click on the above photo for additional process notes and supplies used. More in-depth instruction about Visual Triangles is provided in AnnaBlendz LIVE.
Register for class here.


Your page balance is excellent Heather!
This is one time I recognize the triangle right away! I think I am finally getting the hang of this! NOT! This is excellent! Thank you!
Su
One step at a time Su.