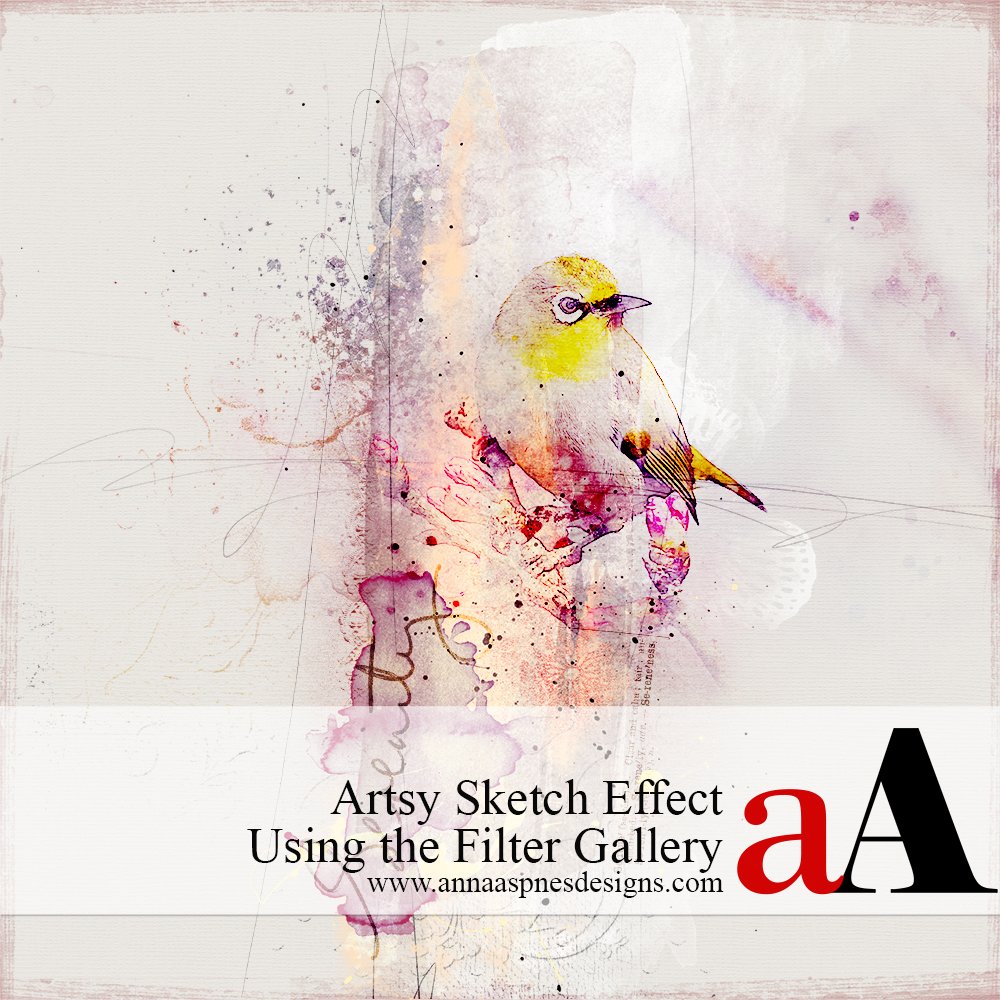
Special guest, Dorci, shares how to create an Artsy Digital Scrapbook Photo Sketch Effect Using Photoshop Filter Gallery
Artsy Digital Scrapbook Photo Sketch Effect Using Photoshop Filter Gallery
A FILTER IS AN EFFECT APPLIED TO A PHOTO TO ADD VISUAL INTEREST TO YOUR IMAGES IN A DIGITAL SCRAPBOOKING PAGE.
- The Filter Gallery is a menu of visual styles or ‘filters’ designed to yield different photo effects.
- Apply them to your images individually or in combinations for a Stacked approach.
- You can also rearrange the Order in which you combine filters for different results.
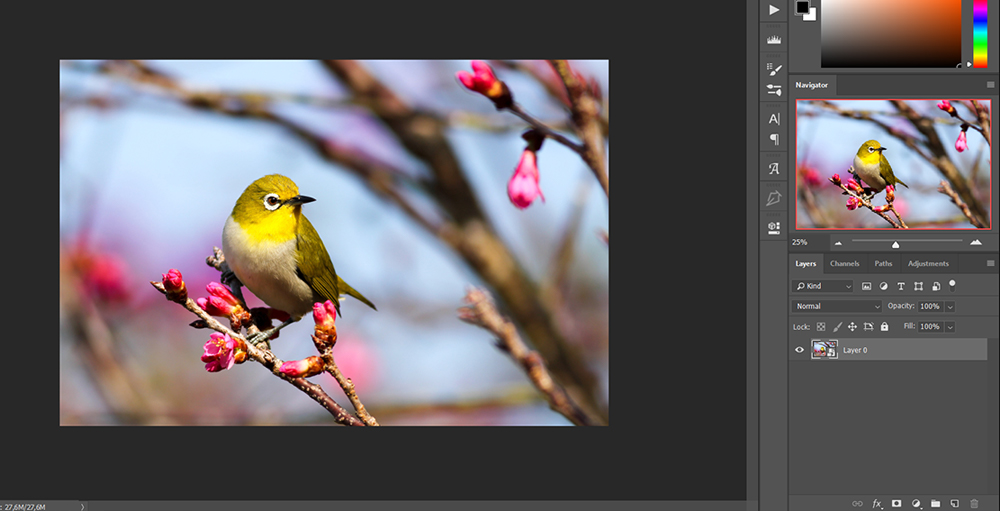
1. Select Your Photo
OPEN THE IMAGE IN PHOTOSHOP AND CONVERT TO A SMART OBJECT.
- Go to File> Open (CTRL+O), select the photo, and click OK.
- In the Layers Panel, click on the lock icon in the layer called ‘Background’ to unlock the layer.
- Select the photo layer in the Layers Panel and go to Layer> Smart Objects> Convert To Smart Object.
NOTE.
- The use of Smart Objects enables you to preserve the original characteristics of an image.
- Filters applied to a Smart Object are nondestructive and can be readjusted at any time.
TIP. The photo effect works best if your photo is high resolution and your Focal Point, sharp and in focus.
2. Apply Photocopy Filter
DUPLICATE IMAGE AND APPLY THE PHOTOCOPY FILTER TO YOUR PHOTO.
- Duplicate the image layer (CTRL + J) by dragging the photo layer to the New Layer icon in the Layers Panel.
- Make sure that your Foreground Color is BLACK.
- Click on the Foreground Color in the Tools Panel and use the Color Picker to select color BLACK.
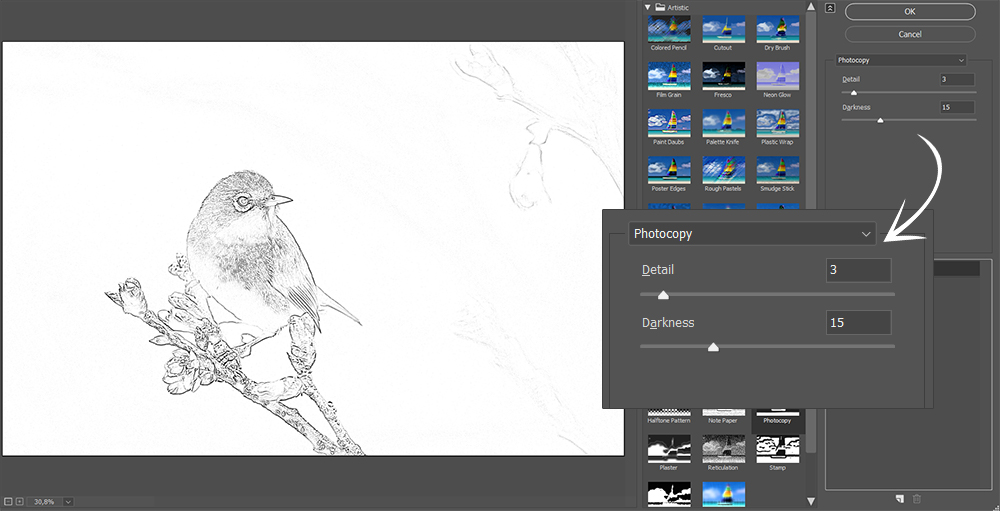
- Select the top ‘photo copy’ layer in the Layers Panel and go to Filter> Filter Gallery.
- Choose the filter Sketch> Photocopy.
- Click the + or – button under the preview area, or choose Fit in View to preview the photo effect.
- Enter Detail and Darkness values for the filter next to the preview area.
TIP. Feel free to experiment with values that best suit your photo.
3. Apply Watercolor Filter
APPLY THE WATERCOLOR FILTER TO YOUR PHOTO.
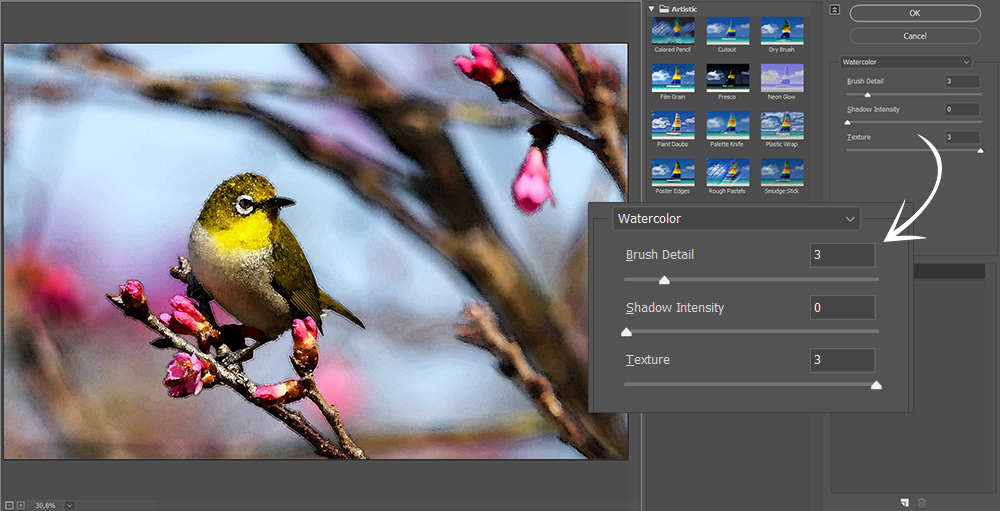
- Select the original ‘photo’ layer in the Layers Panel and go to Filter> Filter Gallery.
- Choose the filter Artistic> Watercolor.
- Choose Fit in View to see how the effect looks on your photo.
- Enter Brush Detail, Shadow Intensity, and Texture values for the filter next to the preview area.
Note. Again, you can experiment with these values.
4. Make Subtle Adjustments
APPLY A BLUR TO THE FILTER LAYERS, AND APPLY AN OVERLAY BLENDING MODE.
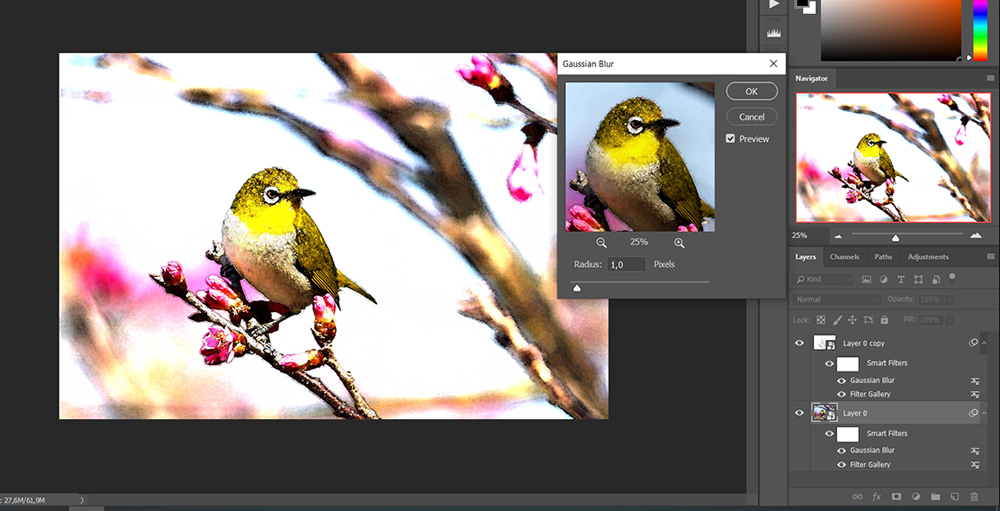
- Select the top ‘photo copy’ layer in the Layers Panel.
- Go to Filter> Blur> Gaussian Blur and adjust the Radius value to 1 pixel.
- Repeat this step on the original ‘photo’ layer as well.
- Select the top ‘photo copy’ layer again and apply the Overlay Blending Mode from the top of the Layers Panel.
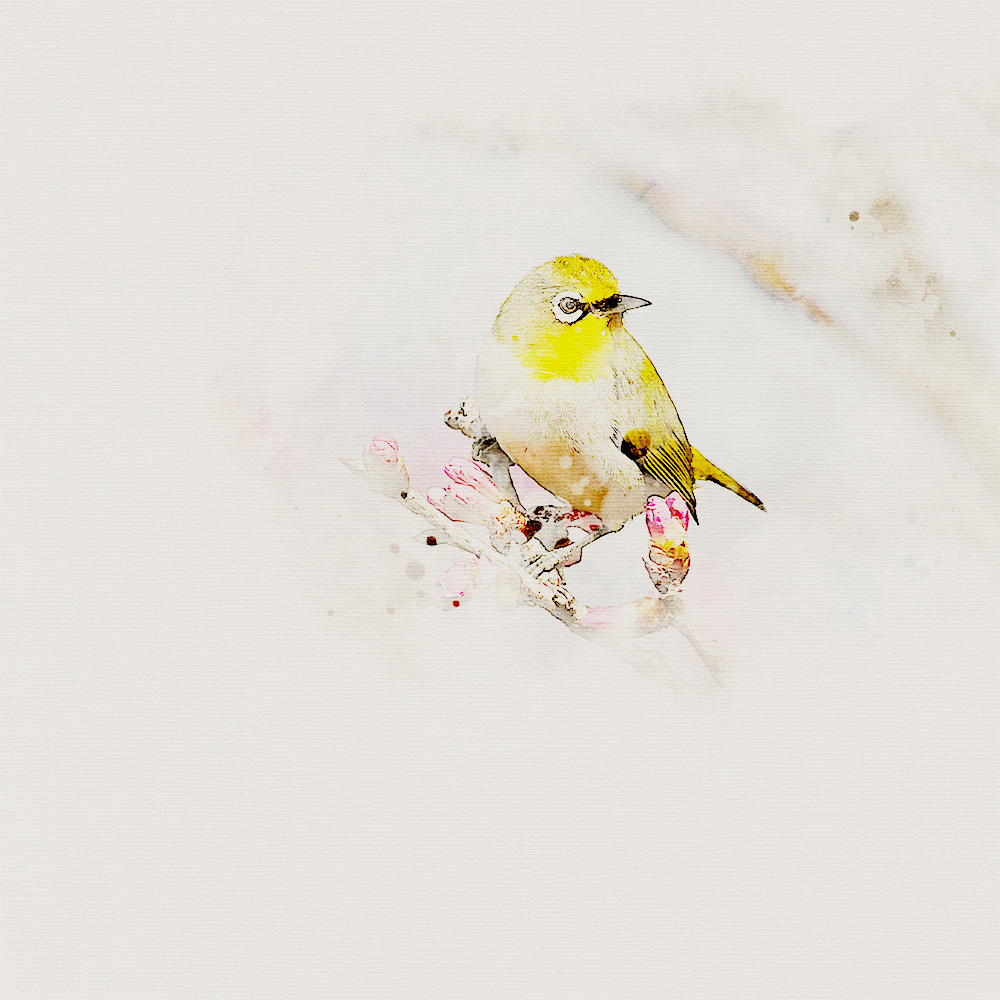
- Select the top layer in the Layers Panel and create a Composite Layer via CTRL + ALT + SHIFT + E.
Note. This will create a Merged layer of all the underlying layers in the Layers Panel.
5. Create New Layout
CREATE A NEW LAYOUT, CHOOSE A FOUNDATION, AND MOVE YOUR IMAGE ONTO THE DESIGN.
- Go to File> New and create a 12 X 12 inch New Layout at 300 PPI.
- Build your own foundation using a Solid Paper and Transfers/Overlays from an ArtPlay Palette.
- Move the Merged composite layer onto the layout by right-clicking on the ‘merged photo layer’ and selecting Duplicate Layer.
- Select the New Layout you just created as your Destination.
- Select the photo layer in the Layers Panel and go to Layer> Smart Objects> Convert To Smart Object.
- Resize and reposition your photo as preferred.
- Apply a Color Burn Blending Mode to your photo.
6. Embellish Your Artistry
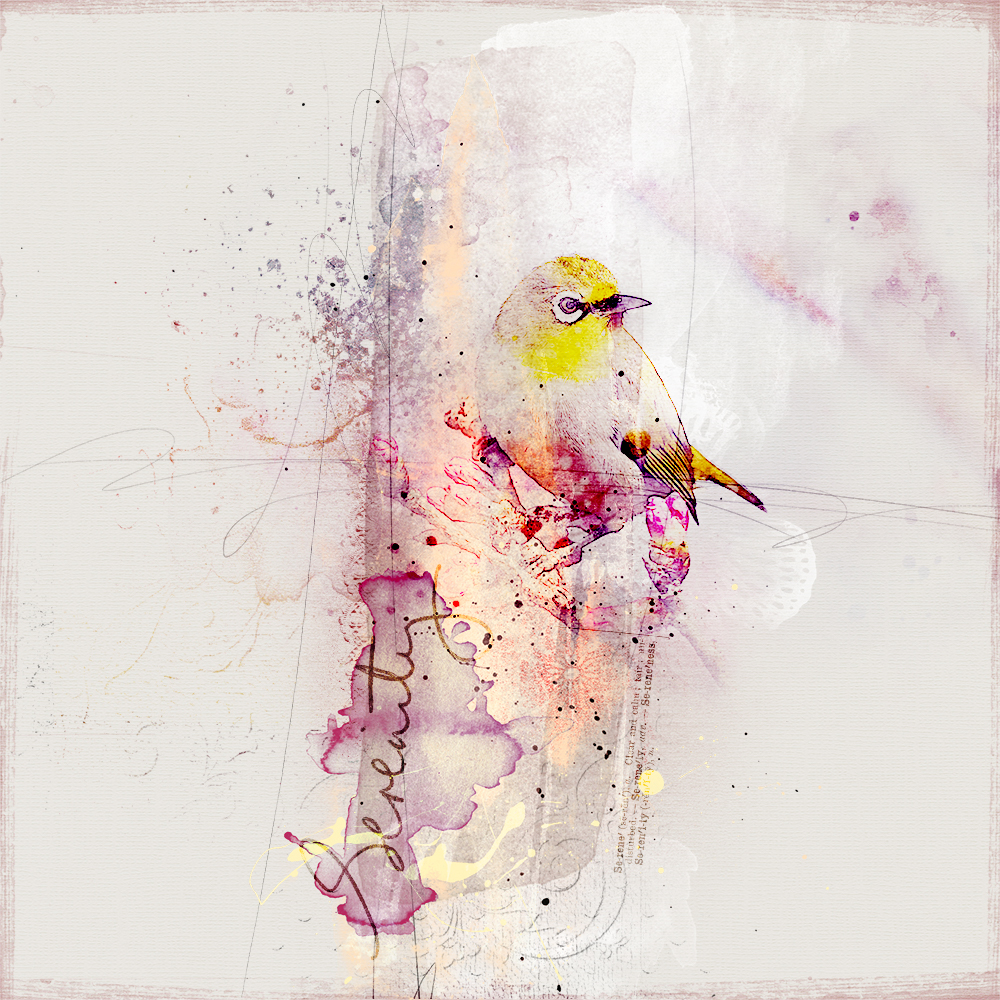
ENHANCE YOUR EDITED IMAGE WITH DIGITAL SCRAPBOOKING SUPPLIES TO CREATE A PHOTO ARTISTRY LAYOUT.
- Add more Transfers/Overlays support and anchor your photo.
- Recolor these layers via Image> Color Balance and/or Image> Hue/Saturation.
- Add ArtsyStains, ArtStrokes, and/or Splatters to your digital scrapbooking layout.
- Remember to stamp Brushes on New Layers using the Paint Brush tool from the Tools Panel.
- Apply different Blending Modes to these brush layers to adjust Color and Contrast.
- Introduce Textures to add depth and create elevated Visual Interest.
- Adjust the photo Color via Image> Color Balance (CTRL + B) to support your layout colors.
- Complete your layout by adding dimensional elements and WordART to your page.
Digital Scrapbook Supplies
Find a complete list of aA DigitalART supplies here.
Summary
USE FILTERS IN PHOTOSHOP TO TRANSFORM YOUR PHOTOS INTO ART.
- Experiment with apply different effects from the Filter Gallery.
- You can also Stack filters in varying combinations to apply a more dramatic look to your photos.
- Refine the effects by changing Blending Modes, Opacity and Colors Adjustments.
Post your questions about Artsy Digital Scrapbook Photo Sketch Effect Using Photoshop Filter Gallery tutorial below.




Recent Comments