

Ulla-May, shares her Artsy Digital Scrapbook Photo Sketch Effectt in Adobe Photoshop.
Note that this tutorial can also be completed in Adobe Photoshop Elements.
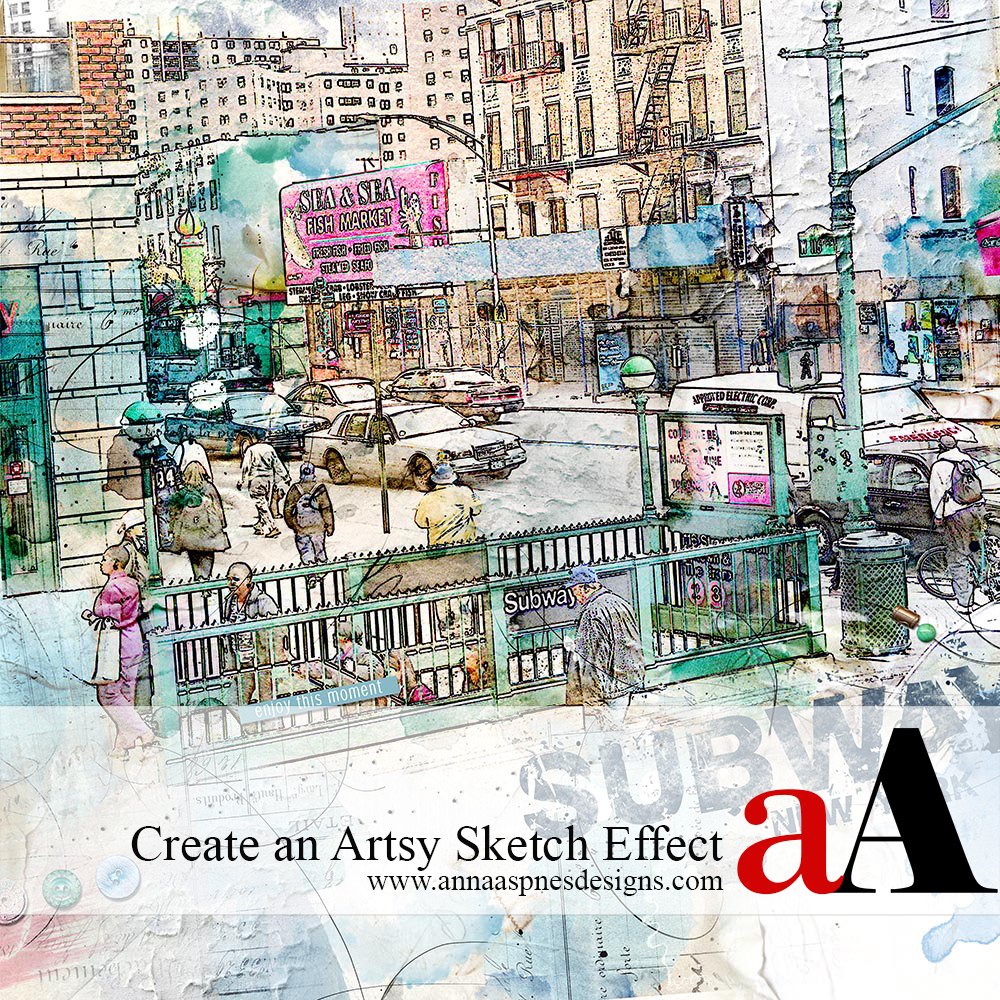
Artsy Digital Scrapbook Photo Sketch Effect
There are many different ways to turn a photo into a sketch. The process described below works best on high resolution images with strong lines, such as those found in architecture.
The effect can be applied to other photos but more editing may be required.

1. Select A Photo. Select a photo, save it as a new document and close your original photo. Change the name of this layer from Background to photo (this will unlock the layer).
With the photo layer selected, go to Image> Image Size. When the dialogue box appears, set the Resolution to 72 and in the top box (Pixel Dimensions), change the Width or the Height to 2000 px, and accept the corresponding change (for instance, when I set the Width to 200px, the Height changes to 1500 px), then click OK.
2. Duplicate the Photo Layer. Duplicate the photo layer (CTRL/CMD + J) and rename it photo copy. Add a black and white adjustment layer (Layer> New Adjustment Layer> Black & White) to the photo copy layer and click OK.
3. Create a Basic Sketch Effect. Select the photo copy layer. Change the Blending Mode to Color Dodge, then invert (CTRL/CMD + I) the layer. Next, while you still have the photo copy layer selected, apply a Gaussian Blur to the layer (Filter> Blur> Gaussian Blur). Adjust the radius of the blur until you have an effect that you like, then click OK. I used a Radius of 4.0.

4. Duplicate the Photo Layer. Duplicate your original photo layer (CTRL/CMD + J) and move it to the top of your layer stack. Name this new layer Sketch.
Make sure you have Foreground and Background Colors set to BLACK and WHITE, then to Filter> Filter Gallery> Sketch> Photocopy. When the dialogue box appears, set Detail to 1, Darkness to 15 and click OK. Change the Blending Mode of the Sketch layer to Multiply.
5. Duplicate the Sketch Layer. Duplicate the Sketch layer (CTRL + J). This new layer will be named Sketch copy.

6. Stylize the Edges. Duplicate your original photo layer (CTRL/CMD + J) and move it to the top of your layer stack.
Rename this layer ‘Stylize’, then go to Filter> Stylize> Find Edges. Set the Blending Mode of this stylized layer to Multiply.

7. Colorize. Duplicate your original photo layer again (CTRL/CMD + J) and move the copy to the top of your layer stack.
Rename this layer ‘Color’ and change the Blending Mode to Darken.
Adjust the Opacity of the layer as preferred.
You may want to experiment with Blending Modes for this layer to see the various effects they produce.

8. Add Glowing Edges. Duplicate your original photo layer (CTRL/CMD +J) a final time and move the copy to the top of the layer stack.
Rename this layer ‘Glowing Edges’. Now, go to Filter>Filter Gallery>Stylize>Glowing Edges. When the dialogue box appears, set the Width to 1, Edge Brightness to 15, and Smoothness to 6, then click OK.
Change the Blending Mode of this layer to Soft Light and adjust the opacity.
Depending on your photo, you may have to make some additional adjustments. For example, my photo turned out too dark so I adjusted the levels to brighten up the final image.
9. Merge Layers (Optional). When you are happy with your image, you can merge (Layer> Merge Visible) all of your layers and move them to a new document where you can add elements, textures, and journaling.
I took my completed image and placed it over an artsy paper, then changed the blending mode of the image to Color Burn.
Note that you can also preserve your layers and simply make a copy of your new image by using the command CTRL/CMD + SHIFT + ALT + E.

This process is just a way to get you started.
Experiment with Blending Modes on the different layers and/or adjust the Hue/Saturation of your image for different effects.
aA DigitalART: ArtPlay Palette Break Away and ArtPlay Palette Downtown.Post your questions about Artsy Digital Scrapbook Photo Sketch Effect in the comments.


Thank you for sharing this great tutorial!
Wow! That’s all i can say! Wow, such a stunning effect!
Thank you, Ulla-May, for describing the process: i will definitely give this a try!
Such a fabulous tutorial Ulla-May!! I will be giving this a go also!! Just love this!!
Thank you Ulla-May! I just made the whole process and it worked fabulously on my photo!
I have saved everything in a PS action, so I might be able to “sketch” my next photos very quickly 😉
Great idea Sabine!
Thank you for the wonderful tutorial…can’t wait to give it a try!!
This is awesome, thanks for sharing your process – I cannot wait to give it a try 😉
Thank you Ulla-May!!
Fabulous tutorial, it’s such a different approach and I will most certainly try this out 🙂 Thank you!!
Great tutorial Ulla-May, thanks so much! I’ve tried it out! 😉
Thanks a lot for this, I’ve struggled with trying to find a good tutorial and this is ideal, really like your stuff .. buy it then get too scared to do anything with it
Thank you so much – an amazing tutorial – love this effect and never knew how to create it
Terrific tutorial… I love that there are multiple ways with PS CC to obtain the sketch look. I have never used the Glowing edge filter before.. that is really neat. Thank you for the tutorial! Great lesson!!
Great tutorial Ulla-May, looking forward to playing with this one!!
Thanks for the great tutorial. I find your instructions clear to follow. Can’t wait to try!