

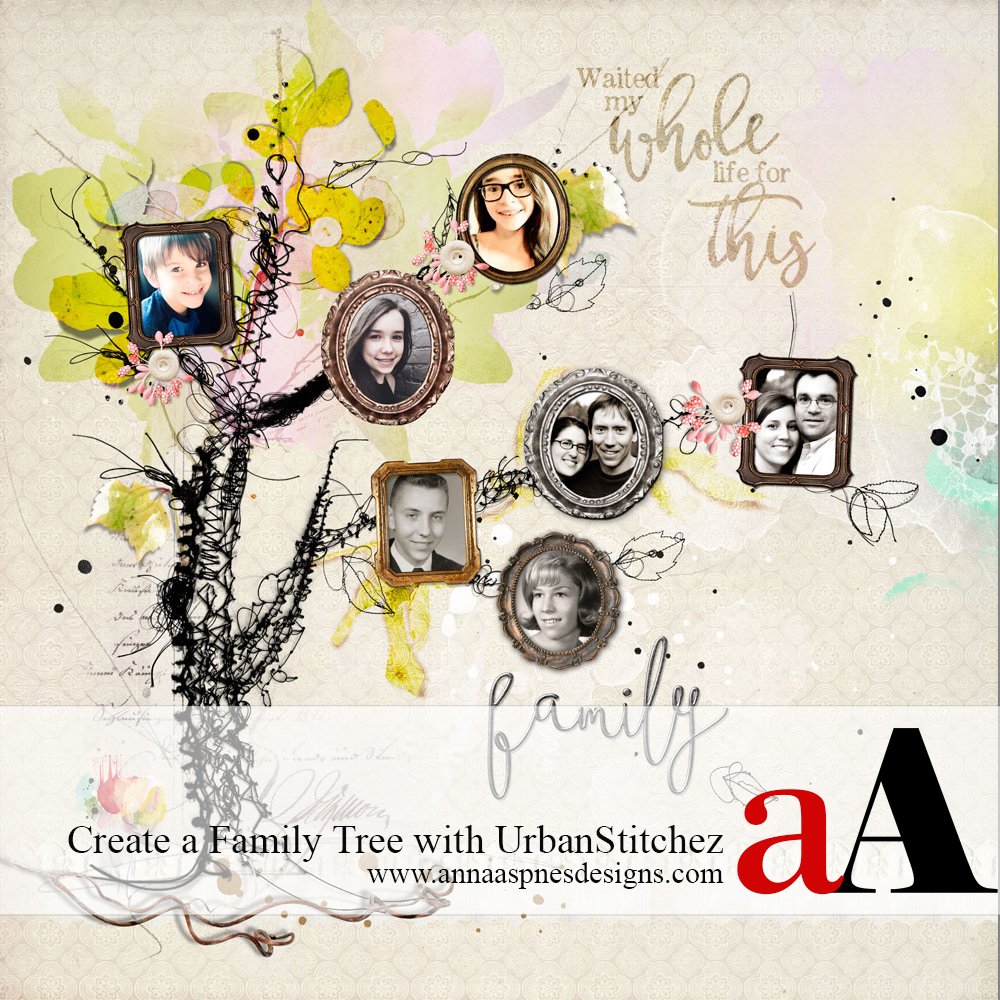
Creative Team Member, Miki, Creative Stitched Digital Scrapbook Family Tree Tutorial.
She shares how to create shapes with digital stitching. In this tutorial she provides the steps for creating a family tree with the UrbanStitchez product range n Adobe Photoshop.
Note that this tutorial can also be conducted in versions of Adobe Photoshop Elements.
UrbanStitchez and UrbanThreadz aren’t just for decoration or adding dimension to your page. You can create art with them and use custom shapes or designs to guide placement.
One of my other hobbies is quilting and so UrbanStitchez provide a “sewn” look to my digital pages. No ‘ripping them out’ if a mistake is made – I just hit the DELETE button on my keyboard and try again!
Creative Stitched Digital Scrapbook Family Tree Tutorial
1. Create a Foundation. Create a new 12 x 12 layout at 300 dpi in Adobe Photoshop or Elements. Go to File> New File, and set specifications in the dialogue box as preferred. Open and move your your background paper onto the new layout using the Move tool from the Tools panel. A solid paper works best for the base.
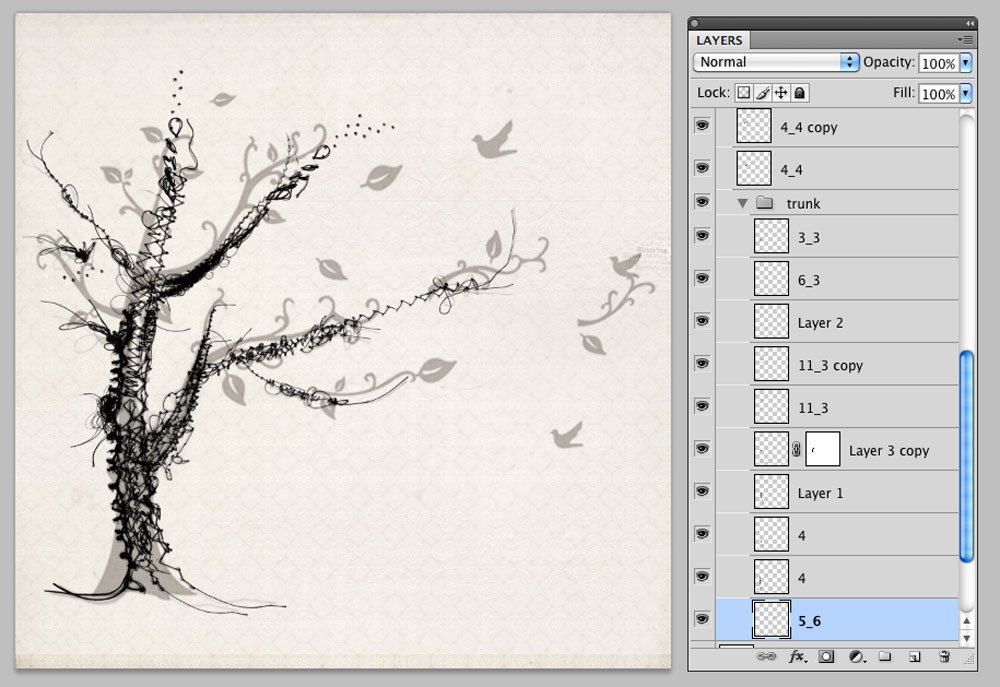
I used a graphic image downloaded from the internet as my outline/guide for the stitched tree. Make sure it’s sized 12 x 12 300 dpi. Import it onto the new page and reduce the opacity.

2. Create the Stitched Tree. Open your choice of UrbanStitchez and begin layering the digital stitching over the image of the tree. Note that UrbanStitchez can be resized, rotated, and flipped horizontally and vertically using the Free Transform Tool (CMD T or CTRL T) found under the Edit menu.
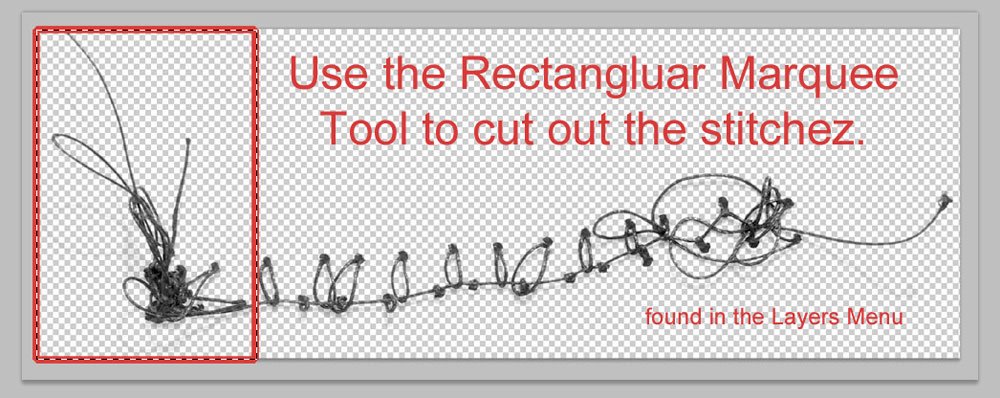
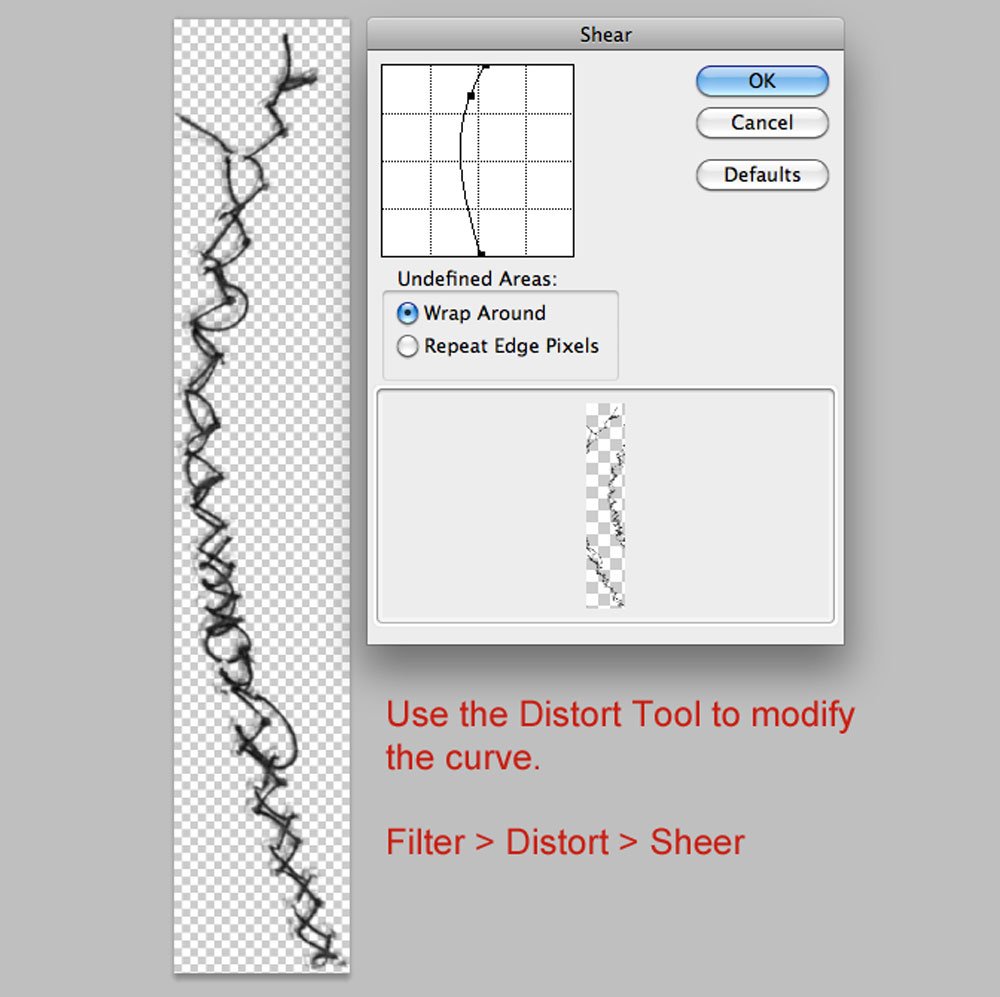
For more variations use the Rectangular Marquee Tool (M) to cut portions of the UrbanStitchez, the Warp Tool (Free Transform> Warp) to stretch or widen the digital stitching, the Sheer Function (Filter> Distort> Sheer) to curve the digital stitching. Layer a variety of UrbanStitchez around the outline to add dimension and texture.
UrbanStitchez Leaves 1 and 2 were also used to build the tree in this digital layout.

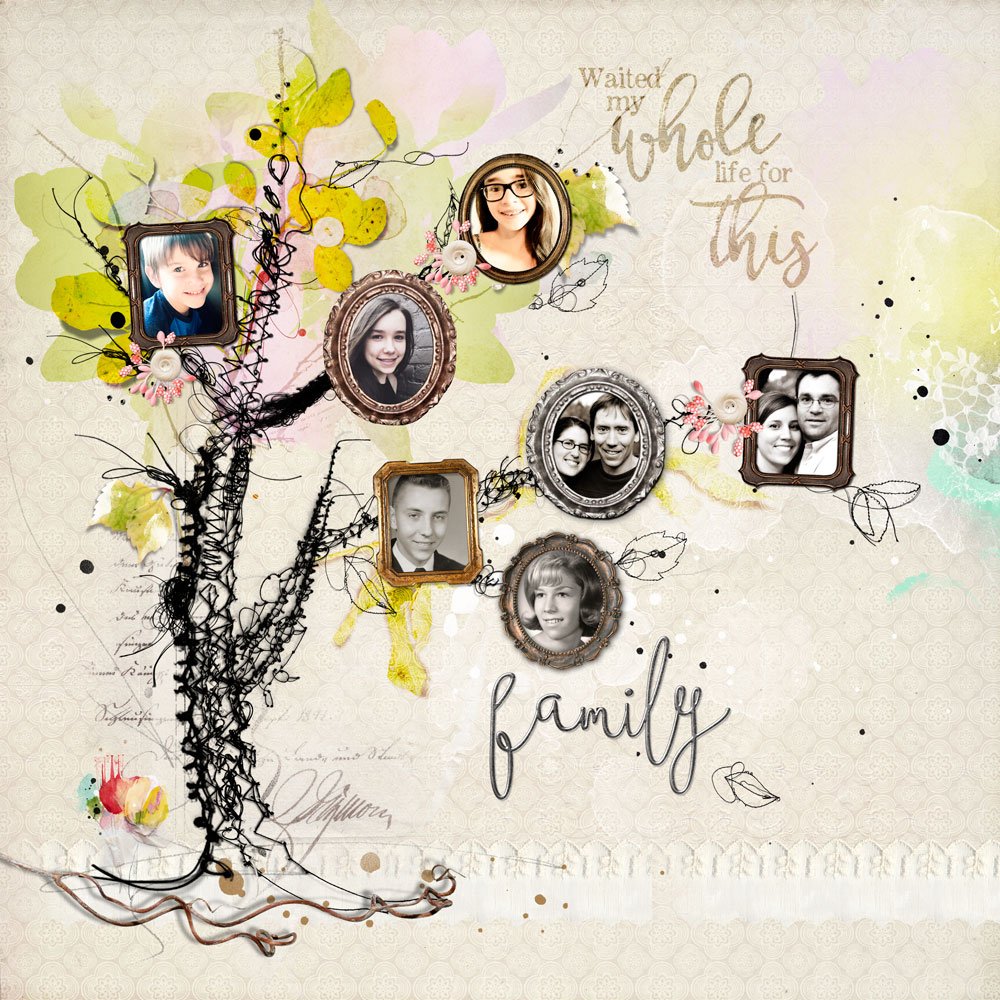
 3. Embellish the Page. Add ArtsyTransfers, Brushes, Elements and WordART to complete the page. I used a variety of frames found in the ArtPlay Palettes to display my family photos. Add embellishments and experiment by applying different Blending Modes.
Recolor the UrbanStitchez as outlined in this Recolor Digital Stitching Tutorial by Creative Team Member Suzie.
Click on the above photo for additional process notes and supplies used.


How cool to use the distort tool. Never thought of that! Love your tree, Miki, and thanks for the tutorial.