
Nancy Adams shares how to Create Digital Scrapbooking Title Frames.
This tutorial is written for Photoshop Elements but may be adapted for use with Adobe Photoshop.
How to Create Digital Scrapbooking Title Frames
Introduction
Incorporate WordART into FotoInspired Templates to create interesting Title Frames.
- Use the frames in FotoInspired or Artsy Layered Templates.
- Transform the WordART to align with these frames to establish a Title Focal Point.
- Learn how to Transform, Merge Layers, Create Clipping Masks, and Add, Mask and Simplify Layers in PhotoShop Elements.
Option #1
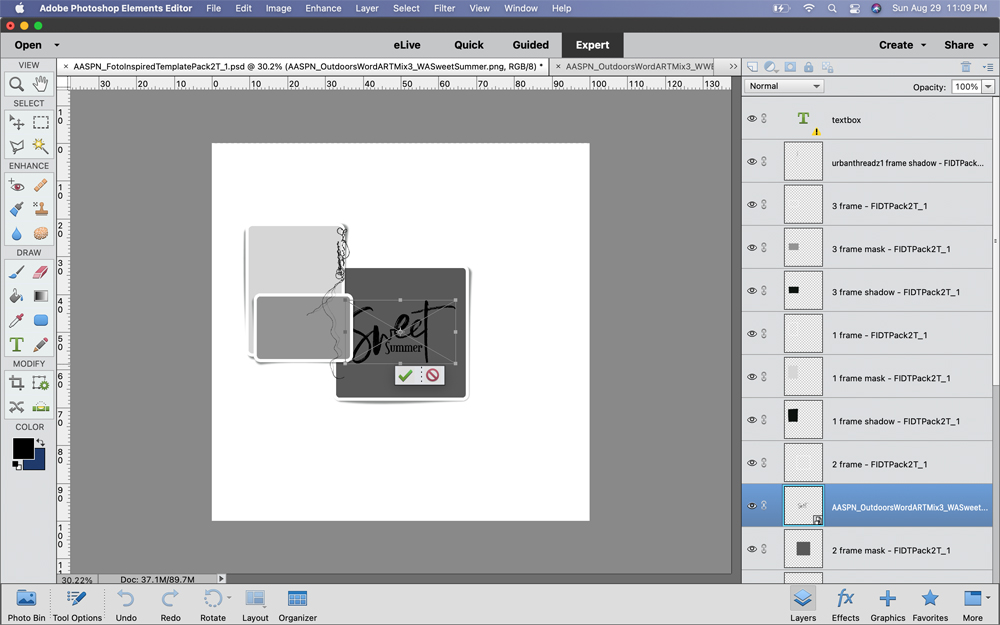
1. Transform WordArt
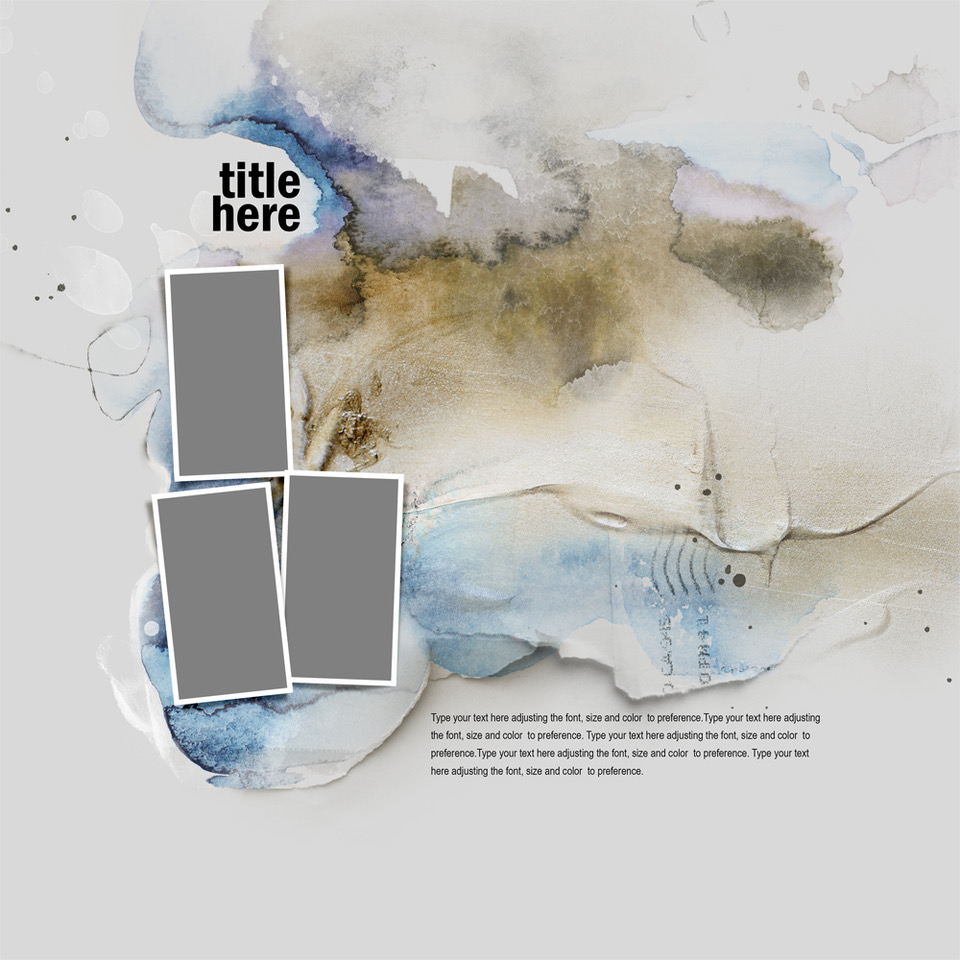
Open an Artsy Layered Template or a FotoInspired Template in your Photoshop Elements workspace.
- Go to File> Open and choose a FotoInspired or Artsy Layered Templates.
- Double click to open the .psd file in your Photoshop Elements workspace.
- Repeat with a WordART file of choice.
- Click on the ‘photo frame’ layer in the Template to select it in the Layers Panel.
- Select the Move Tool from the Tools Panel and drag the WordART into the Template.
- You’ll notice that the WordART layer will appear directly above the layer you selected in the Layers Panel.
- Go to Image> Transform >Free Transform (or Edit> Transform> Rotate in Photoshop) and click on the corner points of the Bounding Box to Resize
- the WordART
- Click on the Bounding Box edges and drag from each side WordART touches the photo frame.
See Also:
- Useful Techniques Video on the Resources page.
Notes:
- In this example, only the photo frame layers are visible.
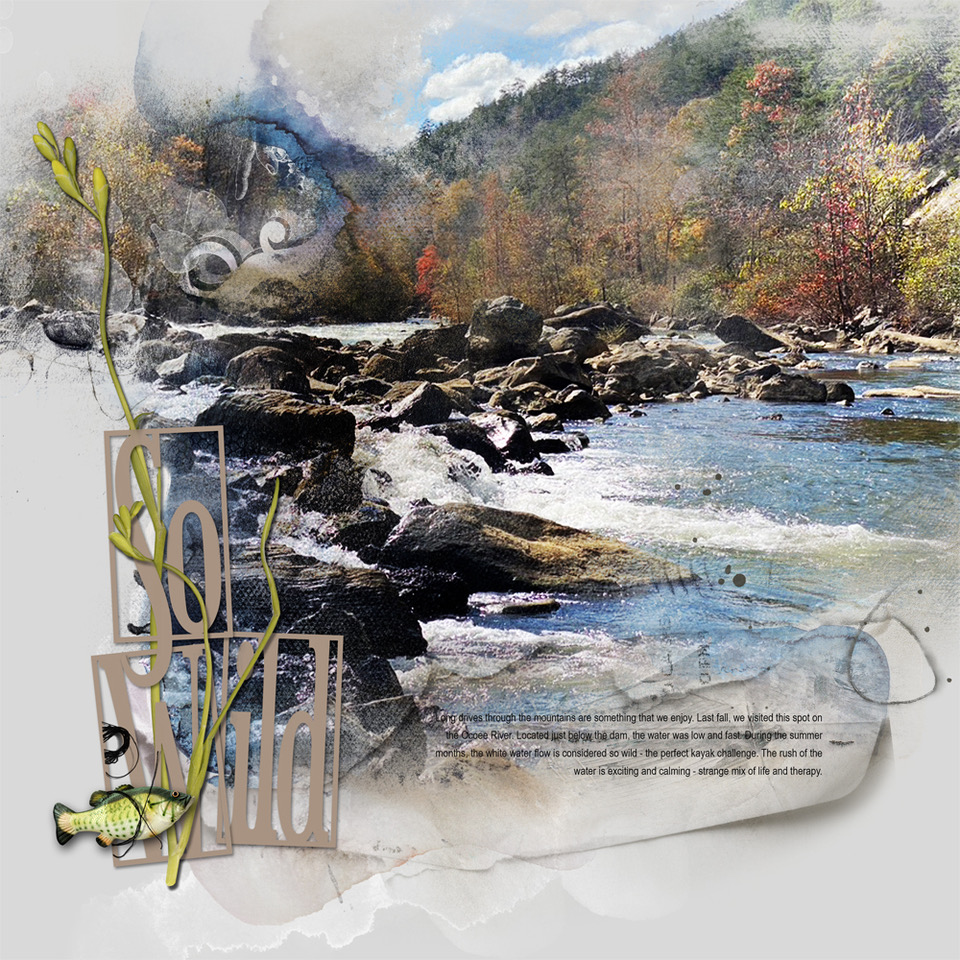
- Nancy used FotoInspired Template Pack No. 2T (1) and Outdoor WordArt Mix No. 3
2. Merge Layers
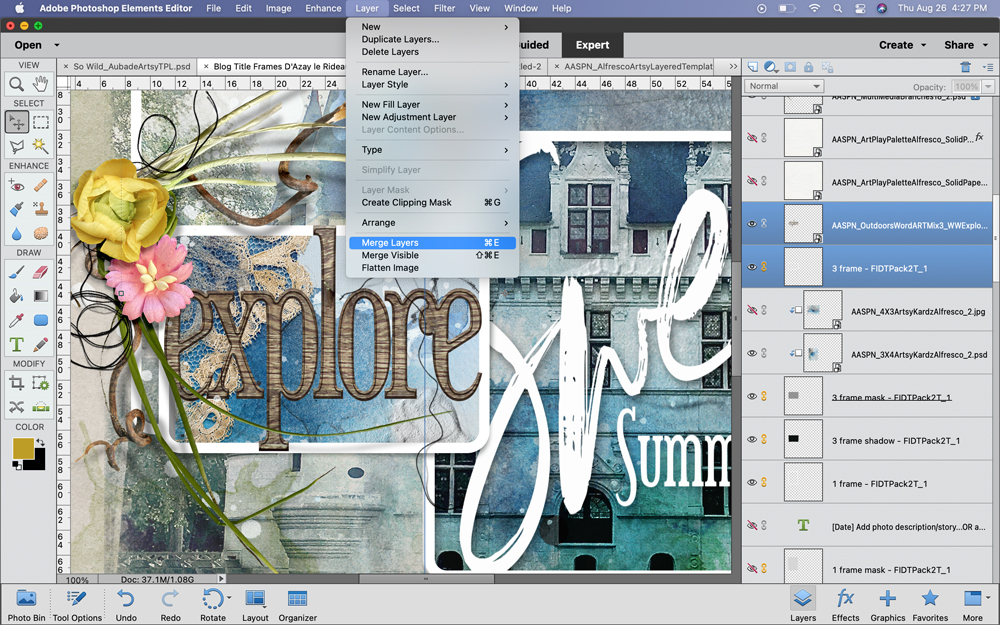
Merge the WordART layer with the frame layer to create a single layer.
- Select BOTH the ‘frame’ and WordART layers by holding down the SHIFT key and clicking on both layers to highlight.
- Go to Layer> Merge Layer.
3. Add Effects
Recolor and add a Drop Shadow layer style effect to create a Dimensional WordART with Visual Interest.
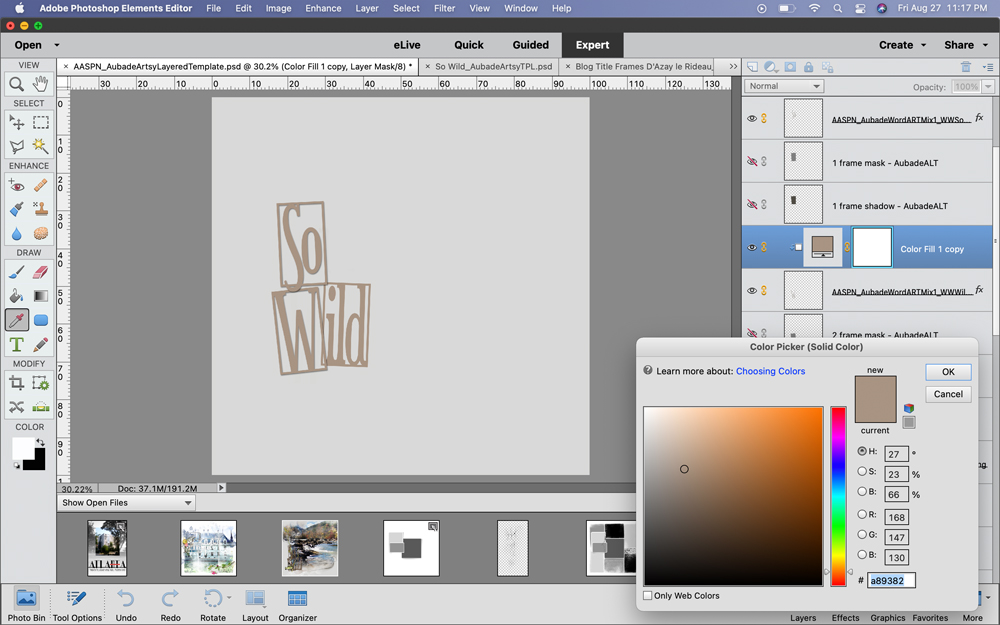
- Select Layer> New Fill Layer> Solid Color (or add a Solid Fill Adjustment Layer by clicking on the Adjustment Layers icon at the bottom of the Layers Panel in Photoshop.)
- Use the Color Picker to choose or sample a color from the pop-up dialogue box.
- With the Solid Fill Layer selected, go to Layer> Create Clipping Mask to ‘clip’ the colored layer to the merged layer.
- The colored layer will now conform to the Shape of the underlying frame and WordART layer.
- Click on the Styles button in the bottom right corner of your screen.
- Select Drop Shadows from the drop-down menu at the top of the Panel.
- Double-click on one of the ‘thumbnails’ to apply it to the merged frame and WordART layer.
- Return to the Layers Panel by clicking on the Layers button.
- Double-click on the ‘fx’ symbol that has now appeared to the right of the merged layer.
- Adjust the Size, Distance, Opacity, and Color to preference in the pop-up dialogue box.
NOTE/TIP:
- You can also clip an Artsy or Solid Paper to the merged frame layer in place of the Color Fill option.
- Clip photos or ArtsyKardz to the ‘frame mask’ layer to create an interesting backdrop to the WordART.
- Repeat this process for each framed WordART element created.
 Option #2
1. Apply Layer Mask
Use a layer mask to modify the WordART, add a new word, or divide the title into two frames.
- Place your WordART element on top of the ‘frame’ layer in your chosen Template.
- Select the word layer in the Layers Panel to highlight.
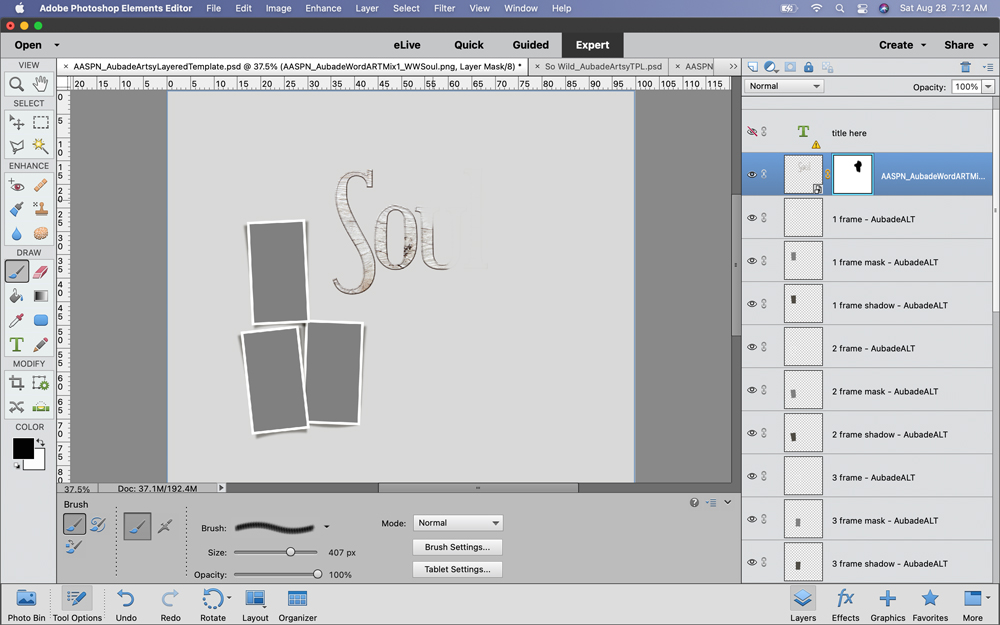
- Click on the Add Layer Mask icon at the top of the Layers Panel (or the bottom in Photoshop.)
- A white thumbnail will appear to the right of the layer and be linked to the selected layer.
- The Fore- and Background colors to Black and White, respectively.
- Select the Paint Brush Tool from the Tools Panel and choose an AnnaBlendz Artsy Brush.
- Paint on the white mask thumbnail to remove areas of the WordART.
- Adjust the Size of the brush as preferred to tackle small details.
- Go to Layer> Simplify Layer.
- Merge the WordART and frame layers and repeat clipping mask steps as outlined in Option #1.
Note.
- Aubade Artsy Layered Template and Aubade WordArt Mix No. 1 are used for this example.
- You could also use a Selection Tool to separate characters in a word to split across multiple frames.
- Apply the Simplify Layer before adding additional effects such as Drop Shadows, ArtStrokes, or Texture BrushSets.
Summary
Use WordART and Template frame layers to create an interesting title accent.
- Choose a Template and WordART to support your digital scrapbooking layout theme and photos.
- Resize and reshape the word layer to the same size as the frame layer.
- Merge the layers to create a unique title frame element.
- Simplify mask layers BEFORE applying additional dimensional effects.
If you like this How to Create Digital Scrapbooking Title Frames tutorial post, try this approach in your next photo artistry and or digital scrapbooking layout design, and share your layouts in the AnnaGallery.




This tutorial is interesting and very useful, Nancy! Thank you for sharing.