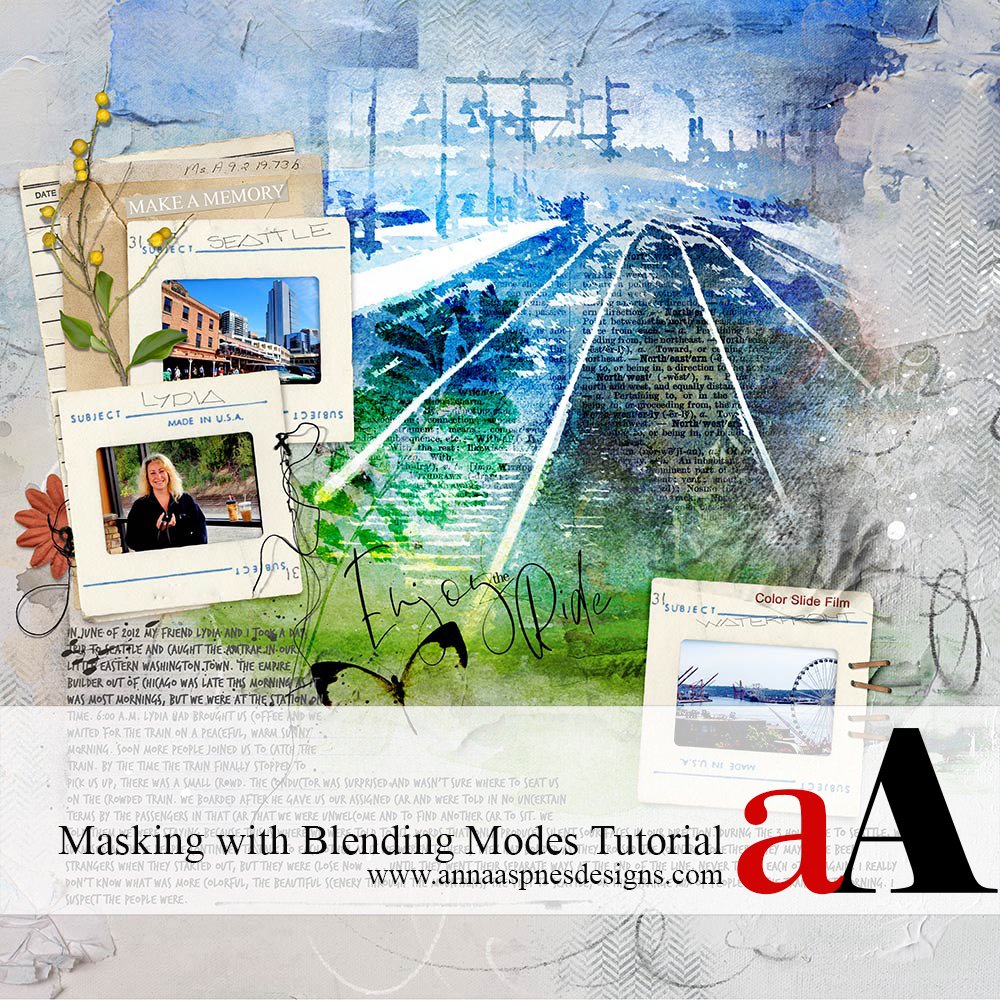
Barbara, shares how to Blended Digital Scrapbook Pages with Masks and Blending Modes
Blended Digital Scrapbook Pages with Masks and Blending Modes
Learn how to blend a photo by clipping a photo to a FotoBlendz clipping mask and applying Blending Modes to yield enhanced color and depth effects.
- Clip a photo to a FotoBlendz Clipping Mask using the Clipping Mask Function in Adobe Photoshop and Elements. Go to Layer> Create Clipping Mask.
- Apply different Blending Modes to various FotoBlendz Clipping Masks and ArtPlay Palette papers to enhance photo constrast, color and depth.
A fun way to begin a layout, foster a specific mood in your artistry or create a custom paper for your digital scrapbooking design.
1. Create a Digital Scrapbook Foundation
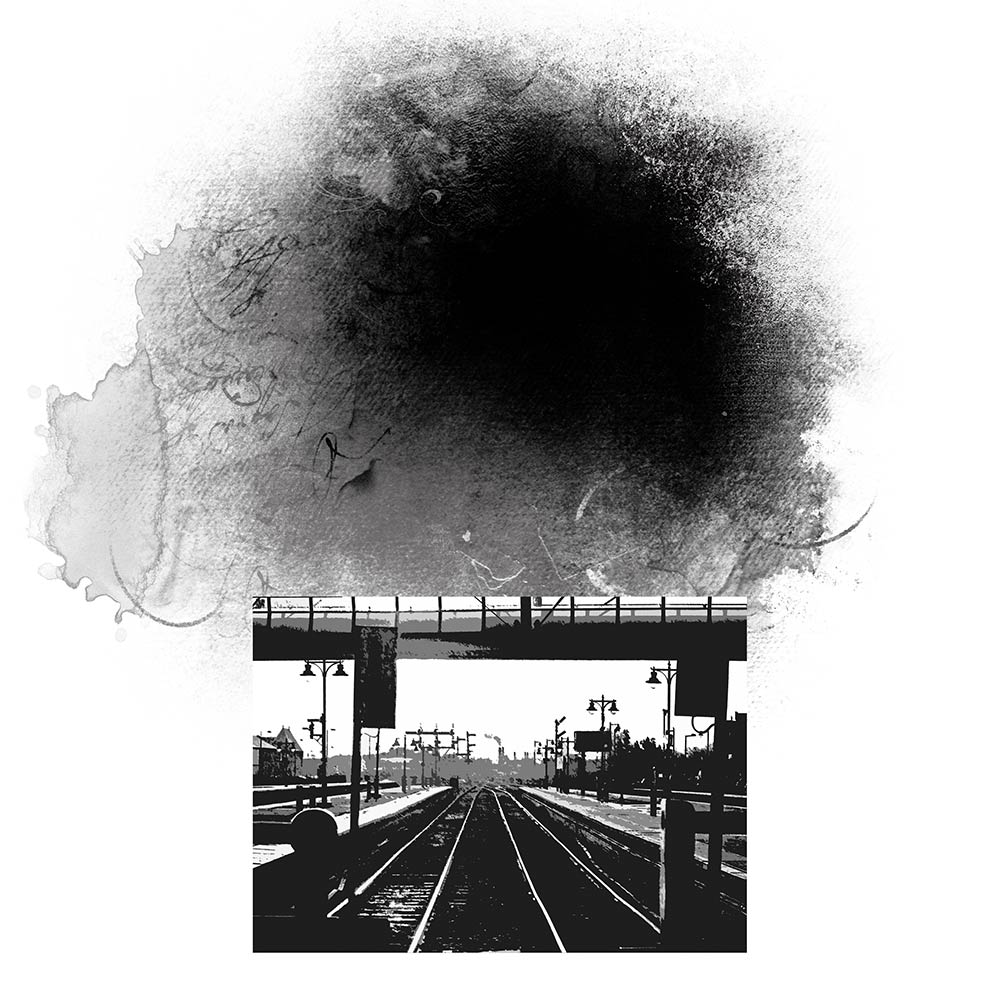
Create a new digital scrapbook page and select a FotoBlendz Clipping Mask and a photo to serve as your Focal Point.
- Go to File> New to create a new 12 X 12 digital scrapbook layout foundation at 300 DPI.
- Choose and open a clipping mask of choice or from Scenic FotoBlendz No. 1
- Move the masks to your digital scrapbook foundation using the Move Tool from the Tools Panel.
- Resize and reposition the masks as preferred using the Transform controls in Adobe Photoshop and elements.
Note.
- The Cut Out Filter was applied to the black and white photo to yield visual interest.
2. Create a Blended Focal Point
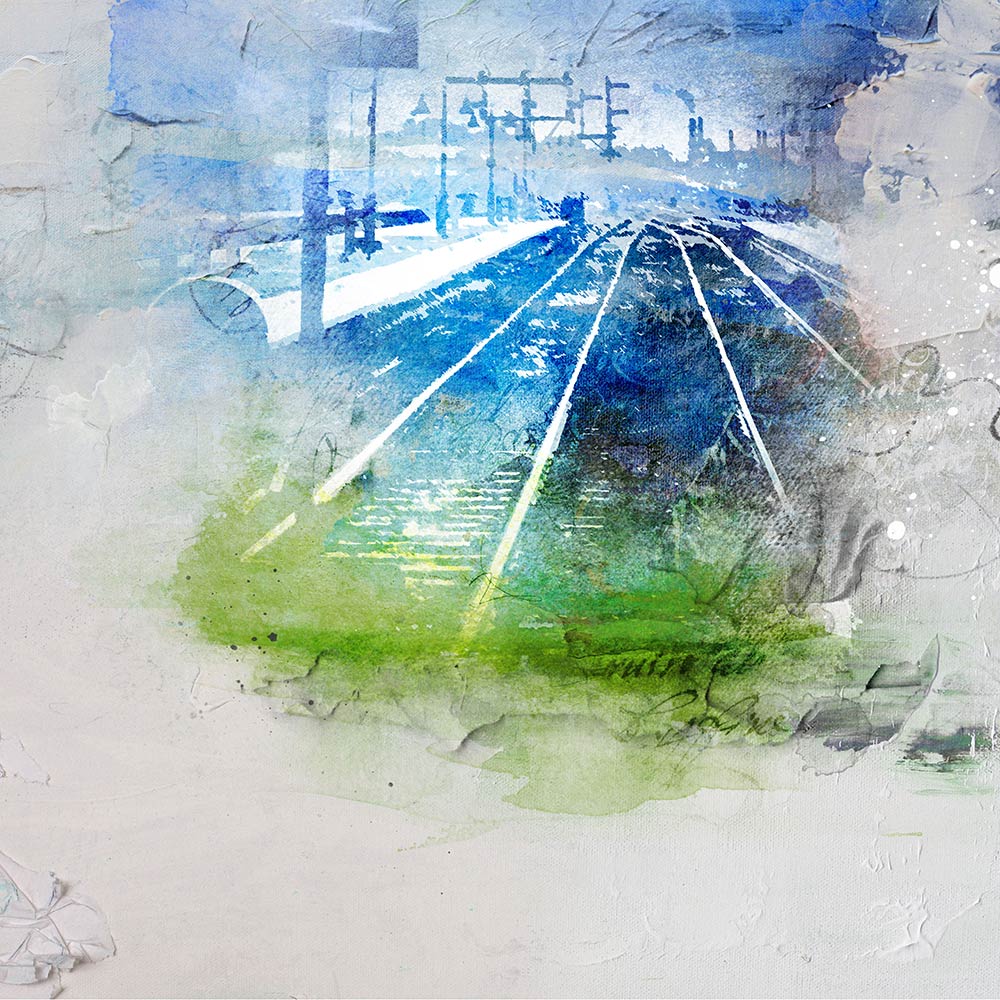
Choose a background for your digital scrapbook page, clip a second artsy paper and photo to the FotoBlendz mask, and apply Blending Modes to blend.
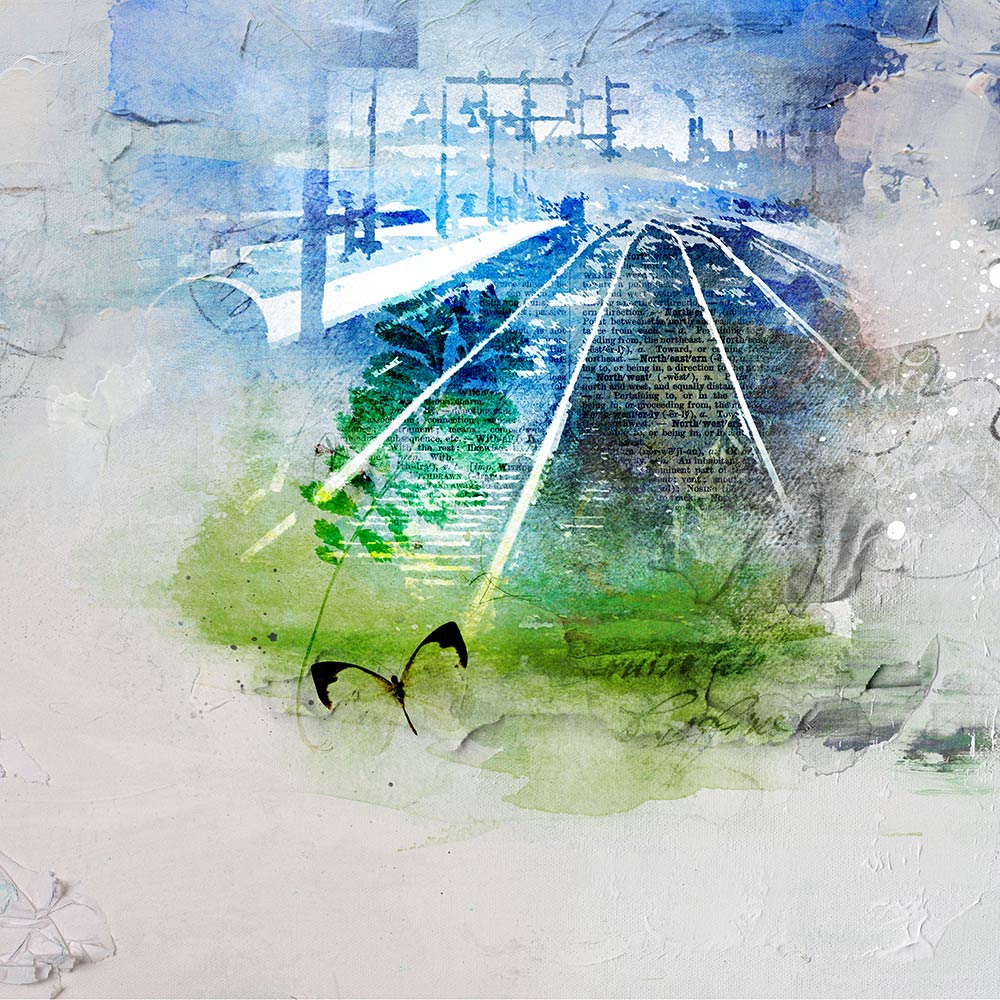
- Open and move ArtsyPaper4.jpg from ArtPlay Palette Scenic to establish a foundational Background layer.
- Clip the ArtsyPaper1.jpg and then photo to the FotoBlendz Clipping Mask.
- You will have 2 layers clipping to the mask known as a Clipping Set.
- Apply the Overlay blending mode to both the photo and mask layer from the drop-down menu in the Layers Panel.
- The background paper remains at the default Normal blending mode.
Tip.
- Use a Layer Mask and brushes to edit any imperfections in your photo or mask so they blend seamlessly.
3. Augment Your Blending
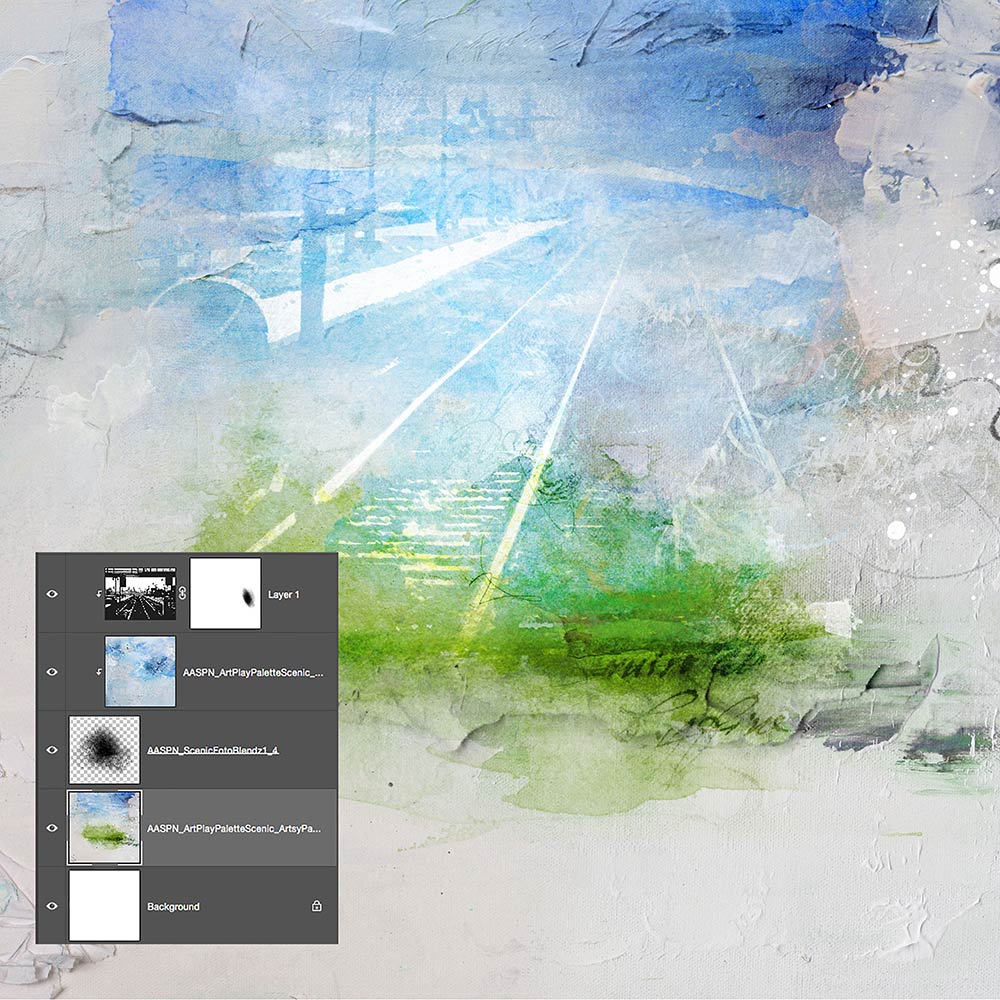
Add a second FotoBlendz clipping mask to your digital scrapbooking page composition and apply a different Blending Mode.
- Open the second FotoBlendz Clipping Mask.
- Position and resize the mask on top of the first Clipping Set using the Move Tool from the Tools Panel.
- Duplicate the photo clipped to the first mask by dragging it to the New Layer icon in the Layers Panel.
- Click-drag-release using your mouse to move the photo ‘copy’ layer up the Layers Panel so that it ‘sits’ directly on top of the second mask.
- Apply the Vivid Light blend mode to the second mask layer from the Layers Panel.
4. Embellish Your Artistry
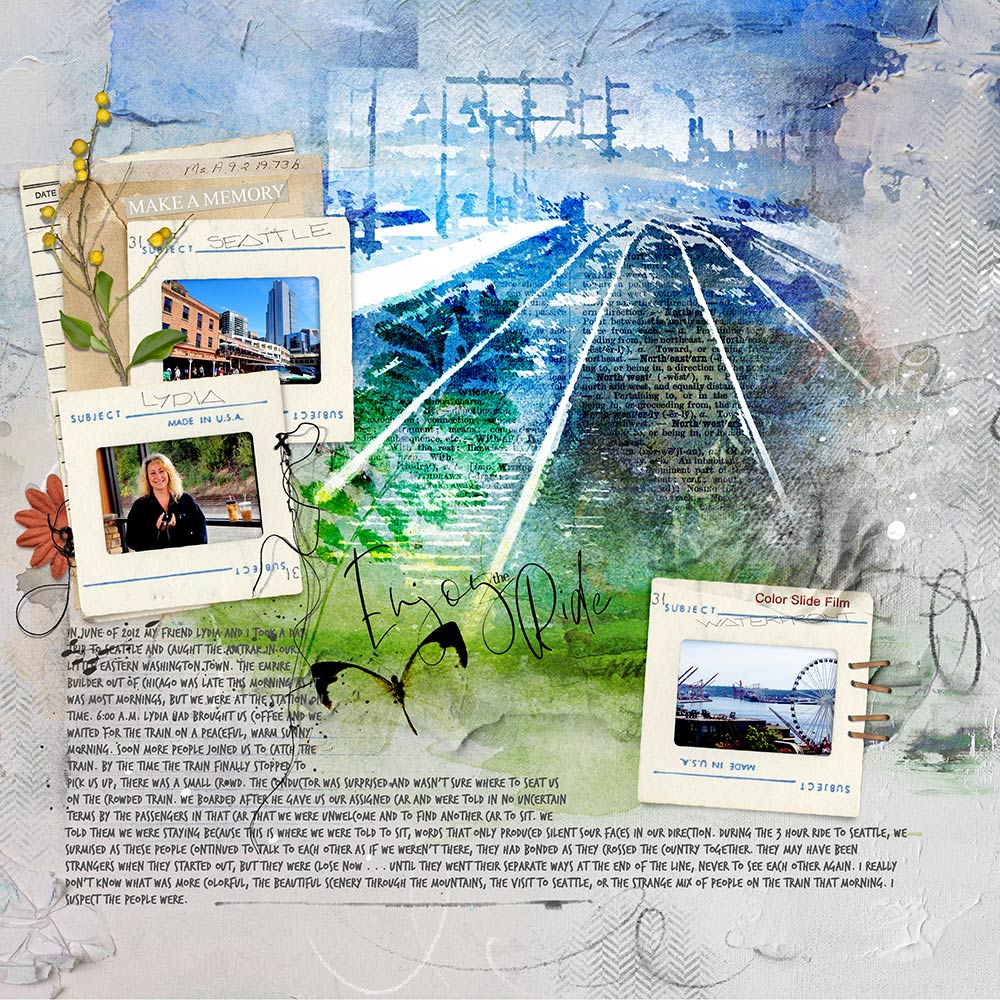
- WordTransfers from Scenic WordART No. 2 were positioned ‘within the railroad tracks’on the digital scrapbook page (below the Clipping Set layers in the Layers Panel).
- Leaf and butterfly elements were placed in the top portion of the layout with Color Burn blending modes applied to each layer to enhance depth and contrast.
Note.
- The WordART has the default Normal Blending Mode applied.
5. Summary
In this Blended Digital Scrapbook Pages with Masks and Blending Modes tutorial, you have learned how to:
- Establish a digital scrapbooking page Foundation,
- Create a blended photo Focal Point in your digital scrapbook pages.
- Clip and photo to a FotoBlendz clipping mask.
- Duplicate photo layers.
- Apply Blending Modes.




Barbara, this is a super fun technique! Thank you very much for sharing, and I’m super excited to play with the processes. I enjoy the “whim” of this craft and the surprising results. Thanks!
Fabulous tutorial I love the idea of just playing it’s the way we learn and exercise our creative muscles!!!