

Charlene Mitchell shares guidance on how to print and frame Digital Scrapbooking pages.
Follow this tutorial in Adobe Photoshop or Photoshop Elements.
You will also need Adobe Reader for printing.
How to Print and Frame Digital Scrapbooking Pages
Introduction
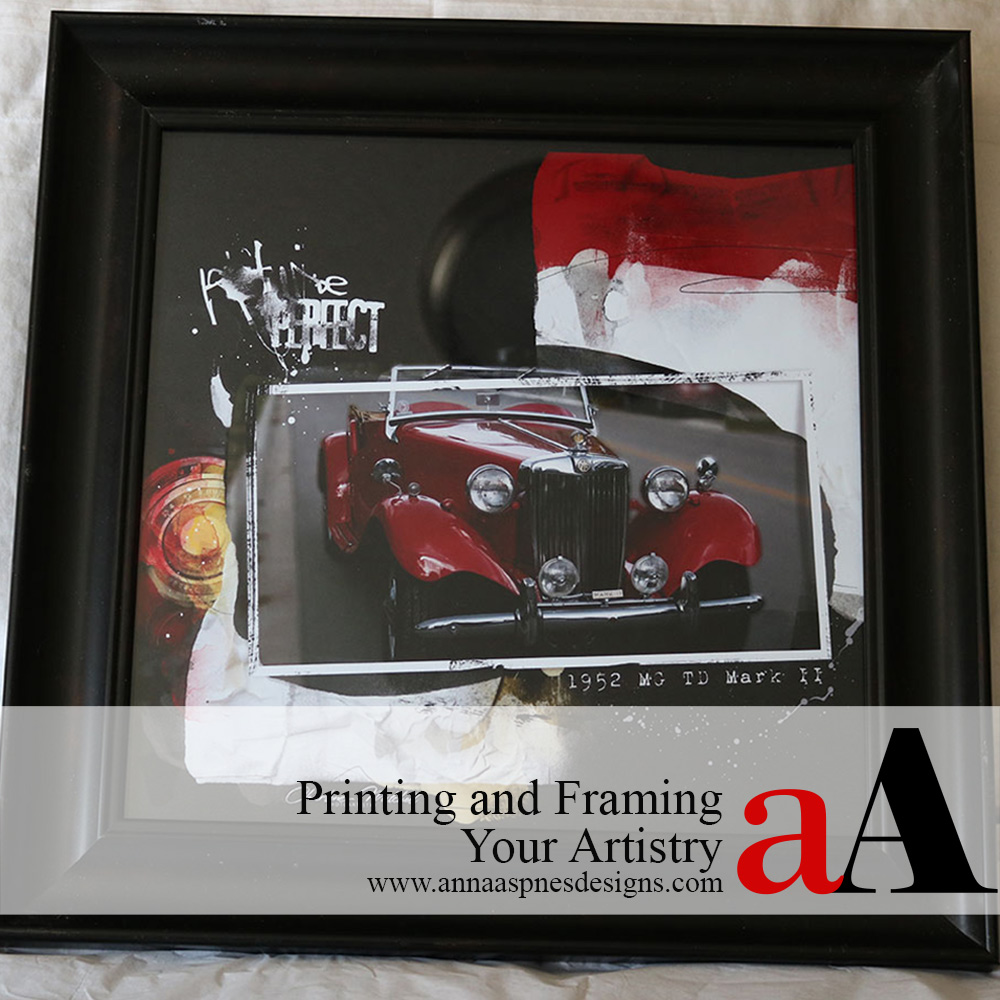
Take your digital scrapbooking and photo artistry from blank canvas to hanging on your wall.
- Create your artistry
- Prepare to print
- Print at the exact size
- Frame your masterpiece
The Story
Solving the dilemma of printing your digital artwork.
- I was invited to participate in a community ‘art walk’ at the end of the month.
- I needed to figure out how to take my artistry in its digital format, to a printed format so I could frame it to be displayed.
- Previously, any time I printed something, it printed larger than the actual image size, making it problematic for framing.

1. Create New Layout Foundation
Use transfer and over a solid paper background to create a new layout foundation.
- Create a New Layout by pressing the CTRL+N (Windows) or CMD+N on your keyboard.
- Enter the Width 12 (inches) and Height 12 (inches), Resolution 300 PPI.
- Move SolidPaper3.jpg from ArtPlay Palette My Camera onto your Layout Foundation using the Move Tool from the Tools Panel.
- Open and place Transfer2.png, then Transfer7.png from the same ArtPlay Palette.
- Position as outlined below.

2. Add FrameMask
Introduce a FrameMask file to yield a focal point in your layout design.
- Add Frame #4 from FramedMasks No. 1.
- Click on the ‘eye’ icon next to the ‘frame’ and ‘frame shadow’ layers in the Layers Panel.
- Click on and highlight the ‘mask’ layer.
- Press CTRL+J/CMD+J to duplicate the layer.
- Select the ‘copy’ layer, then press CTRL+T/CMD+T to transform the layer.
- Right-click your mouse,e then choose Flip Vertical from the fly-out menu.
- Click on the original ‘mask’ layer, then CTRL+CLICK/ CMD+CLICK on the ‘copy’ layer to select both layers.
- Right-click to activate the fly-out menu and go to Merge Visible.
- Duplicate this new merged layer via CTRL+J/CMD+J.

3. Apply Photo
Select the photo, apply filter(s), and then clip to the frame mask layer.
- Go to File> Open and choose a photo to import into your workspace.
- Move directly above the top merged mask layer using the Move Tool from the Tools Panel.
- Press CTRL+ALT+G/CMD+OPT+G to clip the photo layer to the mask layer in the Layers Panel.
- Resize the image as preferred using the Transform Controls to fit the clipping mask.
- Select the photo layer and press CTRL+J/CMD+J to duplicate.
- Import this layer into Topaz Studio 2 or apply one or more Filters of choice from Filter Gallery.
- Move this edited image layer directly above the Clipping Set.
- Press CTRL+ALT+G/CMD+OPT+G to add this layer to the Clipping Set.
- Click on the ‘eye’ icon next to the ‘frame’ and ‘frame shadow’ layers in the Layers Panel.

4. Add WordART
Provide context to the imagery using a variety of words and digital elements.
- Add Word9.png from Foto WordART No. 3 and place as preferred.
- Select the Type Tool from the Tools Panel and add any additional text.
- Add Splatter #6 from Splatters No. 9 to enhance Visual Interest.
- Apply your signature if preferred and appropriate
- Save your artistry by going to File>Save.
- Choose the .tiff or .psd option from the File Type dropdown menu to retain all layers for any future editing.

5. Prepare to Print
Resize the image to fit your chosen frame.
- You may need to resize your 12 x 12 layout to fit a smaller or slightly larger frame.
- Go to Image> (Re)size to change the values for Width and Height.
- Note that a small increase in size will NOT affect the print quality of your final print.
- Go to File> Save As., and choose .jpg from the File Type dropdown menu.
- Enter 8 (or higher) in the dialogue box.
- Determine the paper size needed to accommodate your print size, e.g., to create a 12.5 x 12.5 inch print. 13×19-inch paper on my wide-format printer was required.
- Press CTRL+N/CMD+N to create a New Layout and enter desired values for Width and Height.
- Note that Resolution for printing should always be 300 PPI.
- Open your saved .jpg document and drag the layer into the New Layout.
- Go to File> Save As and choose .pdf from the File Type drop-down menu.

6. Print At Exact Size
Create an output that matches the size of your chosen frame.
- Go to File>Open and open the .pdf in the program of choice.
- Then go to File>Print.
- Choose your printer selection from the Printer drop-down menu.
- Don’t worry if your preview doesn’t look quite right at this point.
- Click on the Properties tab.

Note.
- Printer dialogue boxes are all different and dependent on your printer model.
- Look for a place to select your Paper Size.
- In this example, mine is Super B (13×19).
- Also, be sure to choose the correct Paper Type – Mine is Premium Photo Paper Glossy.
- Select OK.

- Look for confirmation that your Document Size and Paper Size (Output Paper) are the same.
- This will correct your Print Preview image.

- Ensure Actual Size is checked for Paper Sizing and Handling.
- Select Print.
Tip.
- The .pdf document is the key to printing at the exact size; you must choose Actual Size in the Print Dialogue

7. Frame Your Artistry
Trim your print and place it in your frame.
- Use an X-acto knife and a ruler or paper cutter to trim your print to size if needed.
- Place the print in your frame and display.


Summary
A challenge turned into a great learning experience, and I am now able to print out any of my creations at the precise size needed.
This applies to any project you create in Adobe Photoshop or Elements, including:
- Scrapbooking layouts – See the aA YouTube Channel.
Like this How to Print and Frame Digital Scrapbooking Pages tutorial? Give a try with your own digital scrapbook pages and post the results in the AnnaGallery.


Recent Comments