
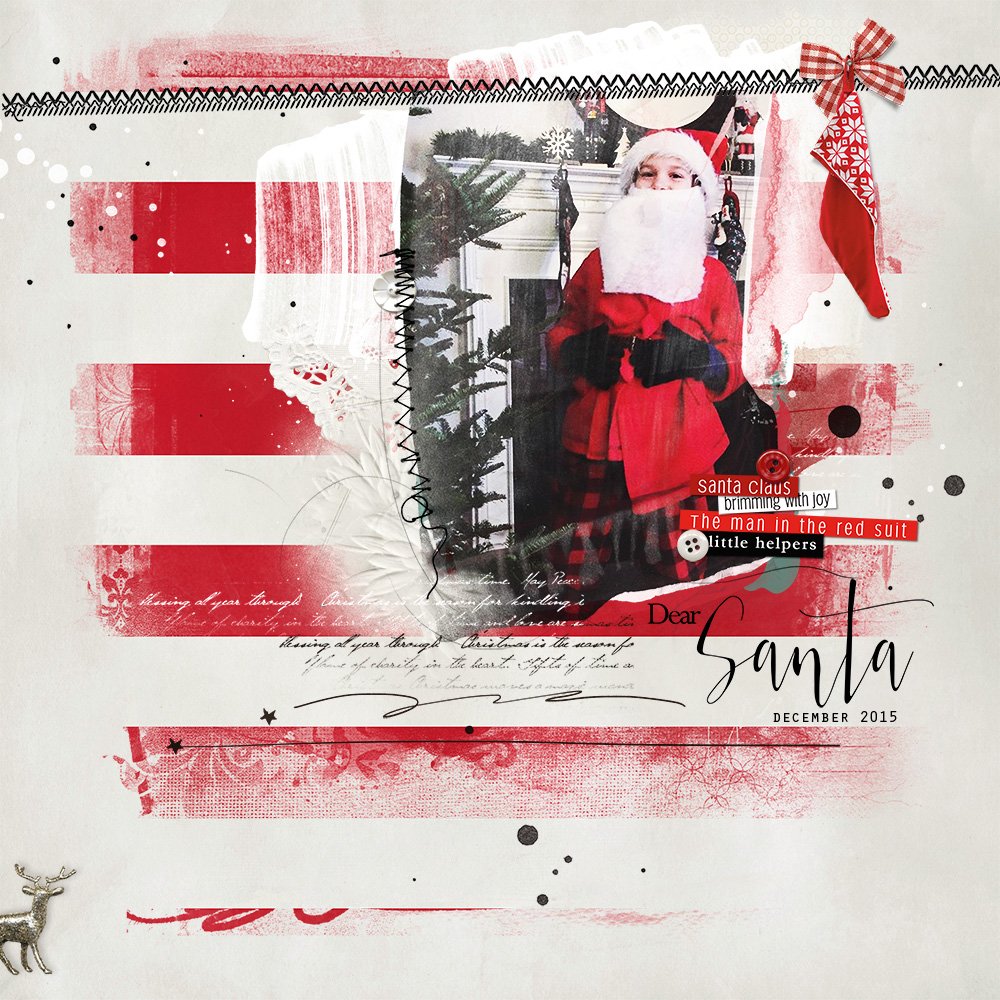
aA Creative Team member, Miki, shares her process on how to create an artsy Christmas layout in Adobe Photoshop.
This tutorial may also be achieved using Adobe Photoshop Elements.
Create an Artsy Christmas Layout
Create this DigitalART layout in 5 simple steps.
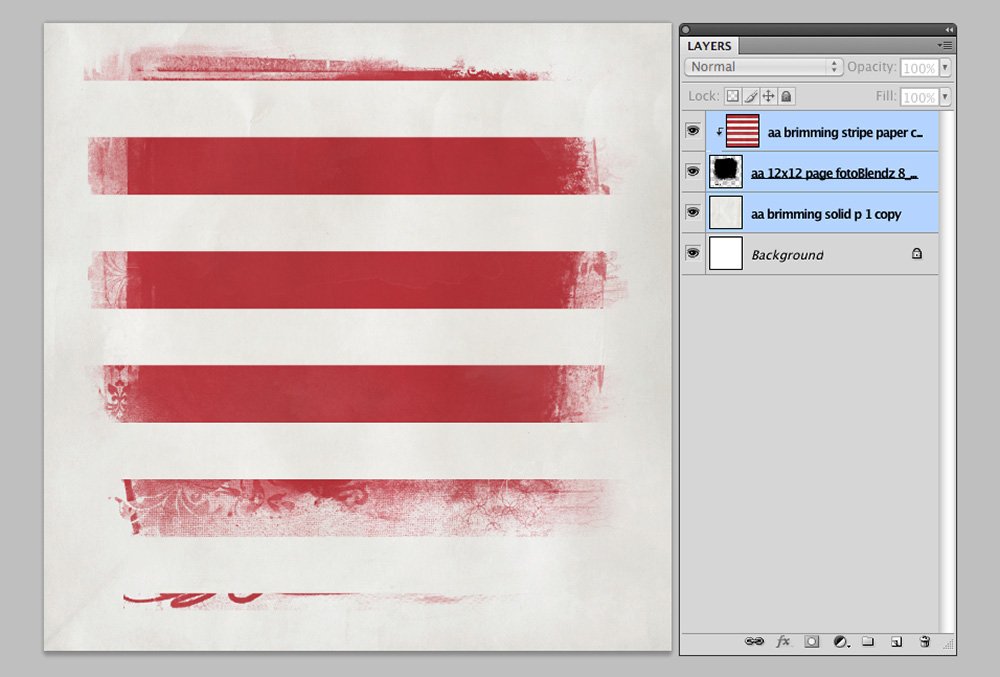
1. Create A Foundation
- Begin with a new 12 x 12 layout at 300 dpi by going to File > New > Open.
- Open and drag the digital paper of your choice onto the layout using the MoveTool from the Tools Panel. SolidPaper1.jpg from Artplay Palette Brimming was used for the foundation of this page.
- Clip the Stripe Paper to a mask from 12×12 Page FotoBlendz No. 8 and set the Blending Modeof the mask to Darken.
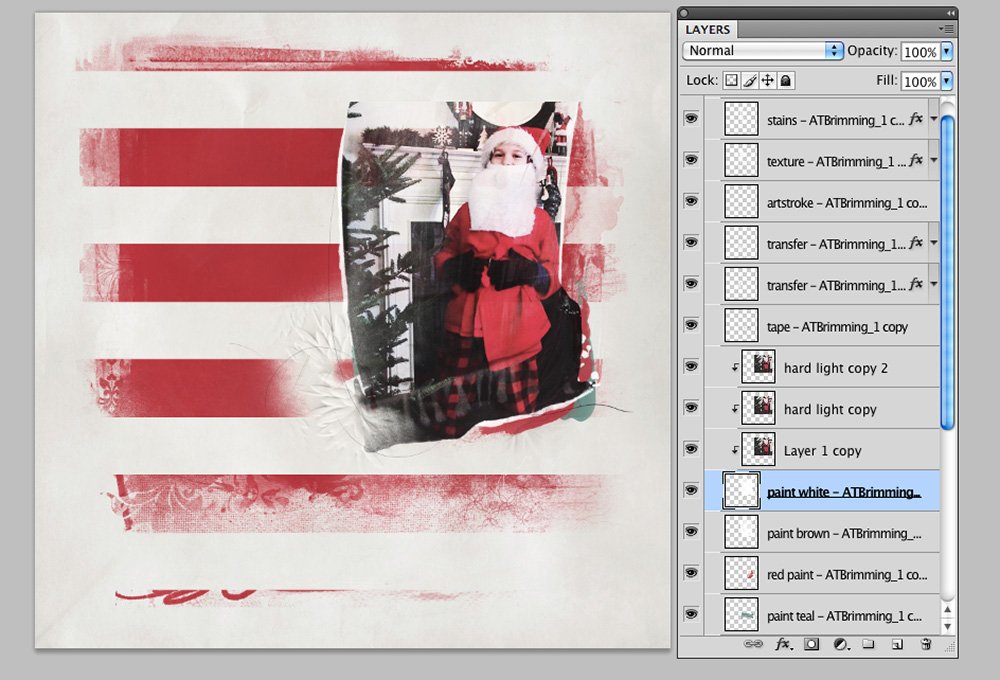
2. Use Artsy Transfers as a Frame
- Open ArtsyTransfers Brimming 1.psd and move all layers onto the page.
- Clip the photo to the large white paint layer using the Clipping Mask function in Adobe Photoshop/Elements.
- Press CMD/CTRL + J to duplicate the image layer 2 more times. This is a Photoshop shortcut will DUPLICATE a selected layer.
- Adjust the Opacity of the photo layers.
- Turned off any of the ArtsyTransfer layers or move them as preferred.
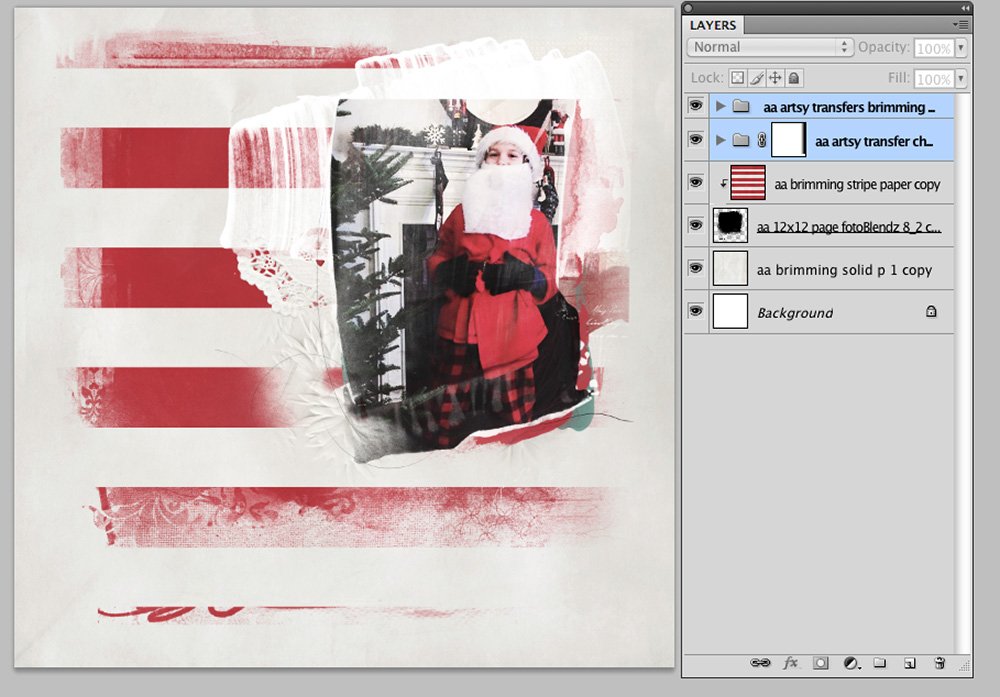
3. Create A Mat
- Layer 1.psd from ArtsyTransfers Christmas Nostalgia under the ‘Brimming’ ArtsyTransfer to create a matte for your photo.
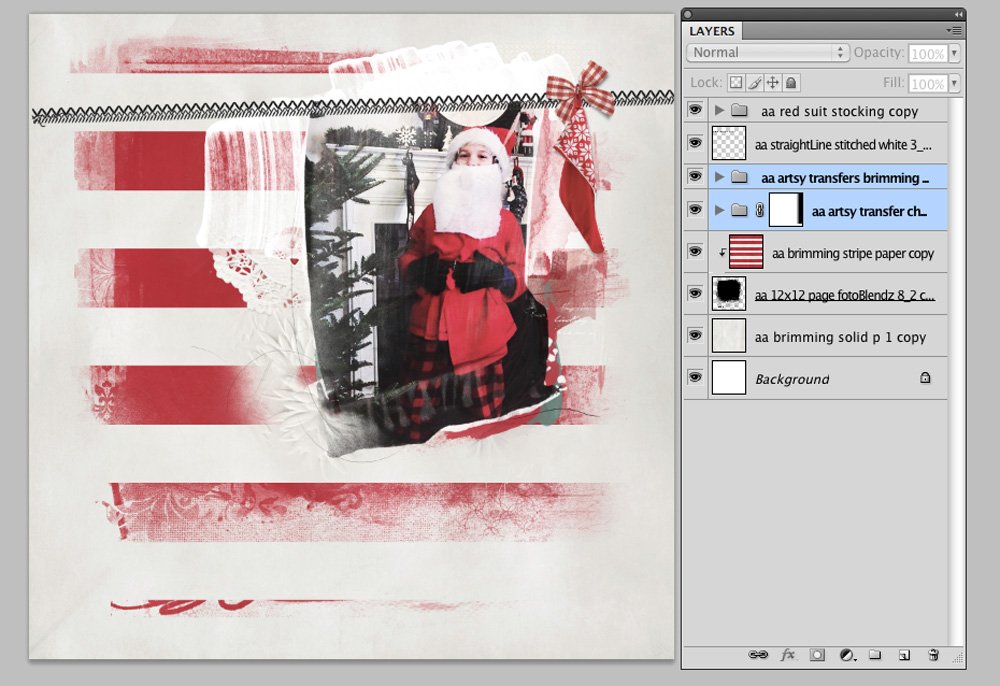
4. Anchor with UrbanStitchez
- Add stitching from Straight LineStitched White No. 3 to anchor the image and provide a place to hang the stocking from Artplay Palette Red Suit.
- Go to Image> Adjustments> Invert or press CMD/CTRL + I to convert the stitching from white to black.
5. Embellish Your Layout
- Complete your layout by adding WordART, Textures, Stitching, ArtsyTransfers, MultiMedia Elements and Brushes from the aAstore.
- Add Artstrokes, ScriptTease and Splatters can be found in ArtsyTransfers Christmas Nostalgia.






Recent Comments