

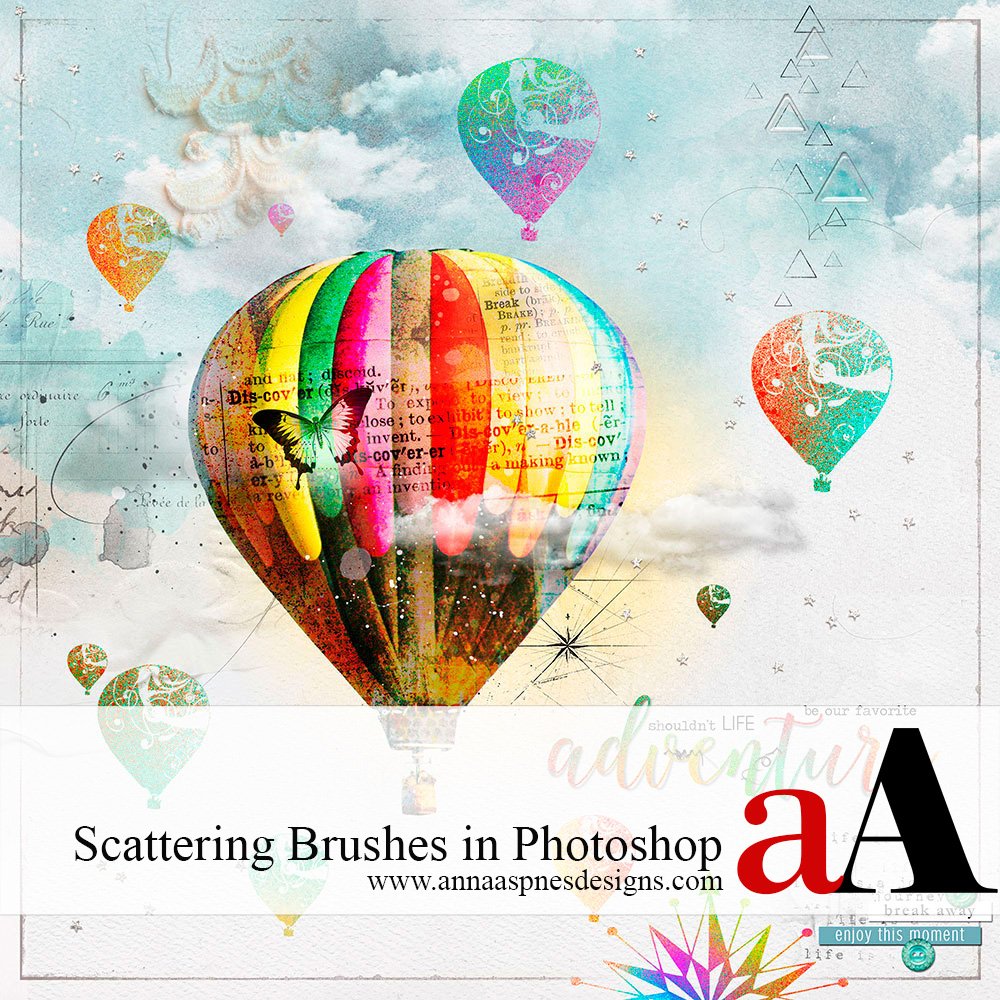
Creative Team Member, Miki, shares a favorite technique for scattering brushes in Photoshop.

Browsing the Brushes Panel. The Brushes panel in Photoshop provides an array of options.
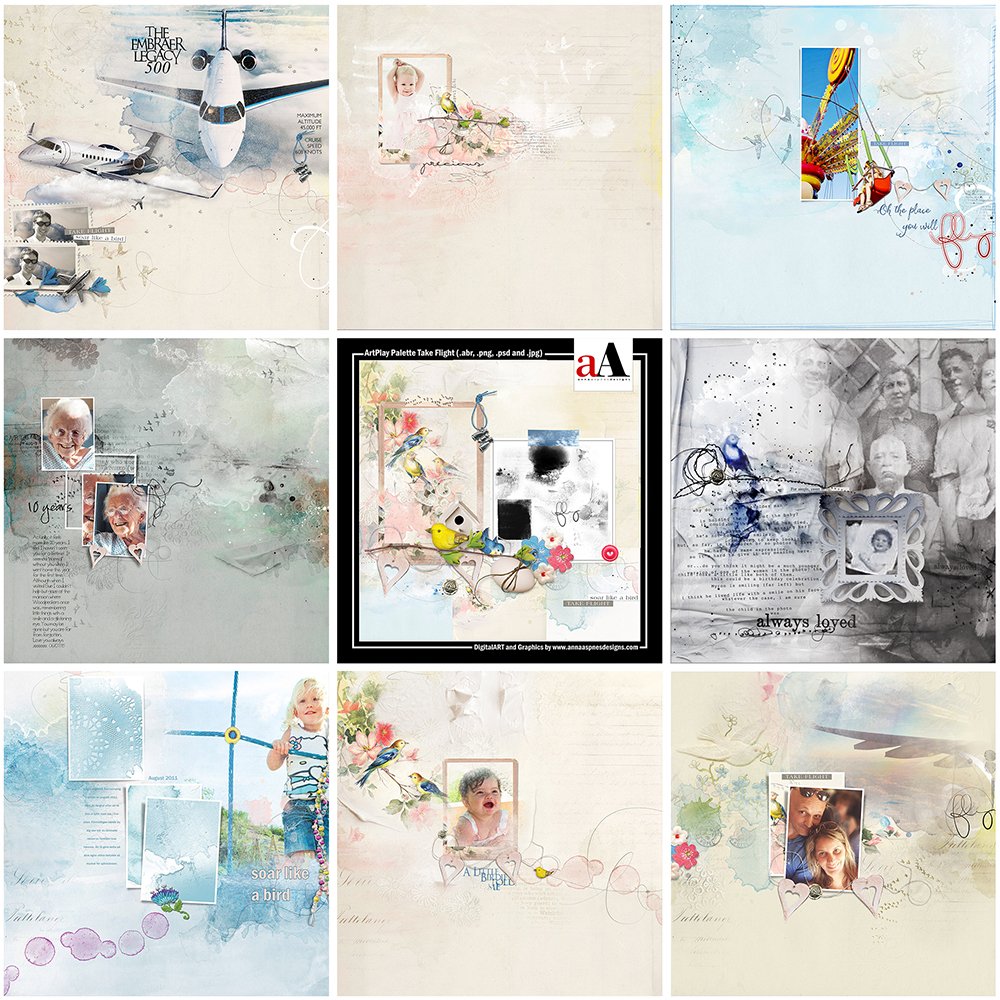
Below are descriptions of the brush presets used in this tutorial:
- Brush Presets. This is where you load, view and make brush selections such as shape and tip. See Anna’s tutorial Brushes #1 | Loading and Using Brushes Basics.
- Brush Tip Shape. Enables you to customize the selected brush tip and is one of the most important parts of the Brushes panel. You can select the brush tip, change its size, alter the angle at which it’s applied, change the height-width relationship (roundness) of the tip, and adjust the spacing.
- Shape Dynamics. Adds variation as you drag a brush around the page. For example, if you choose size jitter, the marks left by the brush will vary in diameter. Angle can also be set to Direction, which forces the brush tip to adjust the direction that you drag. This adds some variation and randomness to the page.
- Scattering. This varies the number of brush tips instances as you drag as well as their placement.
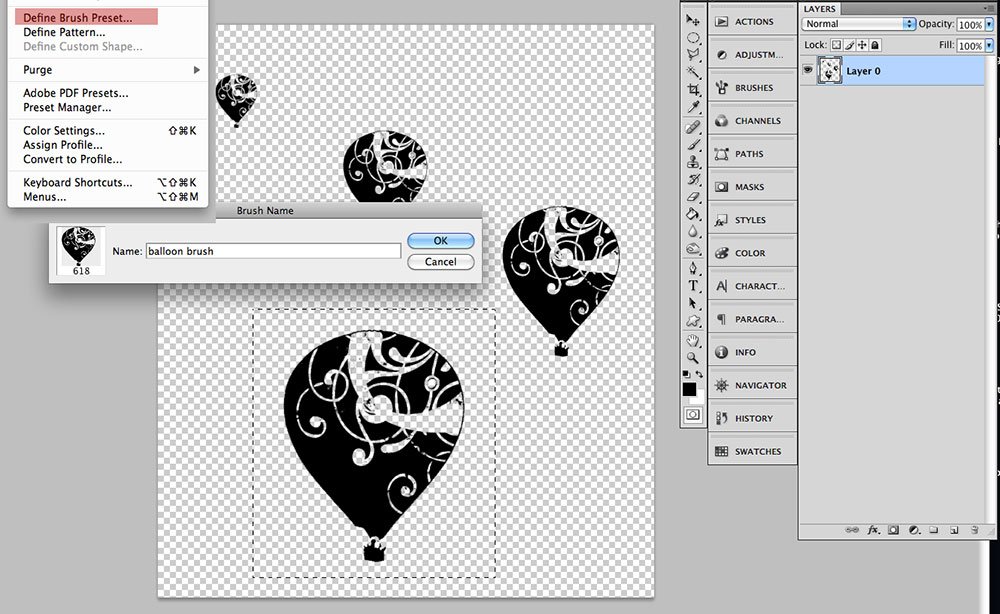
Selecting the Brush. Open Anna’s Beach Bum BrushSet in Photoshop, Select Brush 1 ( Hot Air Balloons). Select the Rectangular Marquee tool from the Tools panel, then create a box around the largest balloon and load it as a Brush. Go to Edit> Define Brush Preset> Name Brush> Ok.

Setting the Brushes Presets. Open the Brushes Panel. Click on Brush Tip Shape, select the balloon brush that was just loaded. Set the spacing to 200%.
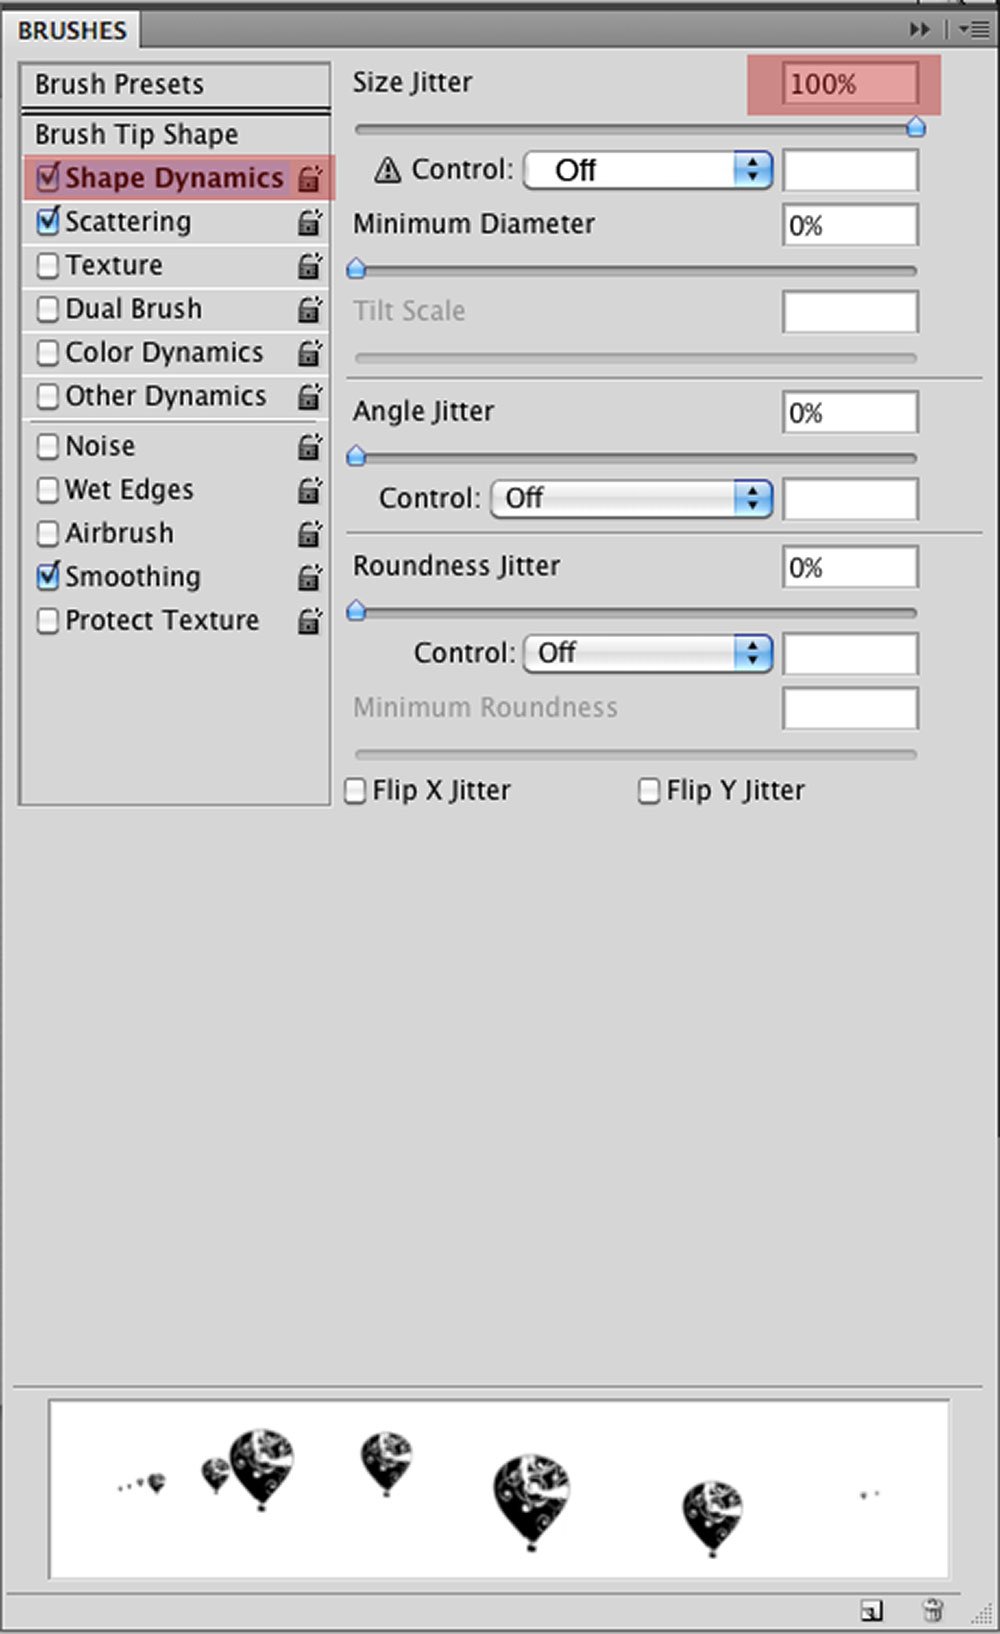
Shape Dynamics. Click on Shape Dynamics, set the Size Jitter to 100%. Control off, Minimum Diameter 0%, Angle Jitter 0%, Roundness Jitter 0%.
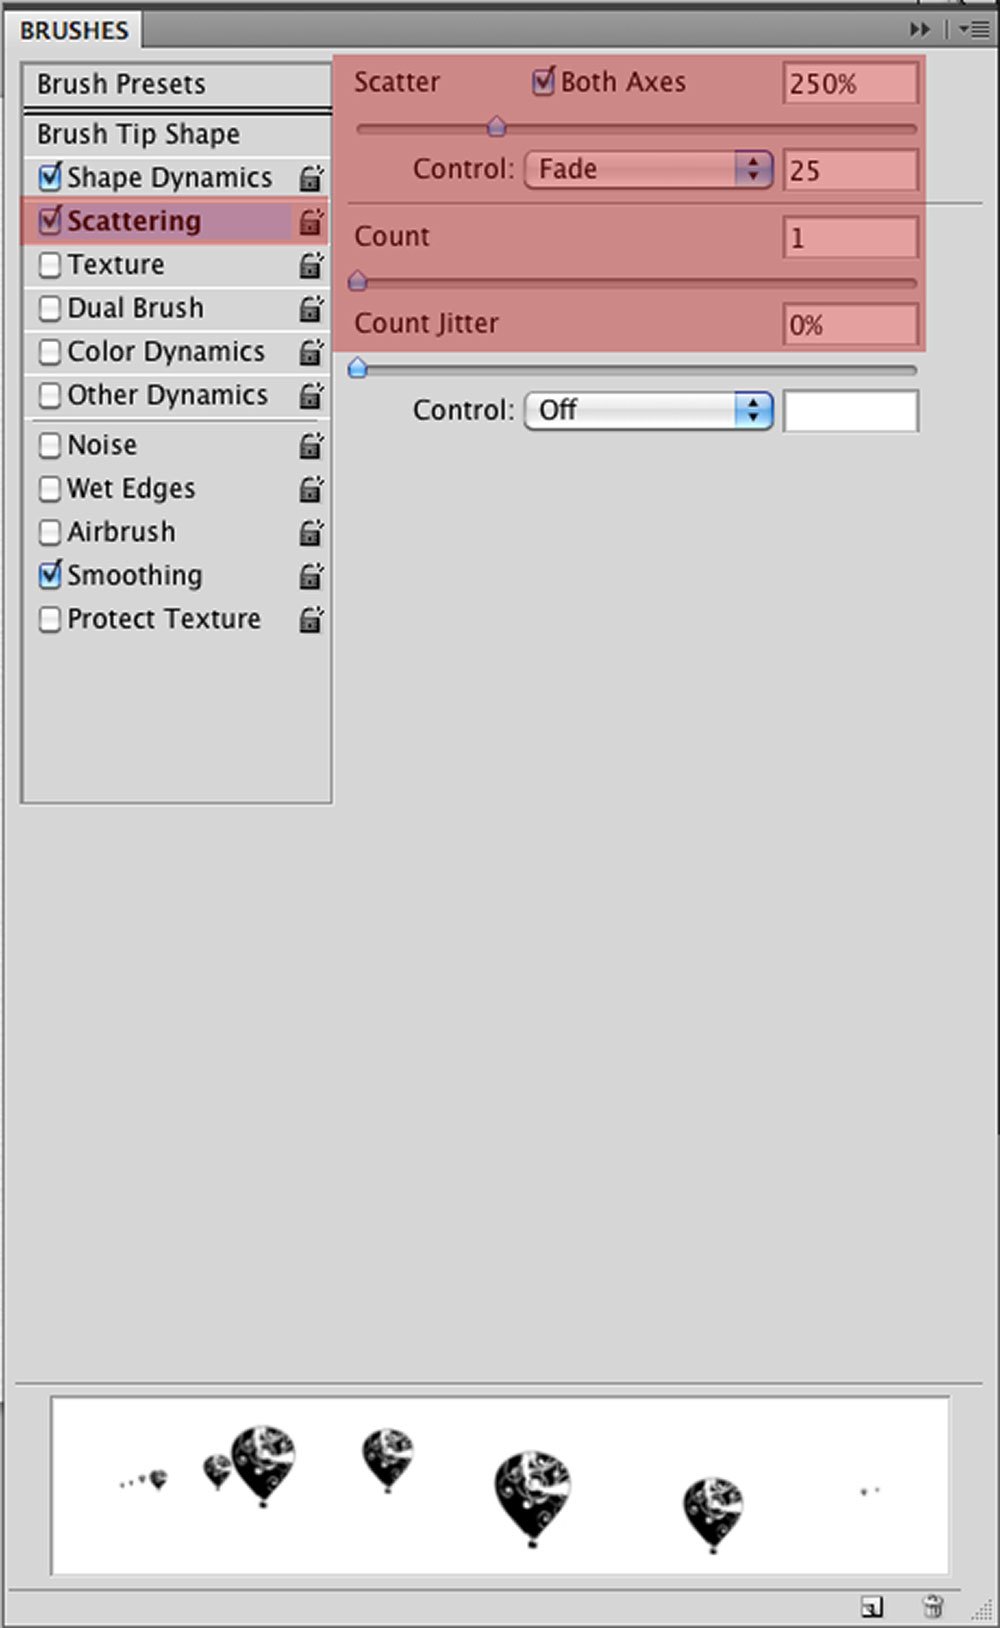
Scattering. Click on Scattering. check the Both Axes box and set Scatter to 250% (you can play with this to find what works best for you). Set Control to Fade (25), Count to 1, Count Jitter 0%.
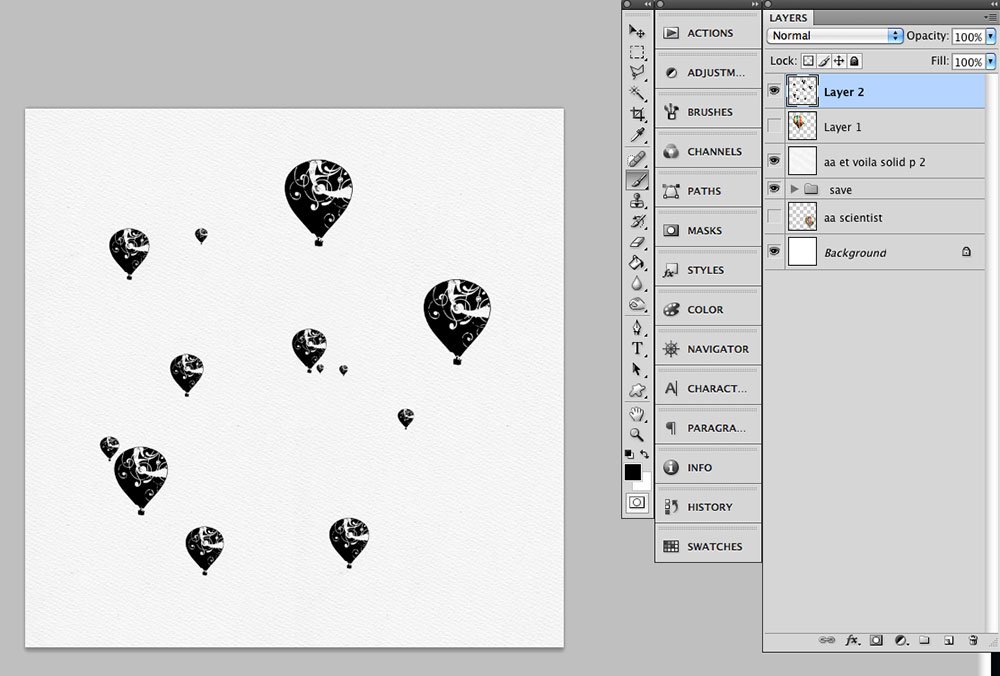
It doesn’t matter what color the brush is as you are just making a template, but black makes it easier to see the outline and details. Begin stamping or dragging the brush around the page. You may want to try this several times until you get a scatter that you like.

Creating a Template. Create a new layer above the brush layer. Link these two layers together by selecting the layers in the Layers panel and clicking on the chain icon. To get the outline to “paint,” click on the balloon brush thumbnail in the layers panel while holding the Control or Command button on your keyboard. This will give you the “marching ants.” Turn off the balloon brush layer and make sure that the new layer is selected.
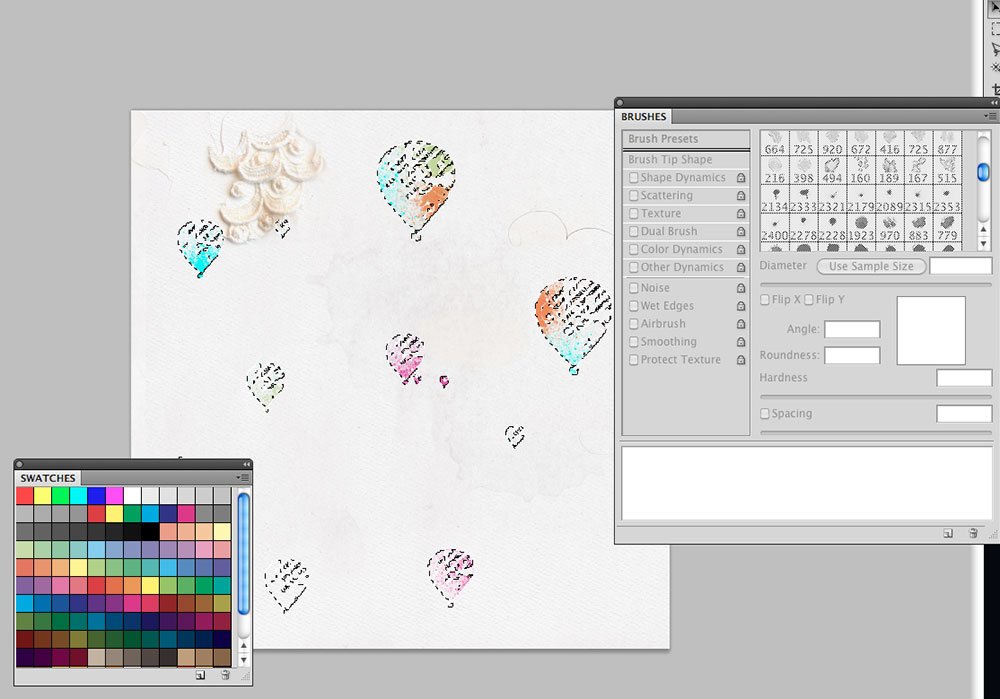
Paint the Balloons. Select Brush 6 from Anna’s Spray Paint Brush Set No. 1. Select the colors that you want to use. You can leave the Swatches panel open for easier color selection. Using just the over spray of the brush, begin painting in the colors. Mix them up for a really cool multi-colored effect. If you want a more dynamic effect, duplicate the spray paint layer and adjust the blending modes. Color Burn and Hard Light blending modes yield the best effect.
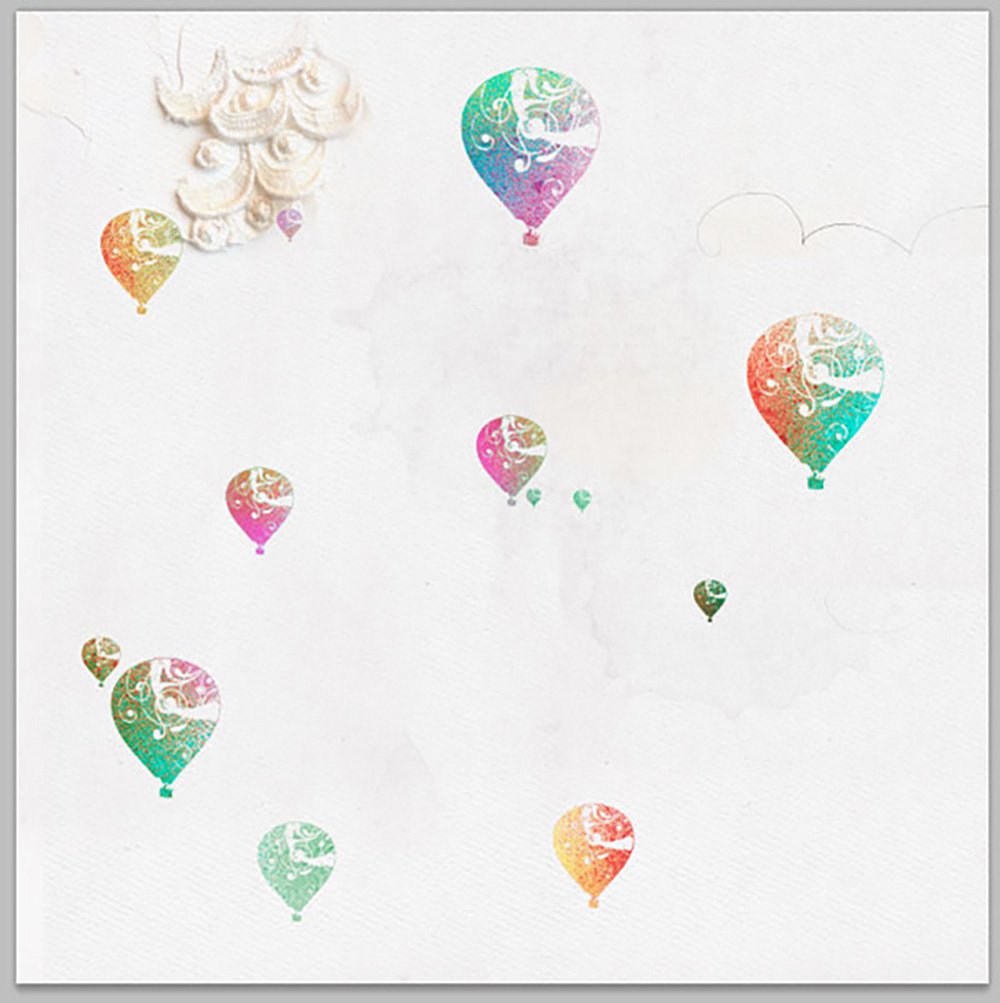
Finish your page by adding WordART, FotoGlows, Textures, MultiMedia Elements and Transfers.
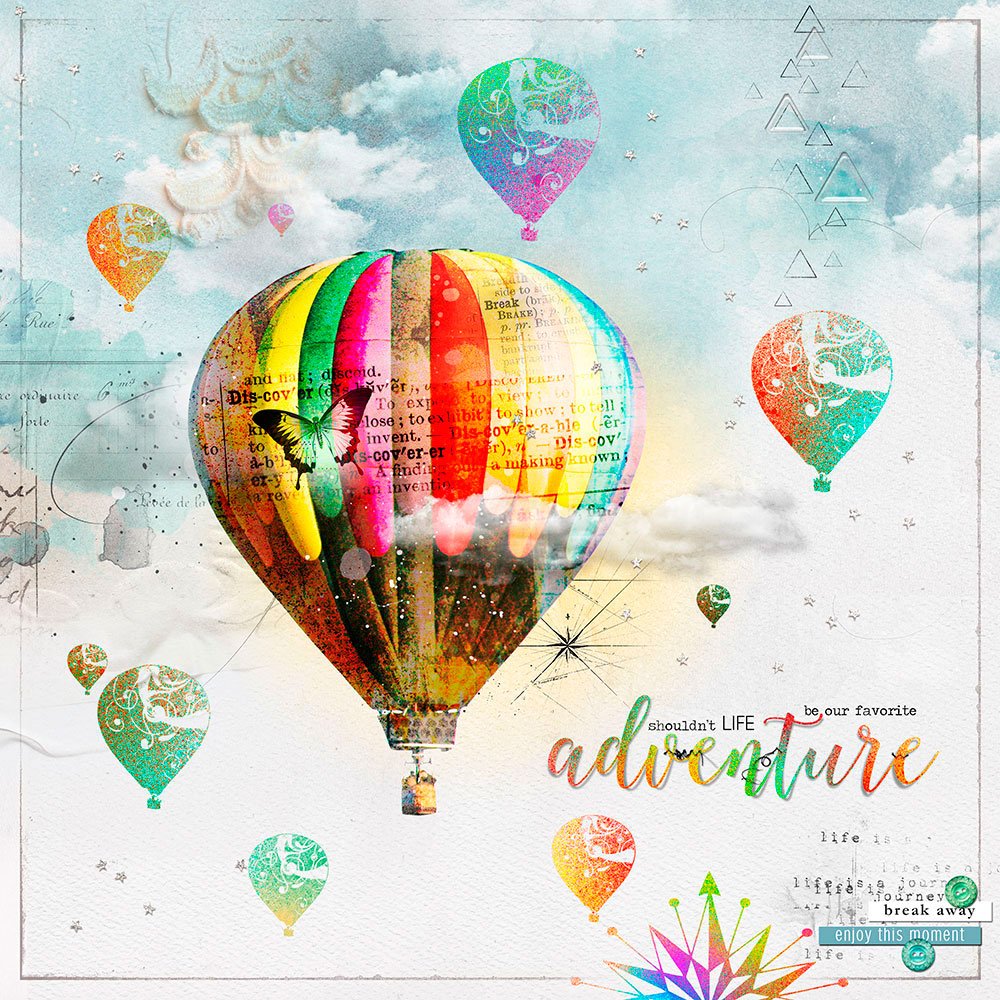
Click on the above image for more process notes and a list of supplies used.


Wow, wonderful tutorial. I didn’t know how the scattering worked, this is so cool and I think I will certainly gonna use it. Thanks for sharing! Also beautiful layout :o)
Miki will love to hear this 🙂
Miki you’ve done an excellent job of explaining how the settings work for the scattering.