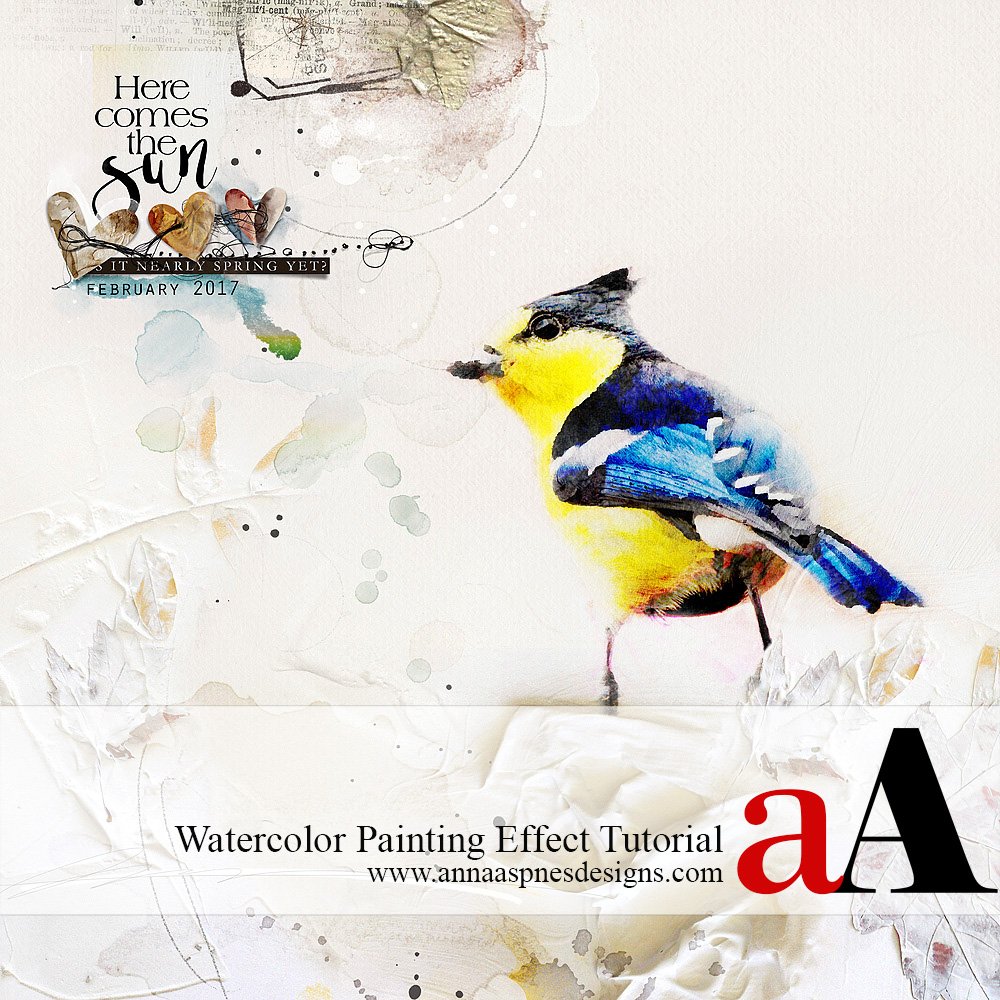
Eva, shares watercolor painting effect tutorial conducted in Adobe Photoshop.
Note that this tutorial can also be completed in Adobe Photoshop Elements.
Watercolor Painting Effect TutoriaWatercolor Painting Photo Artistry Tutorial
A painted effect applied to a photo can add instant visual interest to any artsy digital scrapbooking page or composite.
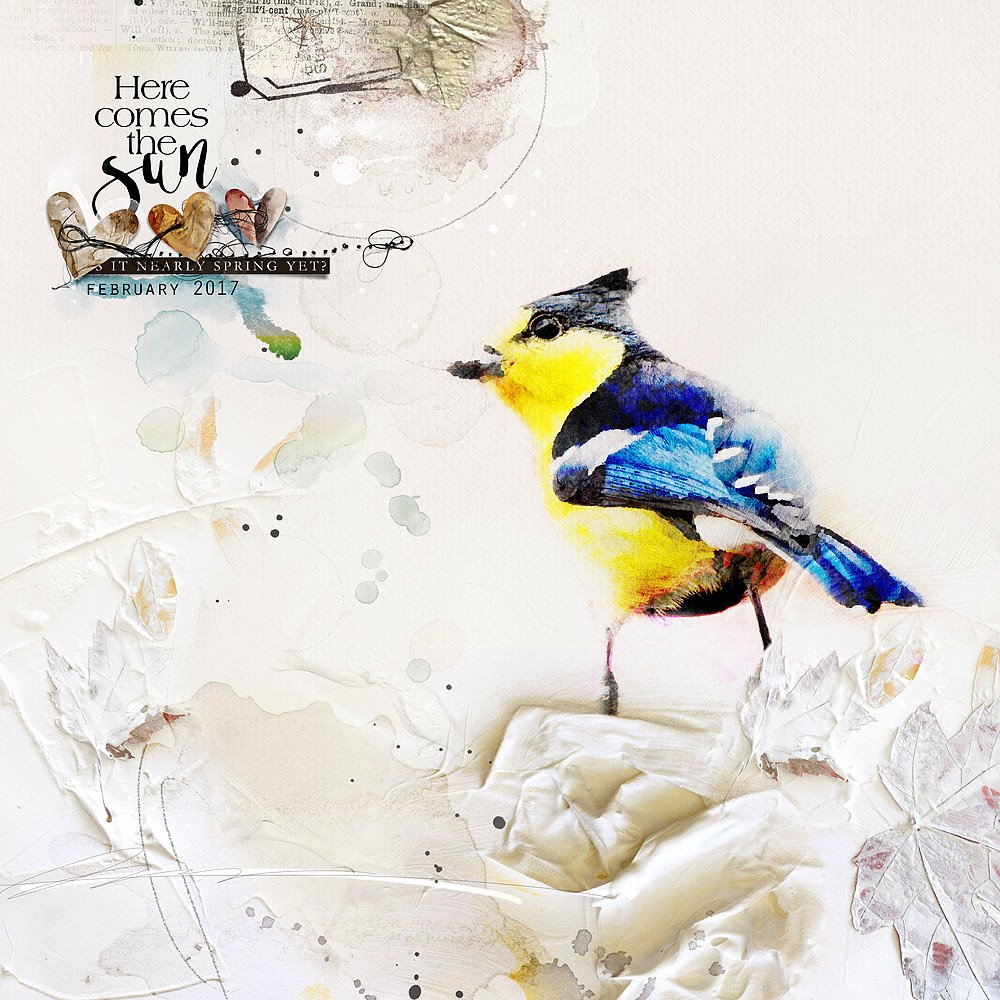
In this layout I am using a bird photos, taken by my colleague, who is a bird-watcher and a great naturalist. I would like to thank him for gifting me with his image.
1. Build A Foundation. Create a new layout and build a foundation for your photo. You can select an ArtsyPaper.jpg from an ArtPlay Palette for a fast and easy background, or create your own.
Arrange Transfers, Overlays and Brushes over the SolidPaper.jpg to form a pleasing design using the Move tool from the Tools panel.
I selected ArtsyPaper5.jpg from ArtPlay Palette Tinge because I was drawn to the rich textures and colors in this paper.
2. Convert to Smart Object. I recommend converting your photo layers into Smart Objects before you start working with them. Smart Objects enables you to preserve the original characteristics of an image so that you can edit in a non-destructive manner.
Smart Objects enable you to resize, rotate, and apply effects to a layout, without effecting the pixels of images and therefore the quality. You can also apply filters to Smart Object with the ability to adjust them at any time.
Select the photo layer in the Layers panel and go to Layer> Smart Objects> Convert to Smart Object (Photoshop ONLY). Notice the layer thumb change in the Layers panel.
Please note you cannot create a Smart Object in Photoshop Elements.
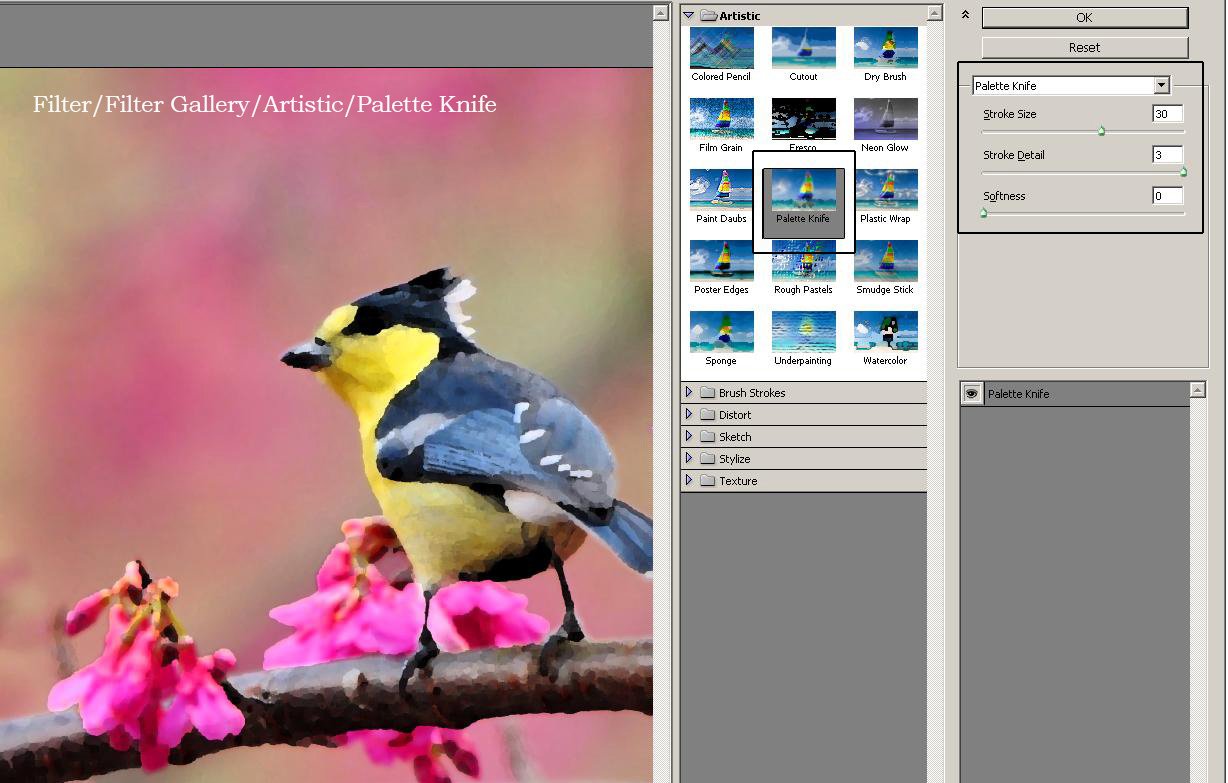
3. Filter Your Photo. Apply an artistic filter to your image. Select the photo layer in the Layers panel, and go to Filter> Gallery> Artistic> Palette Knife (Photoshop and Elements) and adjust the settings as preferred.
4. Mask The Image. Blend the image into the arty background by adding a Layer Mask to the photo layer, before using brushes of your choice on the mask to remove areas of the image into an artsy fashion.
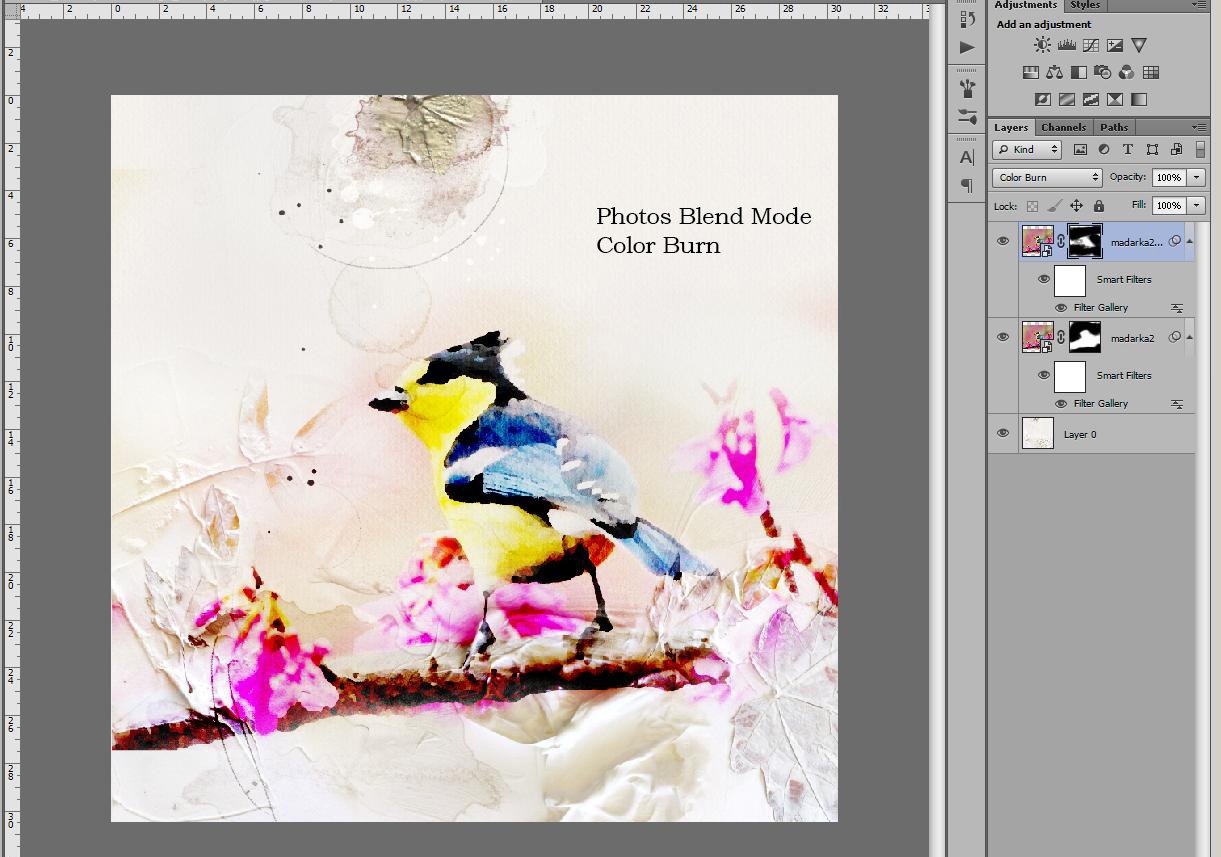
You can use a variety of AnnaBlendz Artsy and ArtPlay Palette BrushSets. I used brushes form ArtPlay Palette L’Amour.
5. Apply a Blending Mode. Blending Modes are located in the Layers panel and can be applied to an image layer to create intensity in color and depth in your photos.
Create a copy of the photo layer by going to Layer> Duplicate Layer (Photoshop and Elements). Select the copy layer in the Layers panel.
Click on the downward-facing arrow next to ‘Normal’ at the top of the Layers panel and choose a Blending Mode from the list of options. I selected Color Burn.
Apply a Layer Mask to this Color Burn photo layer and use a variety of brushes again to remove portions of the layer. You can also adjust the Opacity (Photoshop and Elements) or Fill (Photoshop ONLY) by moving the sliders in the Layers panel.
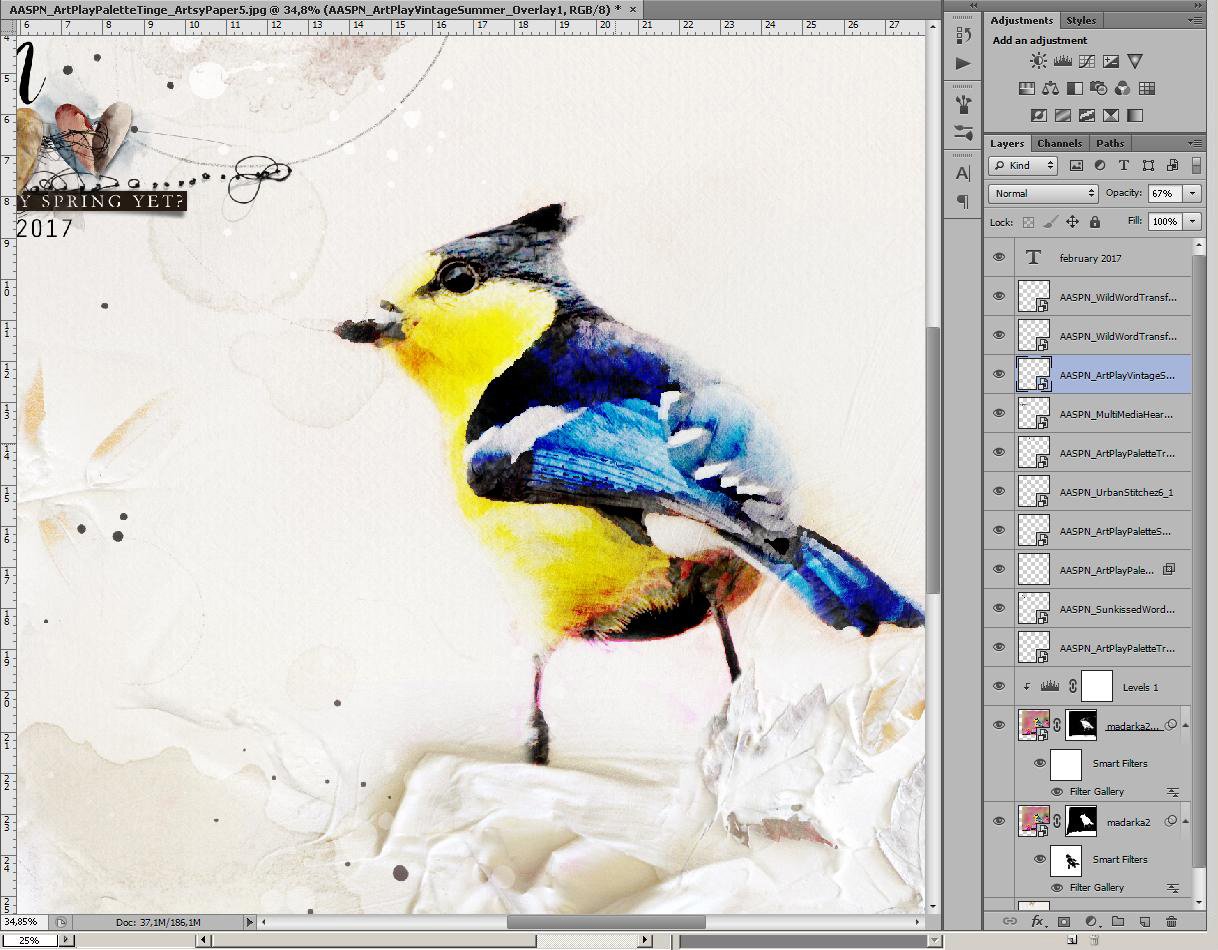
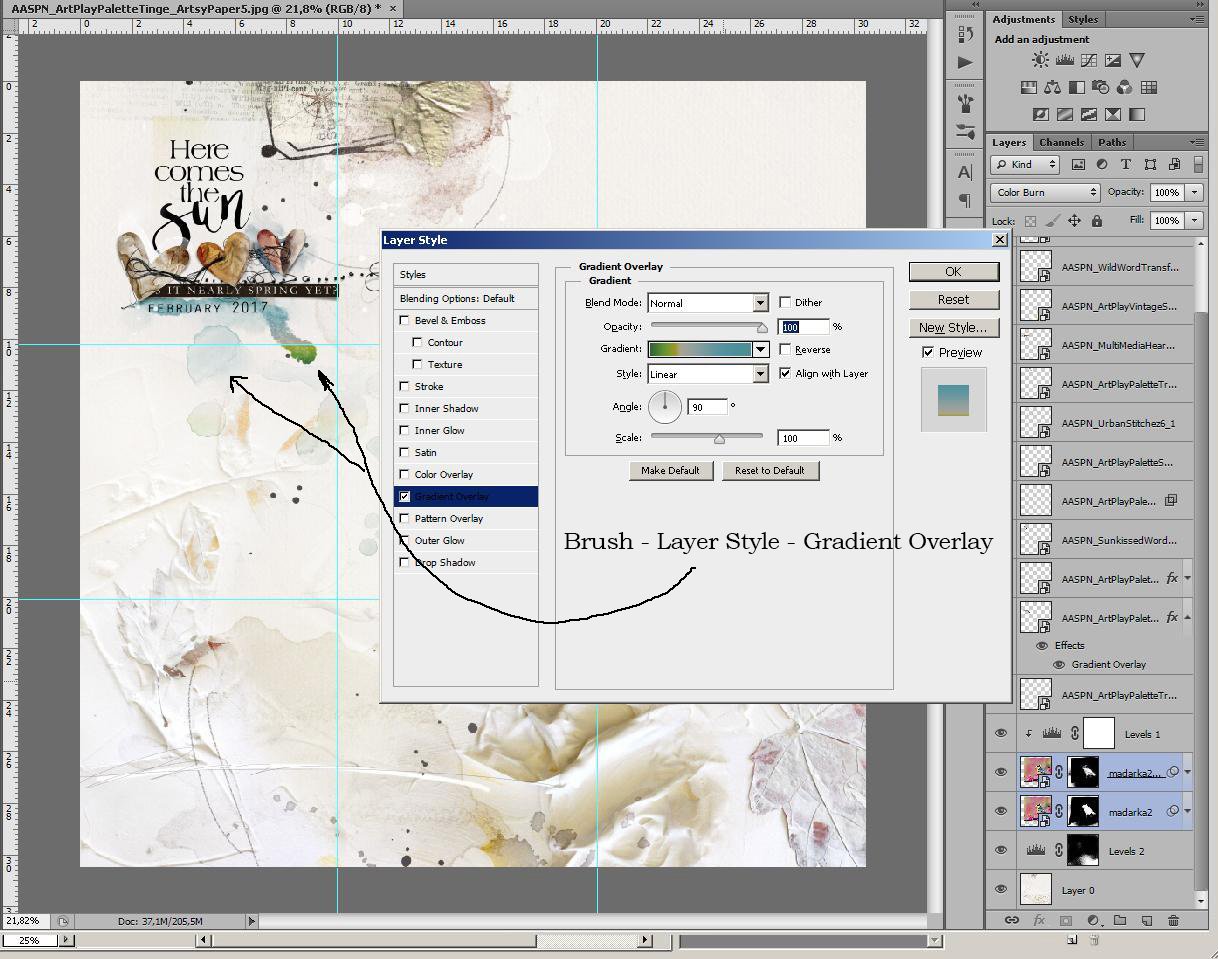
6. Clip A Gradient to Brushes. Add brushwork such as ArtsyStains to your layout by stamping them on new layers using the Paint Brush tool from the Tools panel.
Create a multi-color gradient layer on a new layer using the Gradient tool from the Tools panel. Adjust the sliders in the options window to change colors and adjust the width of each shade.
Clip the gradient layer to the brush layer by pressing CTRL + ALT + G (Photoshop and Elements 15) CTRL + G (Elements 14 and below).
7. Embellish. Complete the layout by adding dimensional elements and words to your page. I adding stitching from UrbanThreadz No. 6, Hearts from MultiMedia Hearts No. 3, a LabeledWord from ArtPlay Palette Spring Due and WordART from Sunkissed WordART No. 1.
Post your questions about this Watercolor Painting Photo Artistry Tutorial in the comments.




Thanks Eva, an interesting tutorial, I’m definitely going to try this!
Köszönöm Éva a tutorialt!! Az oldalad már tudod, hogy nagyon tetszett, most örülök, hogy megpróbálhatok egy hasonló elkészítésével!!
Thank you Fiona! I am so happy, and I can’t wait for your layout!
Dear margeda! Drága Margó!
Köszönöm, hogy visszatértél és alkotsz, és hogy ez nagy örömet okoz neked és nekem is!