

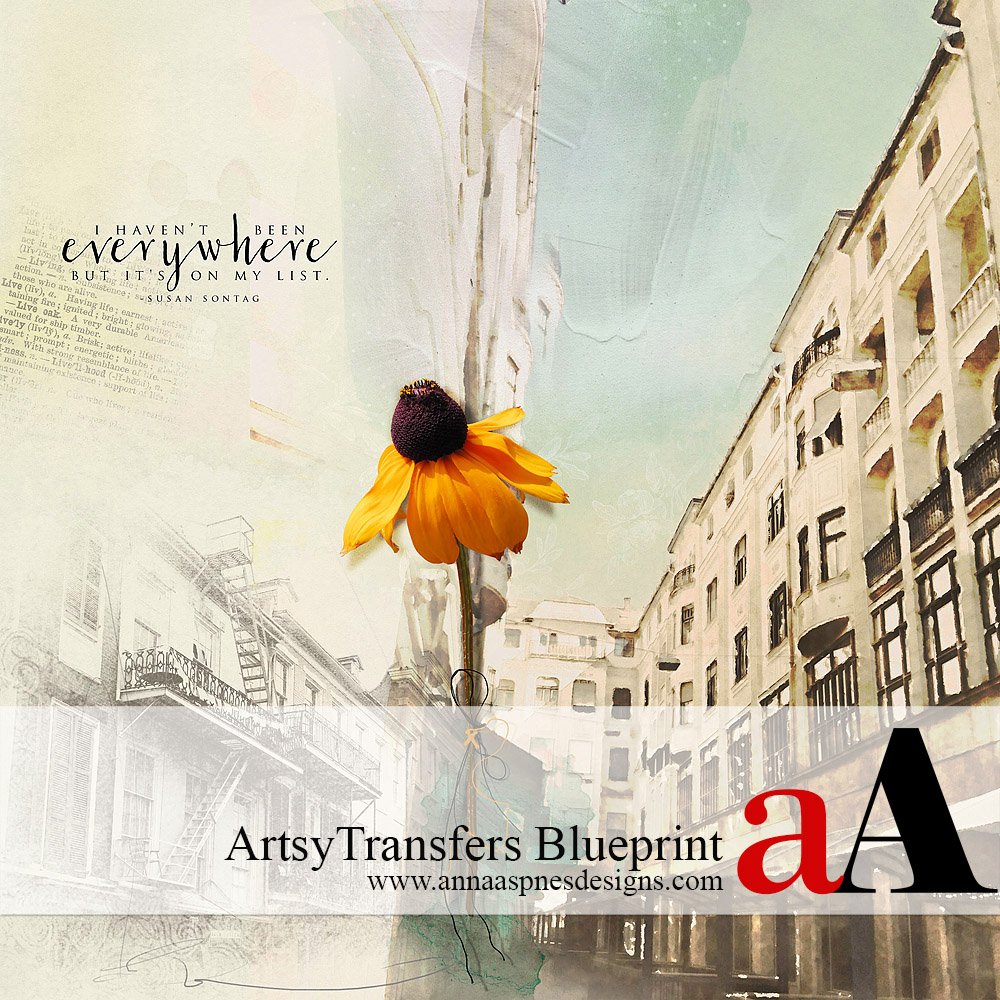
Creative Team Member, Eva, shares her ArtsyTransfers Blueprint using ArtsyTransfers Spring Due to create her layout in Adobe Photoshop.
Note that this tutorial can also be conducted in versions of Adobe Photoshop Elements.
ArtsyTransfers Blueprint
Use the following formula or ArtsyTransfers blueprint with your own photos and differing ArtsyTransfers digital designs to create multiple variations in your digital scrapbooking and artistry pages.
1. Create a Foundation. Create a new 12 x 12 layout at 300 dpi in Adobe Photoshop or Elements. Go to File> New File, and set size specifications in the dialogue box as preferred. Open and move a solid paper onto the new layout using the Move tool from the Tools panel. Open and move the layers from a .psd file in ArtsyTransfers Spring Due onto the new layout, position as desired.
2. Blend your Photo. Open and move your photo onto the new layout using the Move tool from the Tools panel. Apply a Filter to your photo (Filter> Filter Gallery). Eva used the Watercolor, Sponge and Cutout Filters on her layout. Experiment Blending Modes until you have the desired look. Linear Blending Mode was applied to the photo.
Note. Blending Modes can be accessed at the top of the Layers panel in Adobe Photoshop and Elements. Select the layer in the Layers panel to which you would like to apply a new Blending Mode. Click on the ‘Normal’ tab in the Layers panel to activate the options. Select a Blending Mode from the options to apply it to your layer.
3. Add Brushwork. Add Brushwork from ArchiTextures No.5 to balance the page and create interest. Go to Edit > Presets > Preset Manager > Load to load your Brush Set. Create a new layer and stamp the desired brush onto the layout. Experiment with color and opacity.
4. Embellish. Open and drag a Flower element onto your layout. Eva used a flower from ArtPlay Mini Palette Vibrant. Add a drop shadow to the flower to create dimension (Layer> Layer Style> Drop Shadow). Fasten the flower to the layout with ButtonThreadz No.1. Complete the layout by adding a WordART from Travel WordART No. 3.
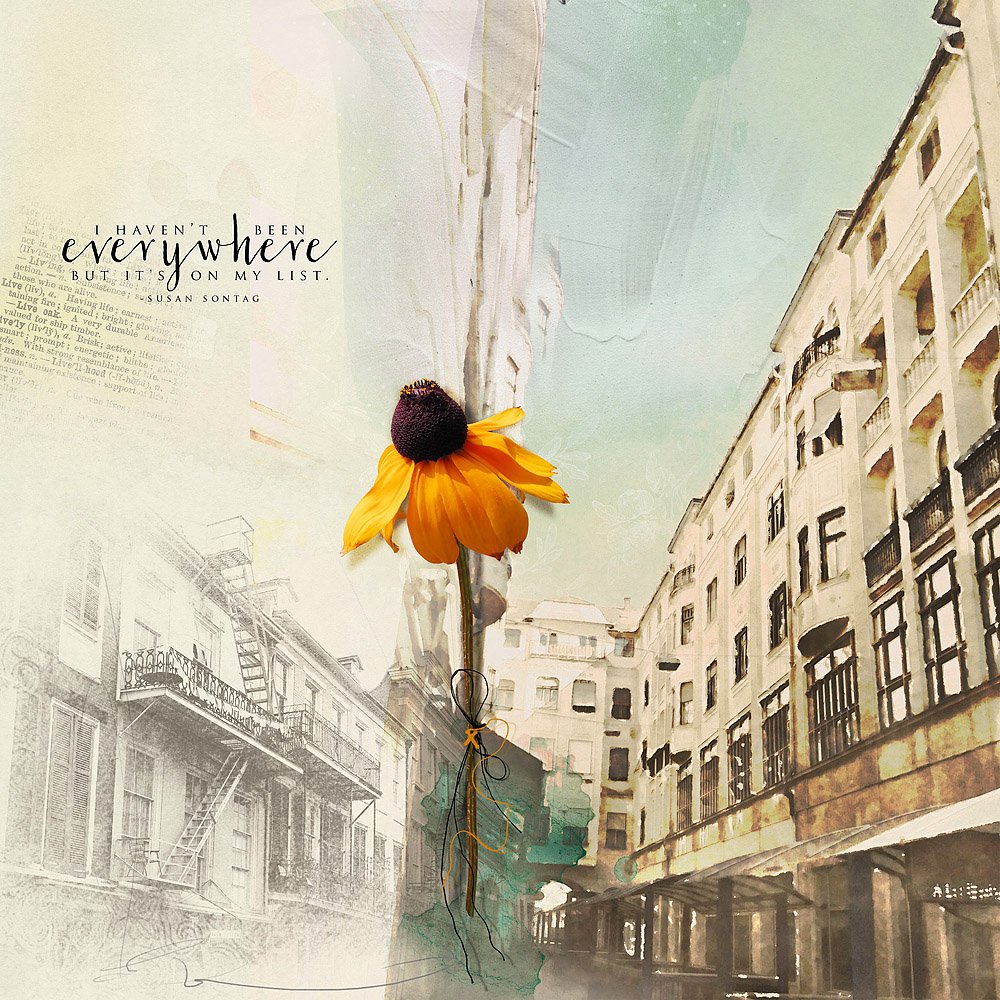
Click on the above photo for additional process notes and supplies used.
See ArtsyTransfers 101 for further guidance on this DigitalART technique.
View the videos on the aA Youtube channel for further tutorials, and guidance on everything you need to know about Using ArtsyTransfers in Adobe Photoshop and Elements.


Stunning page by Eva! Thanks for the blueprint!
I am happy, you like it!
Thank you Marnie!
Beautiful Eva… thanks for the helpful tips!!
Thank you Pam, happy you like it!