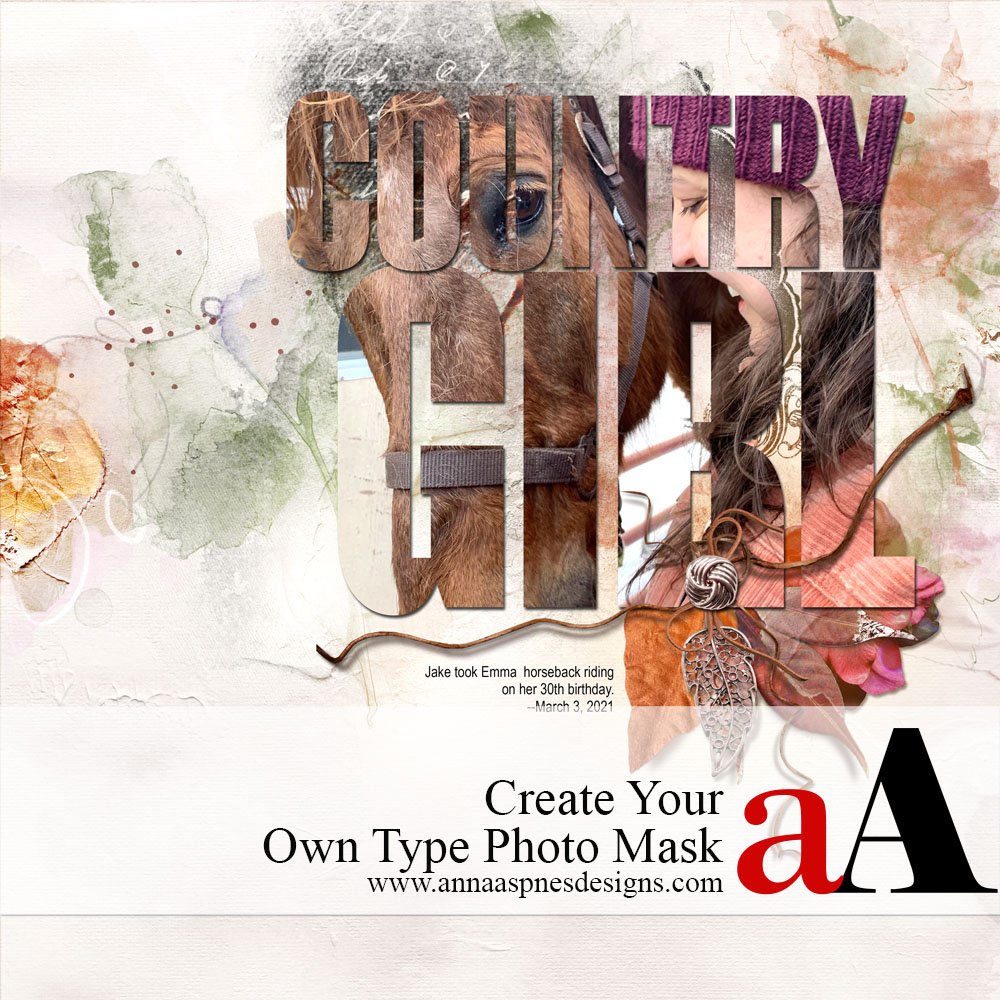
Today, aA Creative Team Member, Laura Tringali Holmes is sharing a tutorial to Create Your Own Type Photo Mask.
This tutorial is conducted in Adobe Photoshop Elements.
Create Your Own Type Photo Mask
Introduction
Any object on any layer can be using as a mask.
- A mask is used with the Clipping Mask Function to instantly change the shape of a photo.
- In this tutorial you will learn how to use Type as a clipping mask.
- Note that ‘Big and Chunky’ fonts with thick lines work best for this technique.
- This FREE font Coda ExtraBold is recommended.
1. Create Type
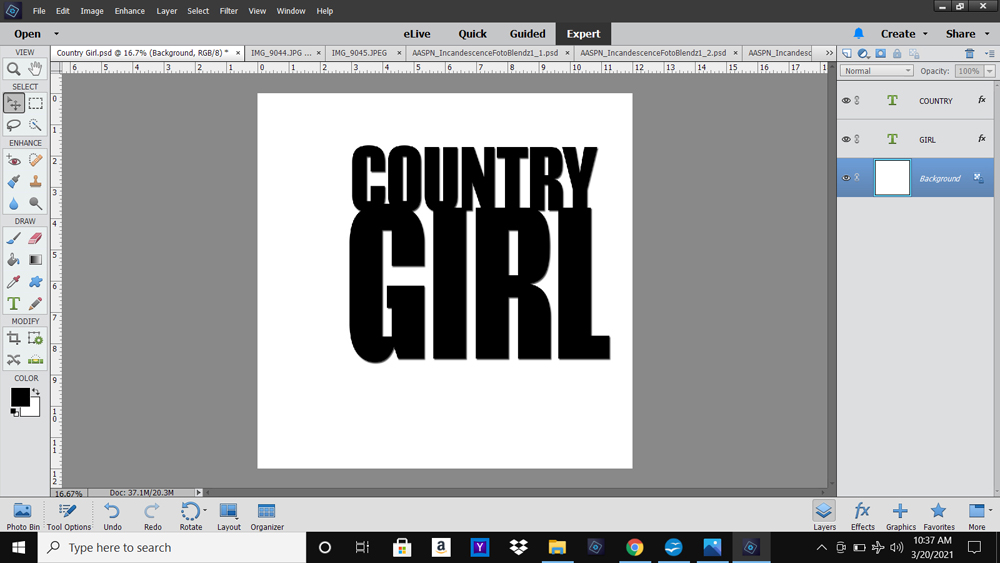
Use the Type Tools to establish a ‘Type’ mask.
- Select the Type Tool from the Tools Panel.
- Choose a Font Style and Size.
- Type your title.
Note.
- Type longer lines of text on Separate layers so you can work on each one independently.
- Elongate the words Horizontally or Vertically by adjusting the Spacing between the Characters to create different effects.
- Overlap the Characters or Words to yield visual interest.
- Placement of the text is Flexible at this point – You will be able to Reposition as needed throughout your layout design process.
- Go to Layer> Layer Style> Drop Shadow to apply Dimension.
- You can also use AnnaStyle Shadows No. 2 (1buttonblackDKBackground).
2. Add Photo
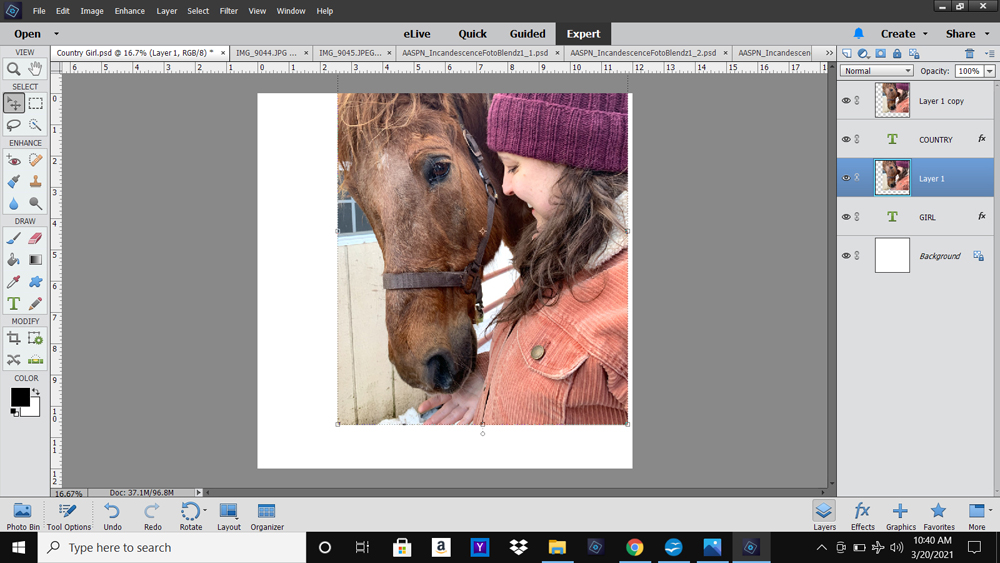
Open and position multiple copies of the same photo on top of the text layers.
- Select the Type layer in the Layers Panel.
- Open and move the photo layer on top of the Type layer.
- Ensure the edges of the image fully extend the edges of the text.
- Duplicate the photo by dragging the layer to the New Layer icon.
- Move the layer with the Move Tool down the Layer Stack directly above the second line of text.
- Repeat the Clipping Mask Function.
3. Clipping Mask Function
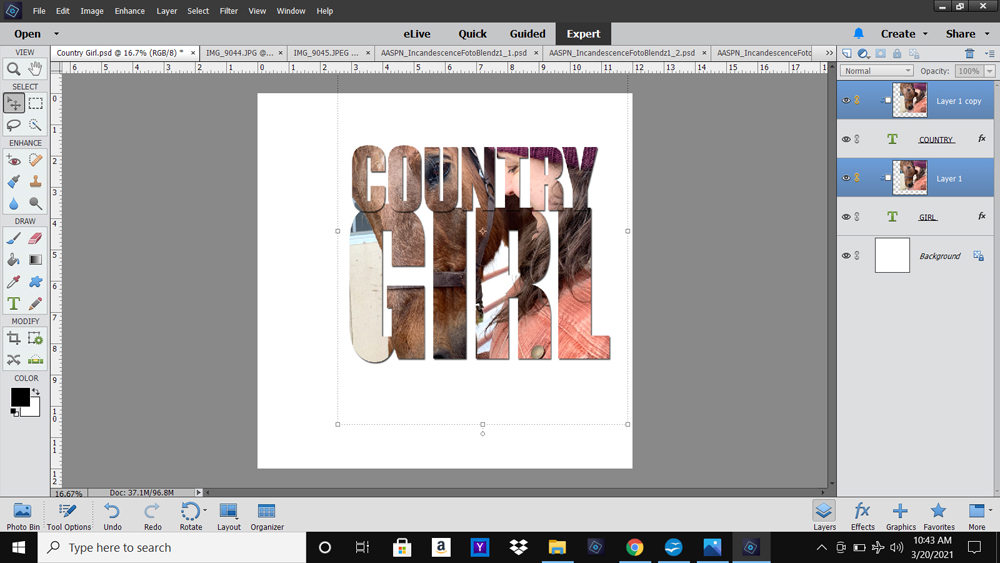
Clip your photo layer to the Type mask using the Clipping Mask Function in Adobe Photoshop or Elements.
- Go to Layer> Create Clipping Mask.
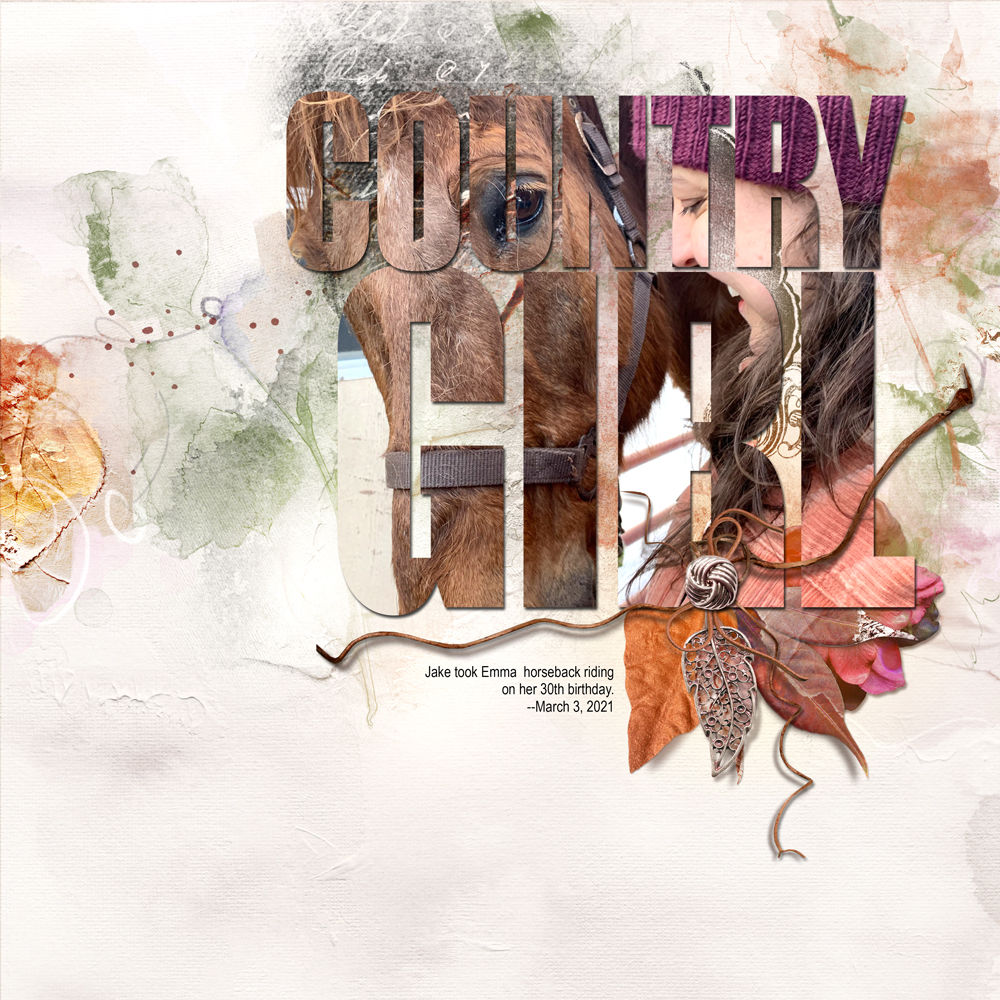
- Notice how the photo conforms to the Shape of the underlying text.
Note.
- Link the photos together using the ‘chain’ icon to the left of the layer (right in Photoshop) in the Layers Panel.
- Linking the photos enables you to move all the image layers Together over the text mask layers to find the best fit for your photos.
- You can ALSO link the photos to the Text so that you can move all the Clipping Sets together.
4. Add DigitalART
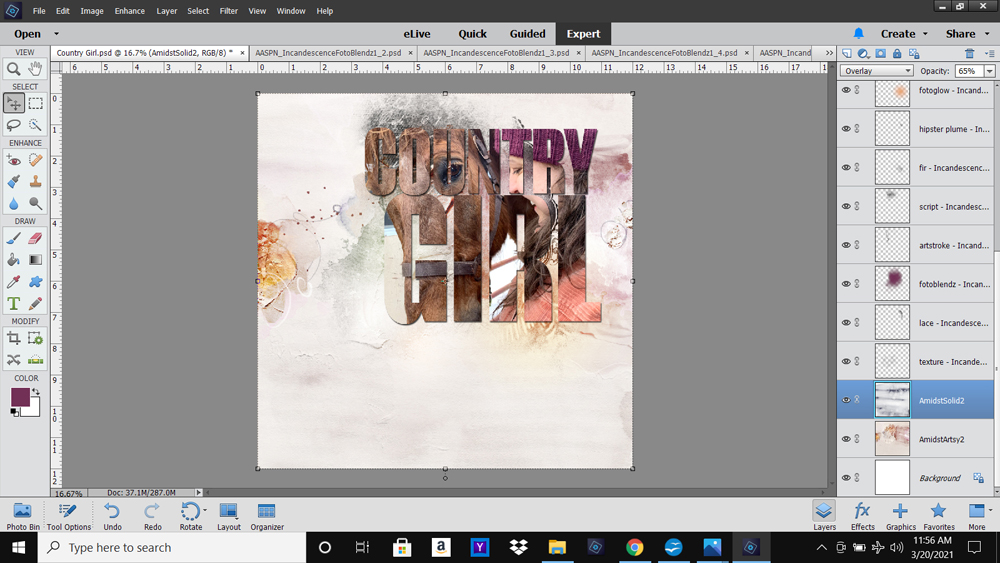
Use your aA digital assets to establish a photo artistry or digital scrapbooking layout design.
- Keep the embellishment simple to Support the type photo mask Focal Point.
- Solid Paper #2 from ArtPlay Palette Amidst was placed above Artsy Paper #2 with Overlay Blending Mode and reduced Opacity applied.
- A layered FotoBlendz mask placed below the Type Photo Mask creates a Foundation (Matte) enhancing Visual Interest via Texture/Light.
- Simply Recolor the mask to coordinate with the Colors in your layout design.
- You can also Duplicate the photo layer again, if preferred, and clip it to the FotoBlendz mask or simply
- Stamp brushes around the Type to frame the imagery – Notice the three green leaves in this photo artistry layout design.
- Reposition the Type as preferred to best support the placement of your aA DigitalART supplies.
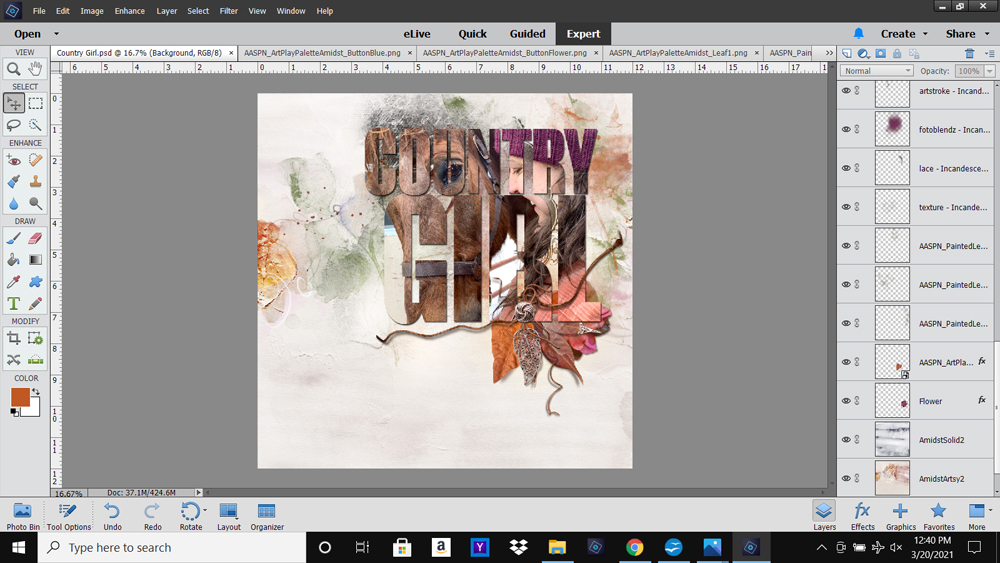
5. Embellish Focal Point
Use a variety of elements to draw the eye to your Type Mask Focal Point.
- Create your own Element Cluster.
- This ‘cluster’ was created using embellishments from Artplay Palette Amidst.
Summary
Create an an all-in-one photo title to create a striking focal point in your photo artistry and digital scrapbooking layout designs.
- Choose a ‘chunky’ font with thick lines to create your title foundation.
- Select and place photo ensuring the edges extend the Type Mask.
- Clip Duplicate copies of the SAME photo to EACH line of type.
- Link the layers if preferred.
- Keep embellishment simple to Support your Focal Point.
- ‘Frame’ the imagery with Brushes positioned in a Visual Triangle.






Super fun tutorial, Laura! Thank you for sharing how to make it even more special using Anna’s designs.
Yes!
Thanks so much Beverly!