
Today Creative Team Member, Margo is sharing Selective Coloring with Adjustment Layers.
Selective Coloring with Adjustment Layers
Introduction
You can use Adjustment Layers to brushes add a multi-color effect to your brushes
- Enables editable coloring.
- Provides SELECTIVE color application.
- Modify Element Properties as preferred.
You will use .png transparent file in this tutorial.
1. Create Layout Foundation
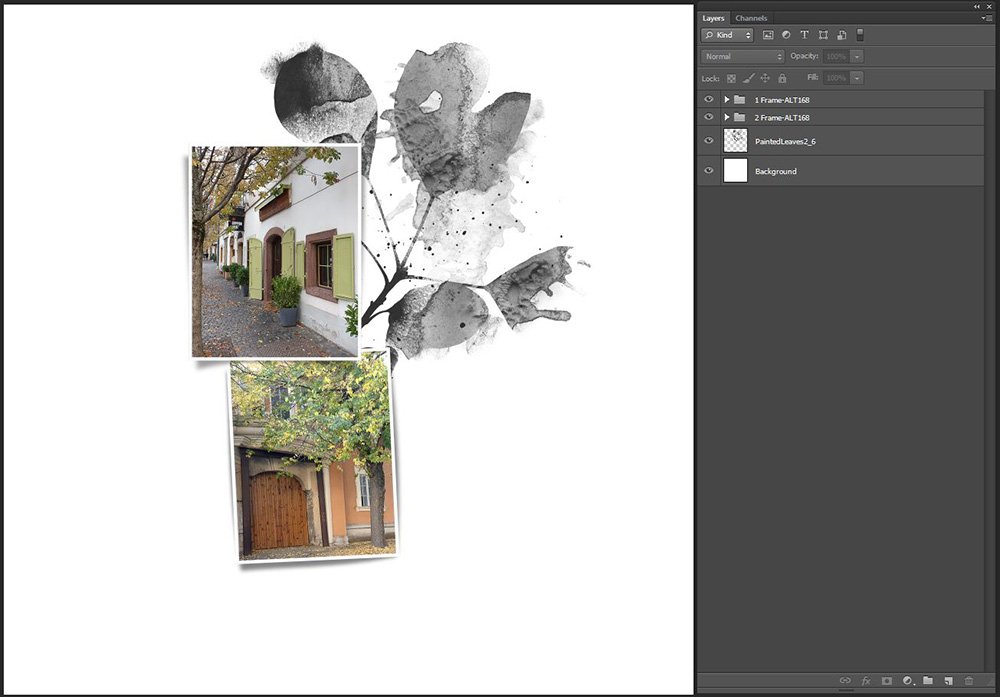
Establish a New Layout and ‘mat’ frame layers from an Artsy Template with a brush element.
- Go to File> New and create a 12 X 12 300 DPI blank file.
- Open and place # 6.png from PaintedLeaves No.2 on the new layout.
- Open Artsy Layered Template No. 168 into your Photoshop workspace.
- Select the layers of the two frame elements in the Layers Panel.
- Move the frame layers using the Move Tool and place over the PaintedLeaves No.2 brush.
- Go to Layer> Create Clipping Mask to attach your photos the the frame mask layers.
2. Apply a Color Adjustment Layer
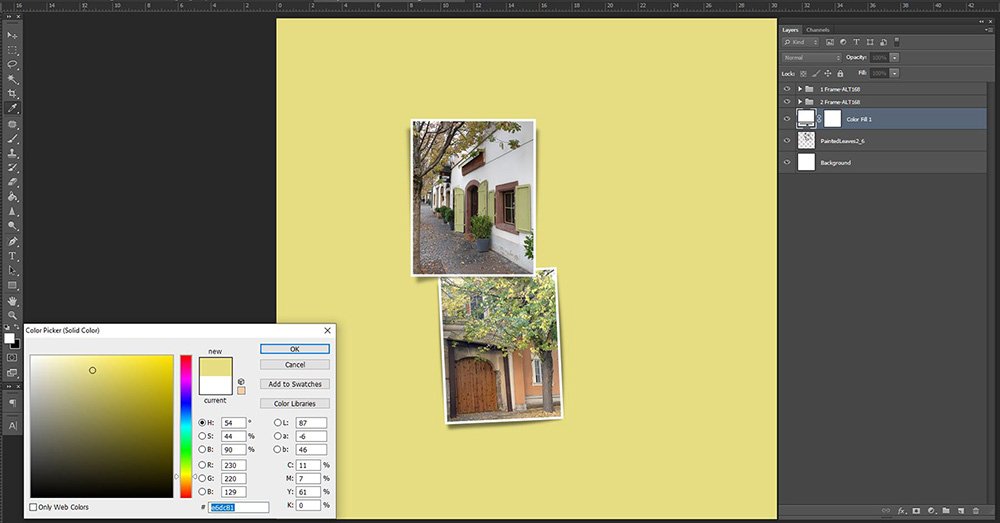
Create an Adjustment Layer and select a color.
- Select the PaintedLeaves element layer in the Layers Panel.
- Click on the New Adjustment Layer icon at the bottom of the Layers Panel.
- Choose the ‘first’ Solid Color option from the fly-out menu which activates the Color Picker.
- Select a color from the dialog box or sample a color as preferred and click OK.
3. Apply the Color to Brush
Use the Clipping Mask function to be selective in your color application.
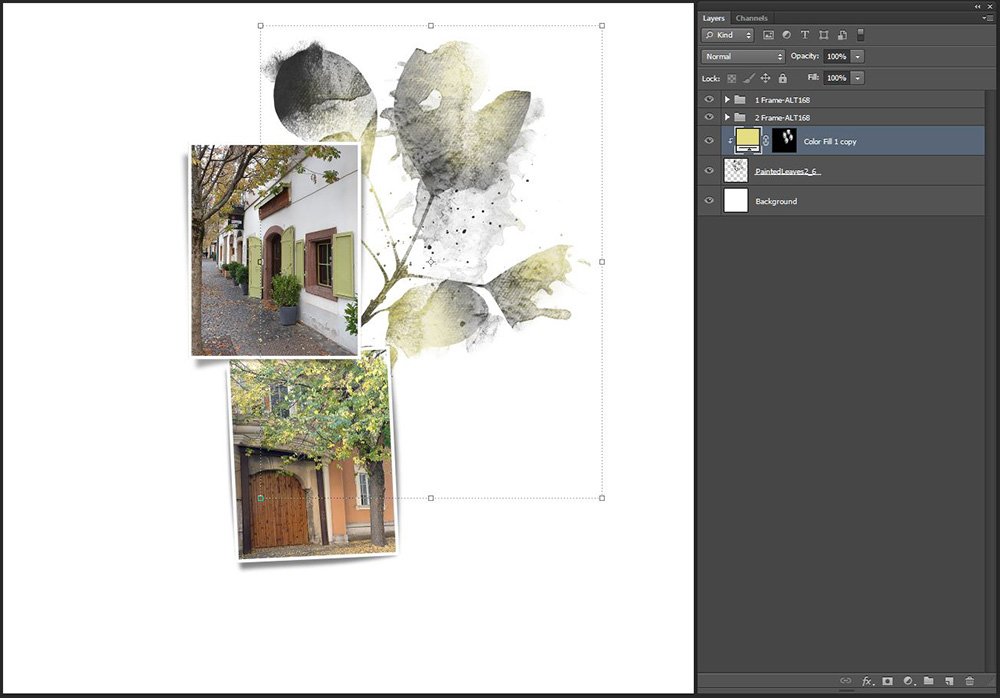
- Select the Color Adjustment Layer in the Layers Panel.
- Go to Layer> Create Clipping Mask to clip the Color Adjustment Layer to the PaintedLeaves brush.
Note. You can also move the mouse between the 2 layers, press the ALT button on your keyboard to convert the cursor to a downward facing arrow, click the left mouse button to clip the Color Adjustment Layer and the PaintedLeaves brush.
- Select the Layer Mask applied to the Color Adjustment Layer in the Layers Panel.
- Press CTRL/CMD + I simultaneously in your keyboard to INVERT the color of the Layer Mask from white to BLACK.
- This masks/hides the visibility of the Color Adjustment Layer completely.
- Choose the Paint Brush Tool from the Tools Panel and make a brush selection of your choice.
- Set the Foreground Color to WHITE and paint on the Layer Mask to selectively color the PaintedLeaves brush.
Notice. The underlying brush layer is partially colored.
4. Add More Colors
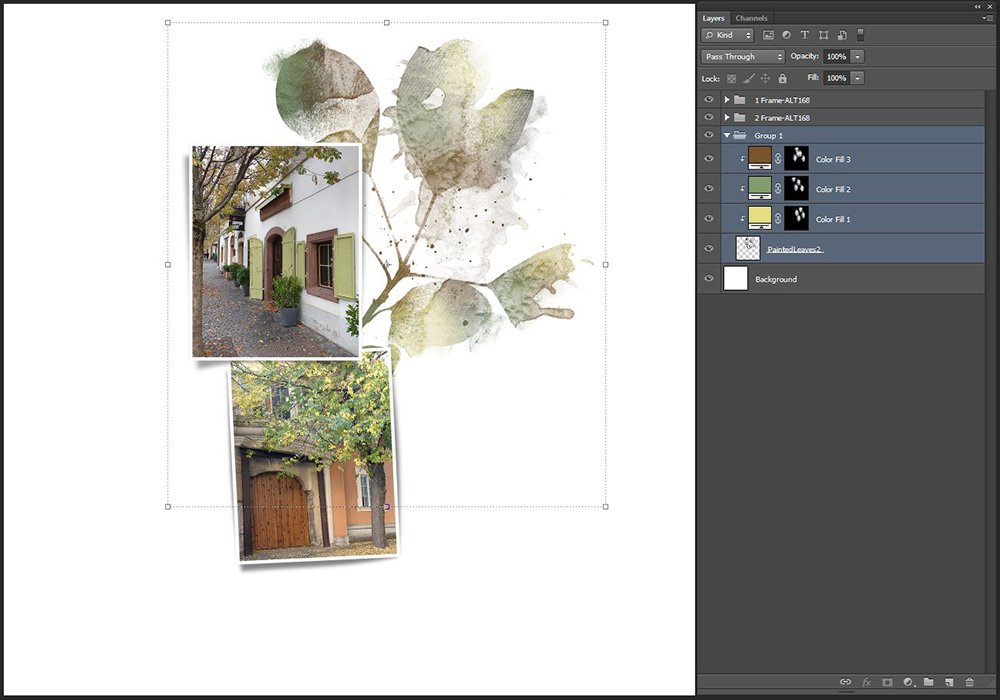
Repeat to apply more colors to your brush element.
- Repeat Step 2 to apply a new Color Adjustment Layer with a different color, and clip the new Color Adjustment Layer to the Clipping Set.
- Repeat Step 3 to selectively color the brush element.
Note. Continue this process as preferred to add as many colors to the brush as you choose.
5. Embellish the Layout Design
Add DigitalART supplies to augment your photos.
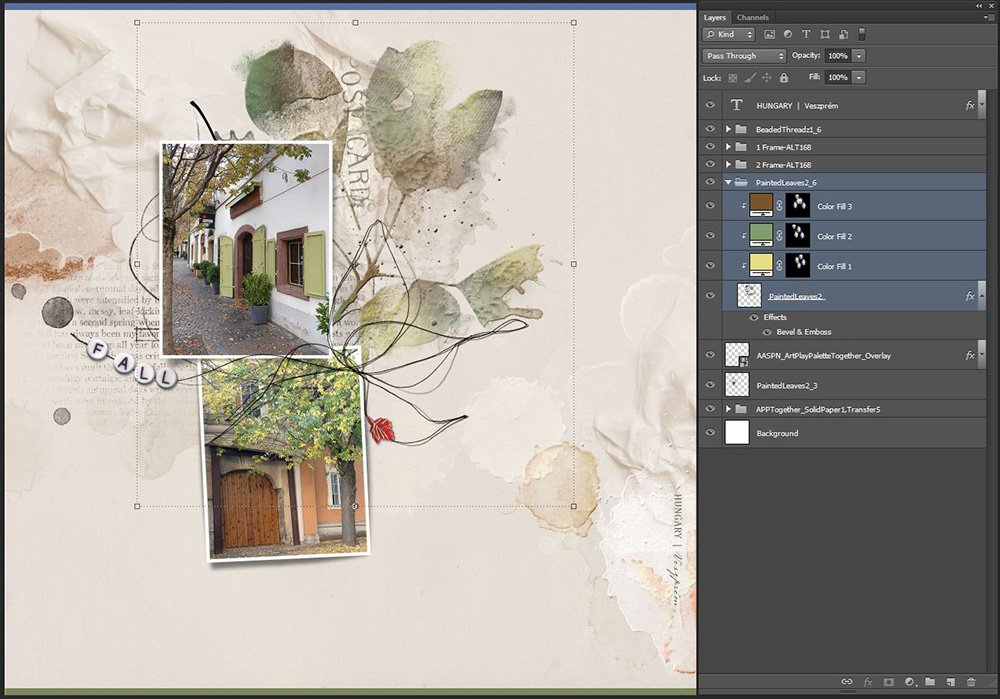
Summary
Use a Color Adjustment Layer to selectively recolor brushes.
- Create the Color Adjustment Layer.
- Clip the Color Adjustment Layer to the Brush layer.
- Completely mask the Color Adjustment Layer.
- Use brushes to paint back in areas of the Color Adjustment Layer.
- Repeat as many times as preferred.
TRY THIS.
- Change the Blending Mode of any layer.
- Modify the Opacity of any layer.
- See FREE Basic Brushes Guidance workshop.
DigitalART Supplies
- Find a full list of DigitalART supplies here.





The layers of custom color created stunning foliage! Going to give this a try! Thanks, Margo, for the creative brush art instruction!