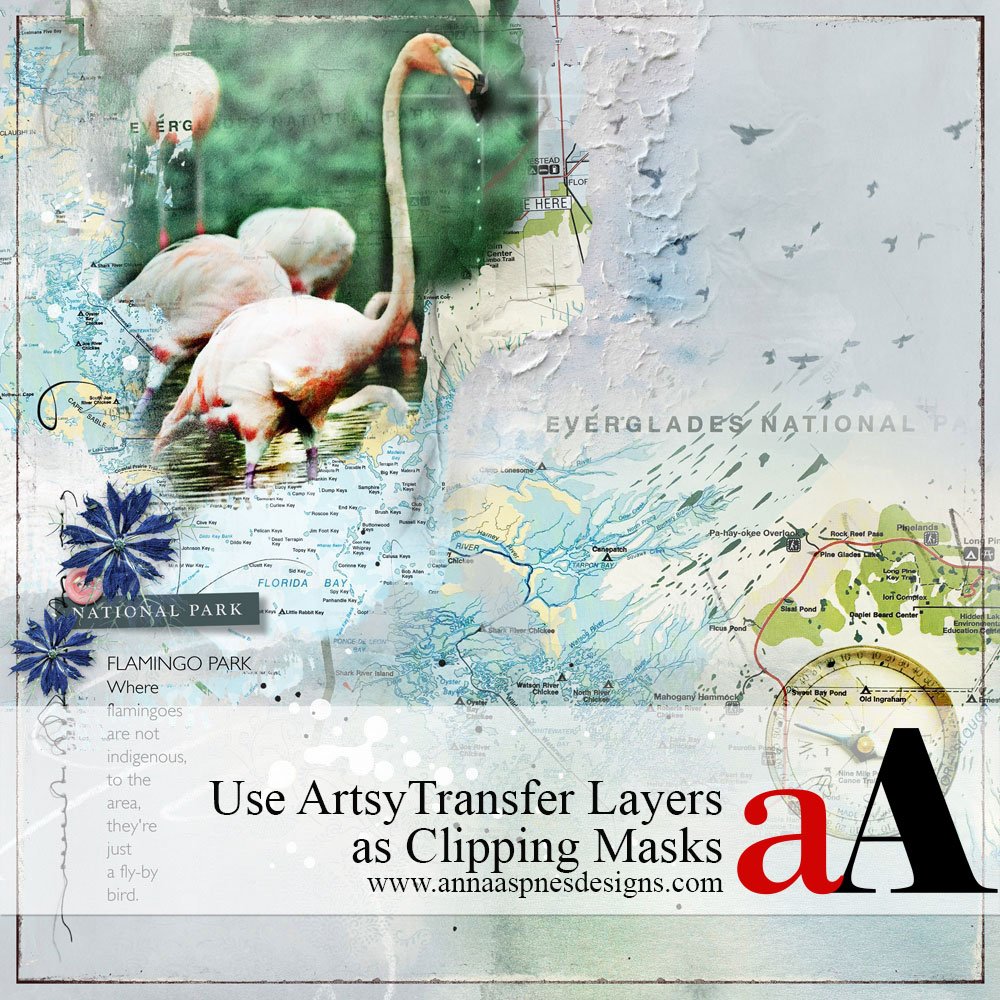
Creative Team Member, Miki Krueger, shares how to Use ArtsyTransfer Layers as Clipping Masks.
This tutorial is written for Photoshop Elements but may be adapted for use with Adobe Photoshop.
Use ArtsyTransfer Layers as Clipping Masks
Introduction
Use the individual layers in ArtsyTransfers as clipping masks to blend your photos.
- ArtsyTransfers are delivered in multi-layer .psd format (while ‘Transfers and Overlays’ in ArtPlay Palettes are in .png format ONLY.)
- This means you have greater FLEXIBILITY in being able to manipulate those layers INDIVIDUALLY.
- You can clip photos and images to ANY of the layers in an ArtsyTransfer.
1. Select ArtsyTransfer
Choose an ArtsyTransfers to coordinate with your focal photo.
- Open the .psd file(s) from the ArtsyTransfer set of your choice.
- I chose a Transfer from ArtsyTransfers Glacial.
Tips.
- ArtsyTransfers should coordinate in terms of Color and Theme.
- Look for large OPAQUE neutral areas that could accommodate your photo.
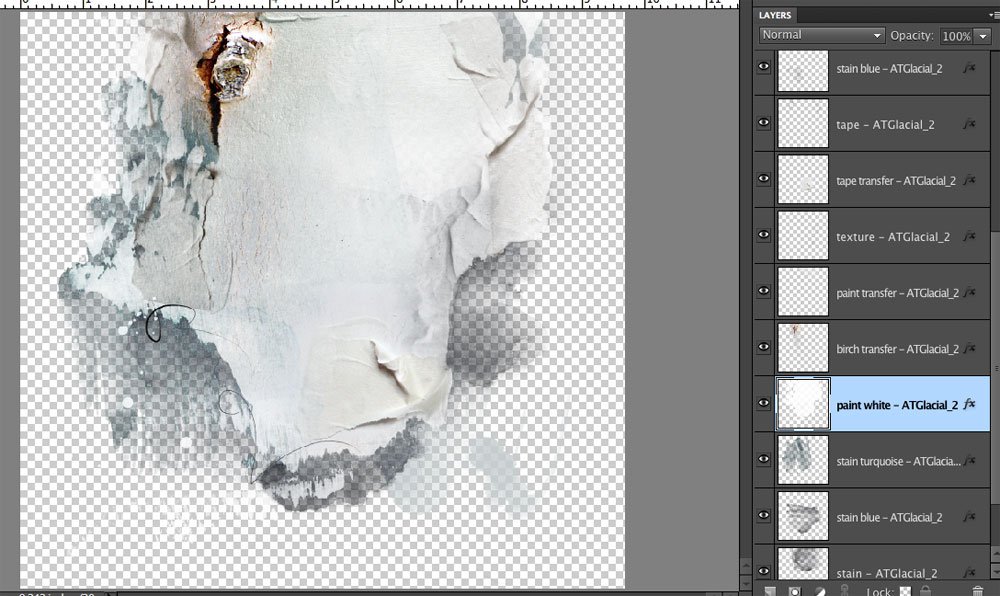
2. Create Clipping Mask
Clip photo or image to ArtsyTransfer layer of choice.
- Select the LARGEST and most OPAQUE layer in the Layers Panel.
- Move your photo or digital image onto the ArtsyTransfer file using the Move Tool from the Tools Panel.
- The photo will be deposited directly above the selected layer
- Clip the image to the paint layer via Layer> Create Clipping Mask.
- Duplicate the photo layer and apply a different Blending Mode from the top of the Layers Panel to enhance the image.
- Re-size the image or Clipping Layer as preferred.
Note. Clipping the layer on top to the layer below creates a Clipping Set and the ArtsyTransfer behaves like a Mask blending your image into the artistry.
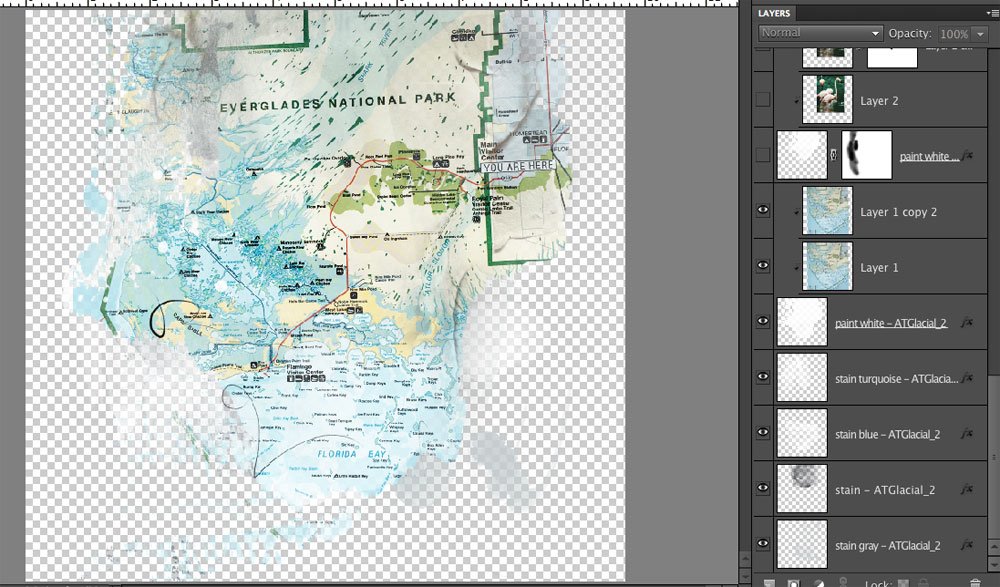
3. Duplicate Technique
Repeat this process with a second photo or image to enhance visual interest.
- Duplicate the Clipping Set by dragging to the ‘New Layer’ icon at the top (Elements) or bottom (Photoshop) of the Layers Panel.
Try This:
- Apply a different Blending Mode to the mask layer.
- Delete the clipped photo layers and replace with a different photo.
- Duplicate the photo layers and experiment with more Blending Modes.
- Re-size the mask layer using the Transform controls to create VARIATION.
- Adjust the placement of the image(s) over the mask to yield the best placement.
- Use a Layer Mask and the Quick Selection Tool to mask areas of photo and image layers.
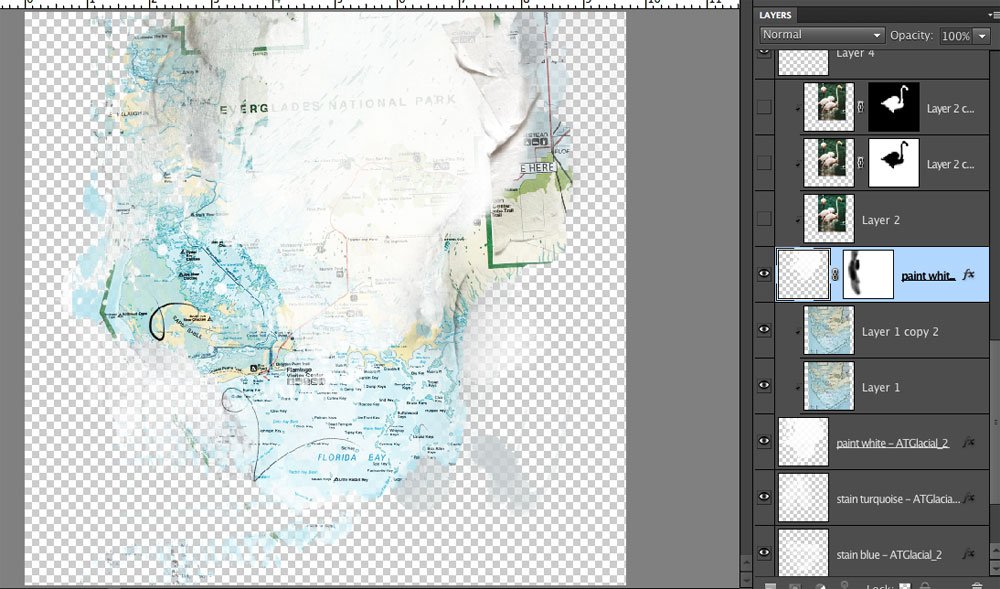
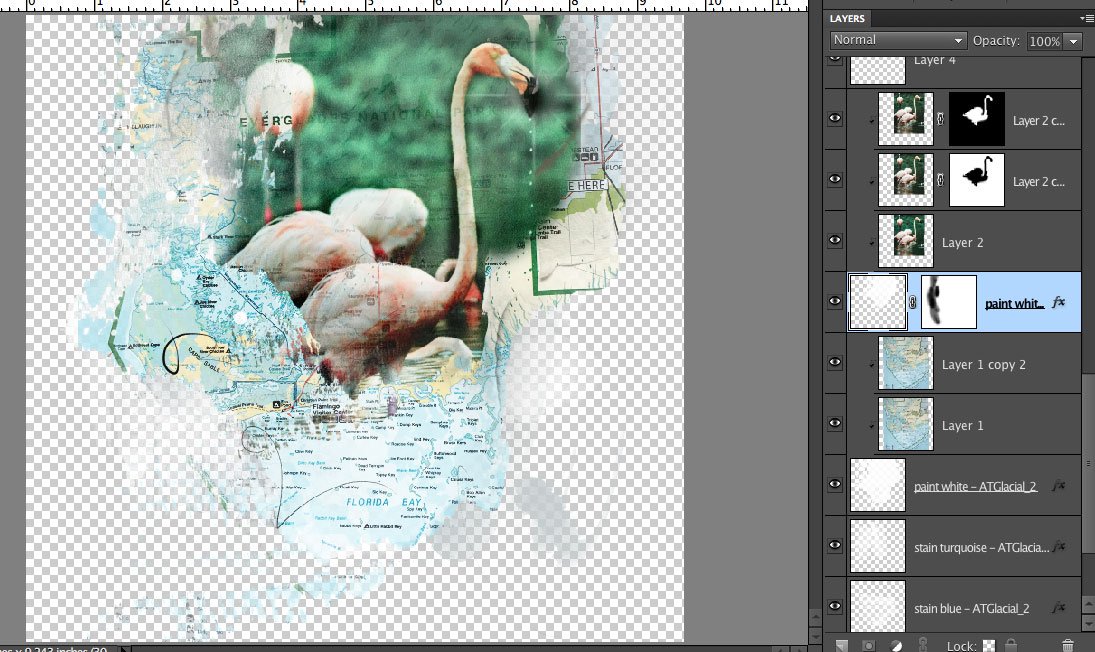
4. Create Composite
Create a single flattened layer of all the layers you have been working with.
- Click on the upper most visible layer in the Layers Panel to highlight.
- Press SHIFT + CRTL/CMD + ALT/OPT + E simultaneously on your keyboard to create the Composite Layer.
- Go to File> New to create a new digital scrapbooking or photo artistry layout design.
- Drag the single image layer onto the New Layout.
- Open and move the Artsy Paper from the ArtPlay Palette of choice below your composite layer to establish the Layout Foundation.
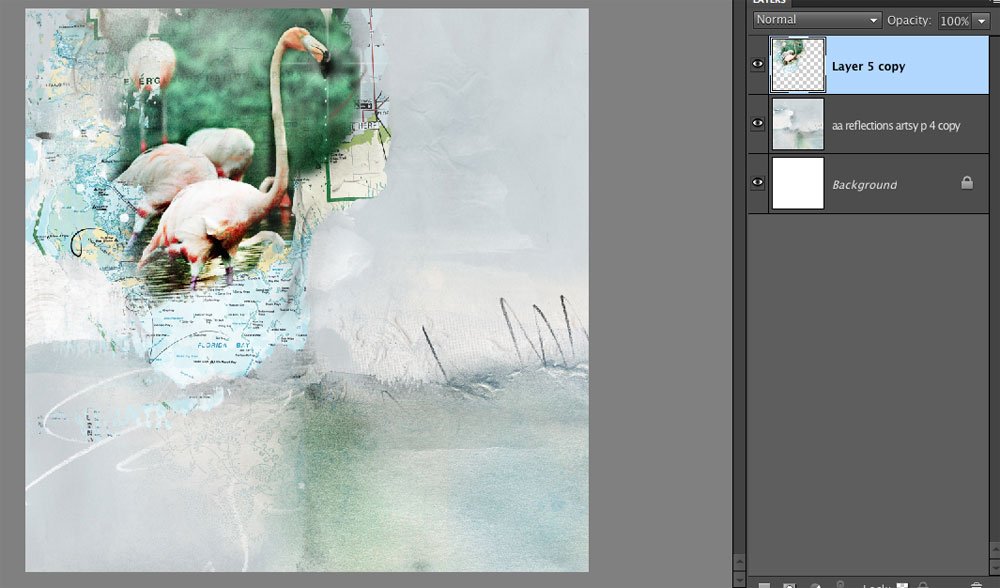
5. Embellish Layout
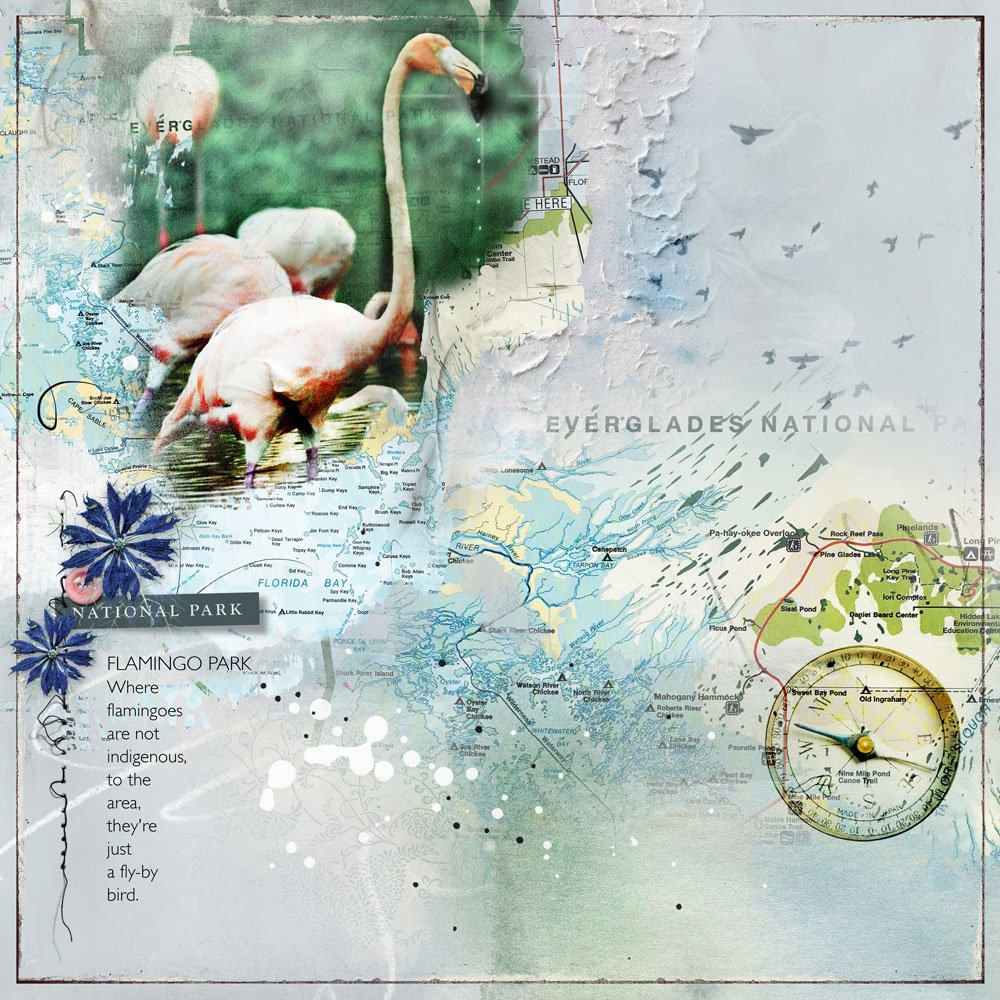
Enhance by ‘dragging and dropping’ ANY of the following onto your digital scrapbooking or photo artistry layout design:
Note. A mix of dimensional and brush elements creates visual interest in the finished design.
Click on the above photo for additional process notes and supplies used.
Summary
Blend a photo using the largest and most opaque layer in an ArtsyTransfer.
- Choose an ArtsyTransfer in a Color and Theme that supports your photo.
- Select the Largest and most Opaque layer as your Mask layer.
- Clip an image or photo to this layer using the Clipping Mask Function.
- Duplicate, apply Blending Modes, replace photos, resize and/or reposition any of the layers to augment complexity in your digital scrapbooking or photo artistry layout design.
- Create a Composite Layer.
- Move to a New Layout, add a Foundation and embellish as preferred.
See also:
- Useful Techniques in Photoshop and Elements video on the Resources page.
- 7 Ways to Use ArtsyTransfers
- Extractions with ArtsyTransfers
- Alter Photos with ArtsyTransfers






Thank you for sharing your process, it is always helpful to see how other create! Love you beautiful page.
I agree. Everyone has different nuances in approaching the same techniques.