
In this series of tutorials, the aA Creative Team will be showing older layouts and reworking them to show you how they made improvements.
Today, Creative Team Member, Laura is sharing her ART rePLAY No. 3.
ART rePLAY No. 3
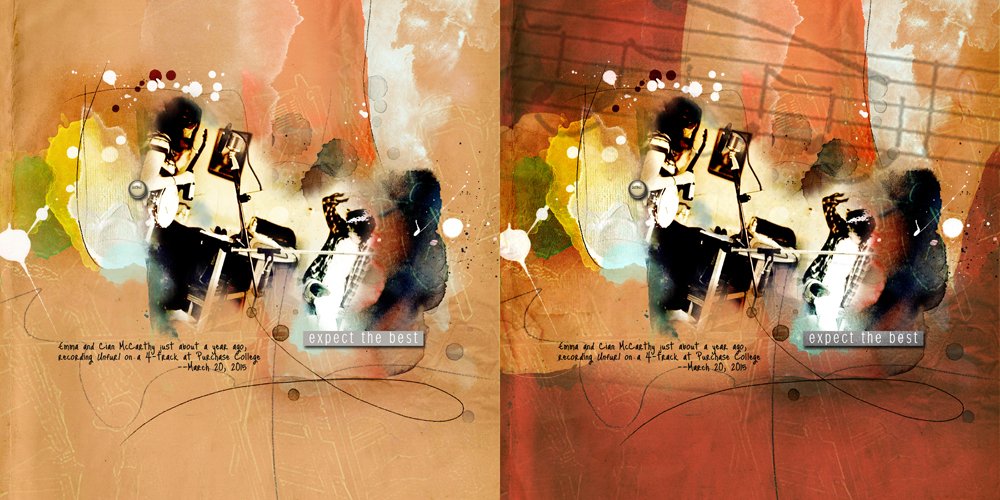
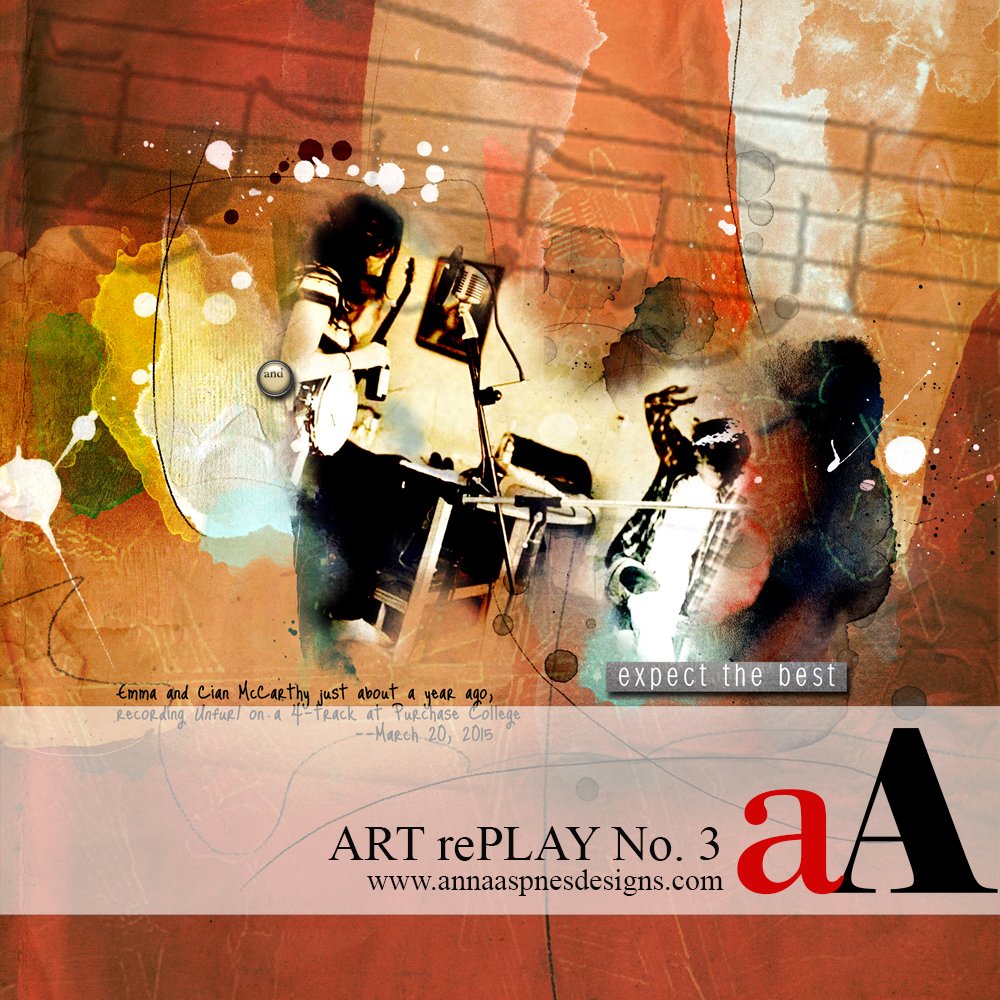
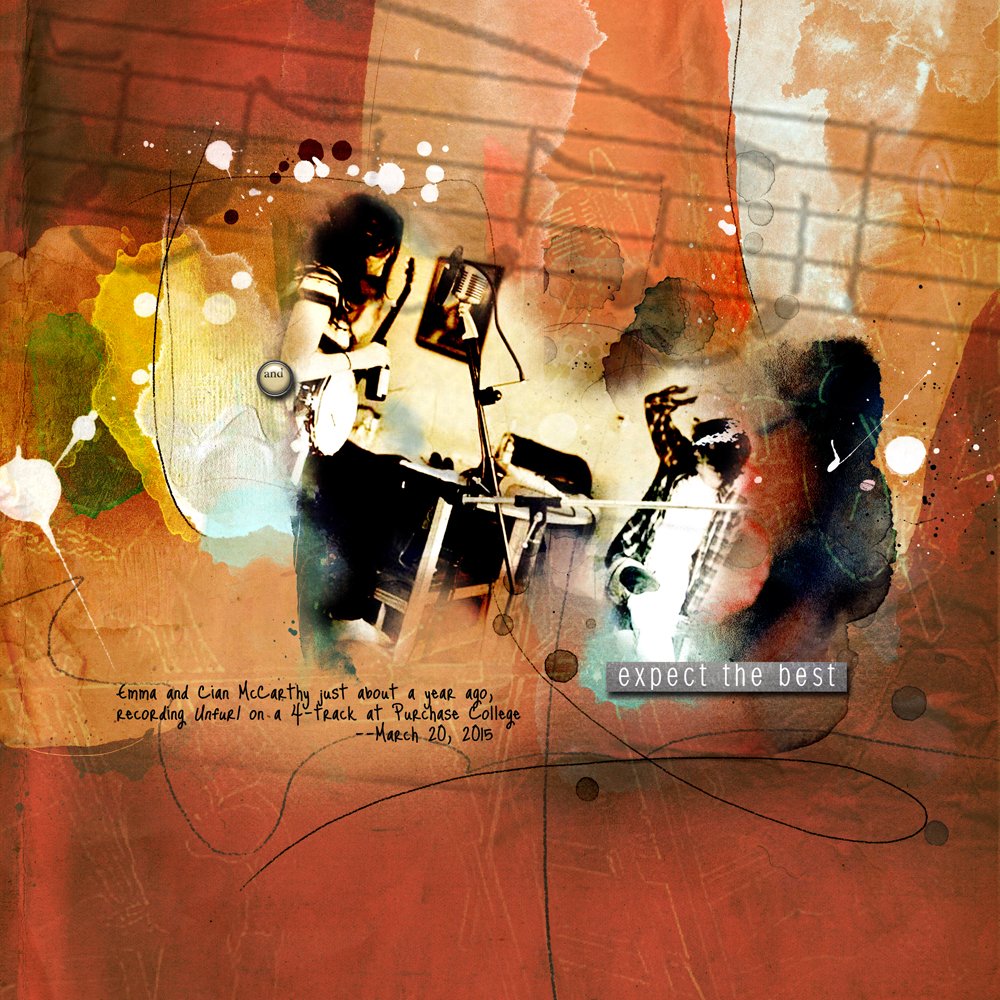
I made the page on the left about my daughter and a band mate almost two years ago, in March of 2015.
I liked the motion and the colors, but the page always seemed flat and didn’t convey the energy that I knew was happening in the room.
I updated the page, which you can see on the right, with one of my favorite techniques—placing Anna’s Artsy and Solid Papers as overlays at the top of the layer stack and using Blending Modes and reduced Opacity to yield different effects.
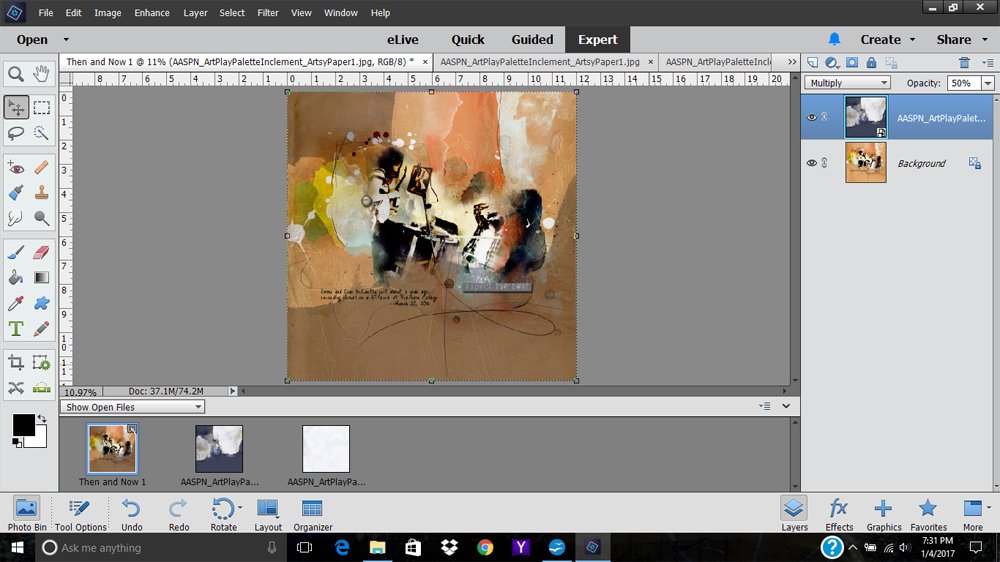
Working with a flattened version of the page, I chose to overlay two papers from the ArtPlay Palette Inclement—Artsy Paper #1 and Solid Paper #1. I dragged the artsy paper onto the layout, changed the Blending Mode to Multiply, and reduced the opacity to 50%. I liked how it brought some electricity to the left and right edges, but the colors looked muddy, so knew I had to experiment with Blending Modes.
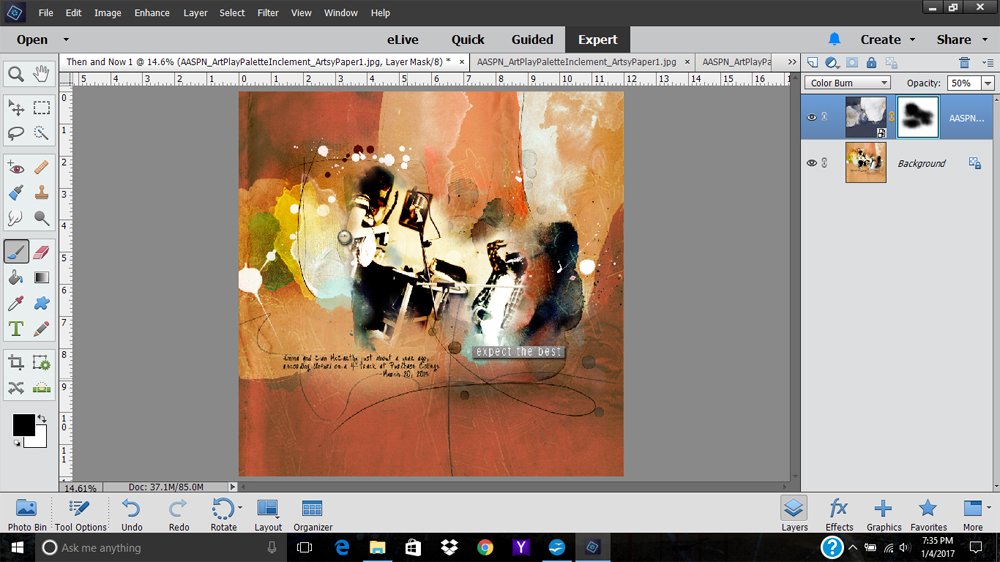
The Color Burn Blending Mode, at the same Opacity, gives much better results.
To restore brightness to the photo (and text), I used a layer mask and a brush from the AnnaBlendz Artsy No. 4 set to whisk away the darker areas, but you could also use the Eraser tool. I set the brush to an opacity of 77% and then feathered it out along the edges by decreasing the opacity even further, to 55%.
This process was then repeated with the solid paper, dragging it to the top of the layer stack in the Layers panel, changing the Blending Mode to Linear Burn, and reducing the Opacity to 70%. The changes were subtle, but the colors were enriched and some texture was added.
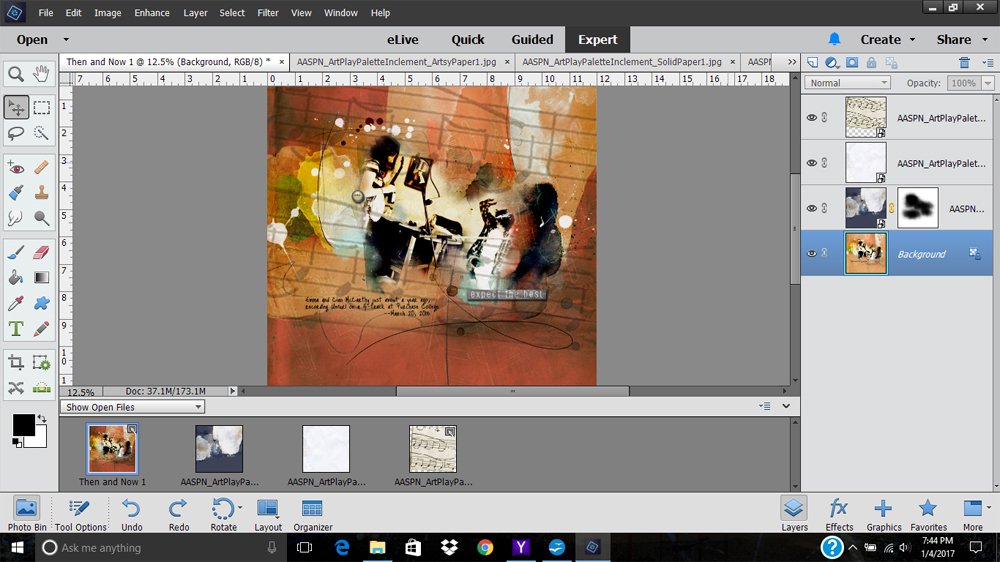
Music motifs were added to the digital artistry layout using the same overlay principles. I didn’t have sheet music, but there is a small music tile in ArtPlay Palette Bliss. I opened, placed and moved this files to the top of the layer stack, enlarged it to fill the canvas. The Blending Mode was changed to Multiply and the Opacity to 35%.
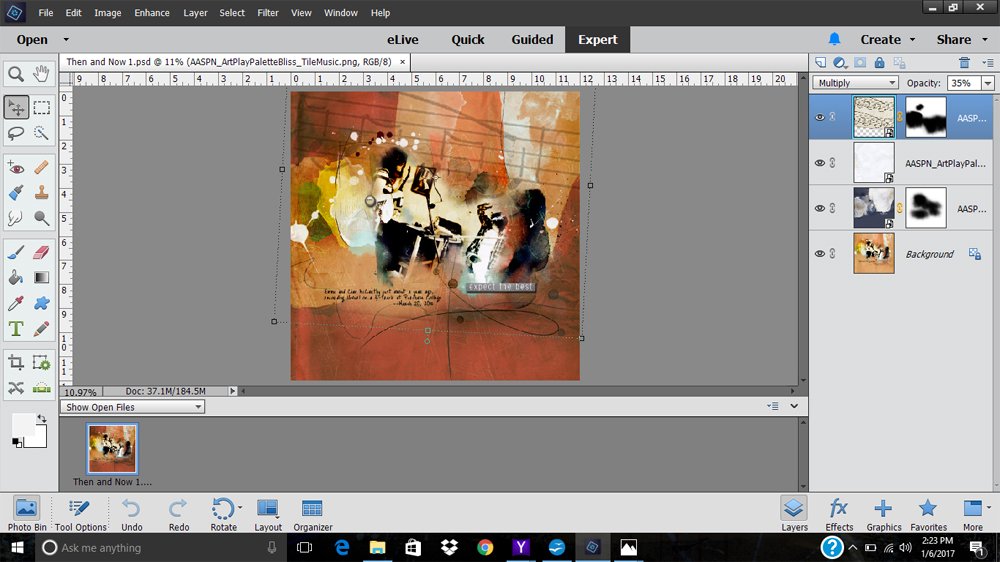
A Layer Mask was used with Brushes to mask areas of the music layer. This refines the effect, de-clutters the text and reveals the nice ArtStokes on the layout. I really liked the effect of how the music seems to be engulfing my daughter and her band mate.
While the alterations in my “after” layout were mainly about color and adding a feeling of energy, I frequently use this overlay technique to add texture—especially grungy and distressed textures—to a design.
If you experiment with Blending Modes shifting the Opacity of each layer, you will find that you can overlay just about anything. It’s an easy way to produce interesting and often surprising results.
Click on the above image to see digital supplies used in Laura’s ART rePLAY No. 3.
Stay tuned for more Creative Team insights to be shared in the new ART rePLAY series.






I learned as much about what to improve in a layout as I did about how to improve it. I often finish a layout and move on without being completely happy with it. You’re descriptions of the energy that was missing in this layout clearly explain how our artistic know-how can amp up an otherwise ordinary photo/layout, bringing it to life as an entire experience with excitement, sound, and energy! Very inspiring!!!
Thanks for the feedback Louise. We’re always looking to nail it 🙂
Thanks so much Louise! I am so glad this was helpful! As I grow more savvy about artistry in my designs (and as I gobble up more and more of Anna’s philosophy), I find that I have more time to play around with things like energy and “vibe,” which I really love to do, and sometimes I can even get what I see in my head down onto the page! No better feeling than that. It’s all such a great journey! –Laura
Some really great ideas here. Will try to implement a few of them. Many thanks for a great tutorial. You’ve inspired me!
Many thanks Tamsin. Sometimes when I look back at the old pages, I just want to redo EVERYTHING! So glad you have been inspired!
Fab tutorial by Laura! So much depth and richness in the rePlay version!
Thanks Marnie! It was great to get this layout so much closer to how I was seeing it in my mind’s eye. I love simple tricks that can give good results with very little time. Wish I could figure out how to do that with some of life’s less interesting chores!