

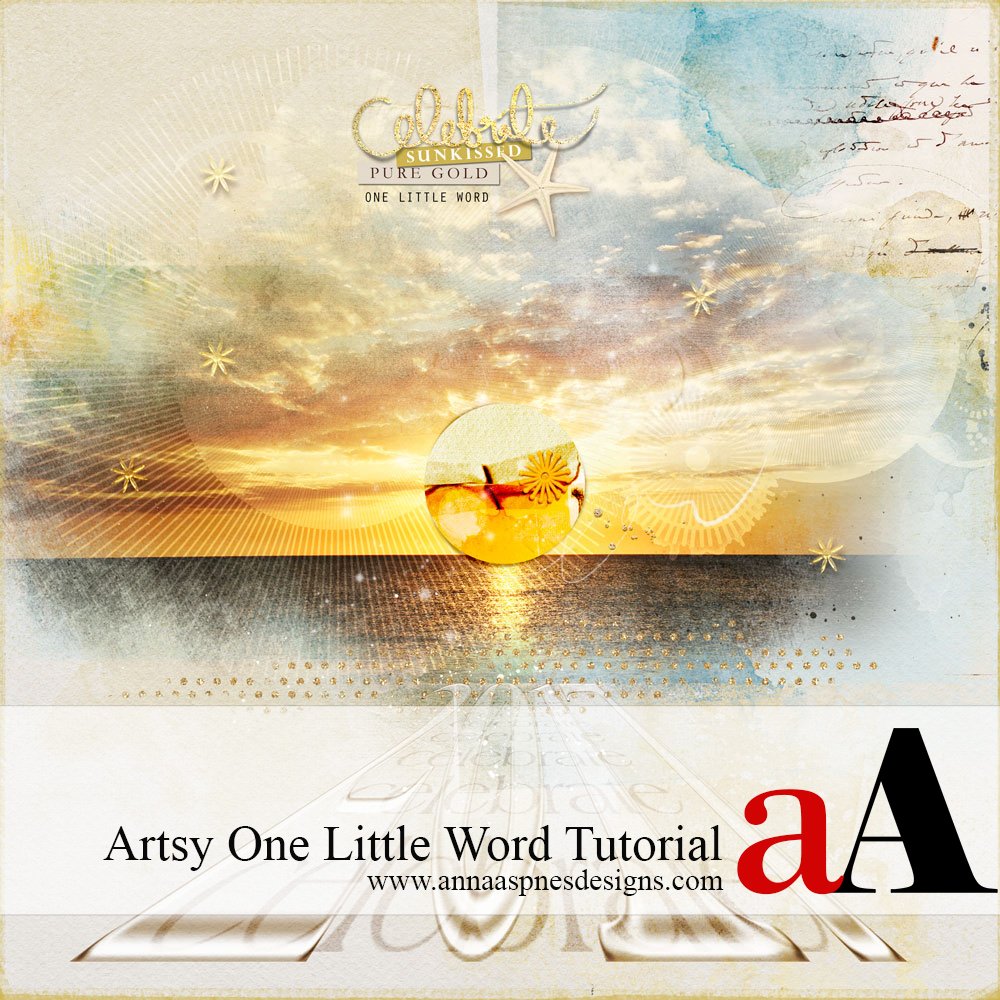
Creative Team Member Miki shares an artsy approach to celebrating her Artsy One Little Word Tutorial conducted in Adobe Photoshop CC.

Note that One Little Word is a registered trademark by Ali Edwards Designs. Learn more about the project here.
Have you selected One Little Word for year 2017?
My One Little Word for 2017 is Celebrate. Not the party like it’s 1999 celebration, but to take enjoyment in the day to day life and to embrace it with joy.
My husband and I are also celebrating our golden anniversary this year. I intend on doing lots of celebrating for this event.
I am celebrating my word through digital artistry as outlined in this Artsy One Little Word Tutorial.
Artsy One Little Word Tutorial


1. Create a Foundation. Create a new 12 x 12 page at 300 dpi. Open and drag your paper onto the layout. Solid paper 1 from ArtPlay Palette Summery was used for this page. Three different masks from FotoBlendz Overlays 3 were layered over the paper, two vertical and one horizontal.
ArtPlay Palette Summery Artsy Papers 2 and 3 and Solid Paper 1 were clipped to the FotoBlendz masks creating a new blended paper. (Option + Click or Alt + Click the line between two layers in the Layers Menu to clip the upper to the lower or CMD/CTRL+ALT+ G).
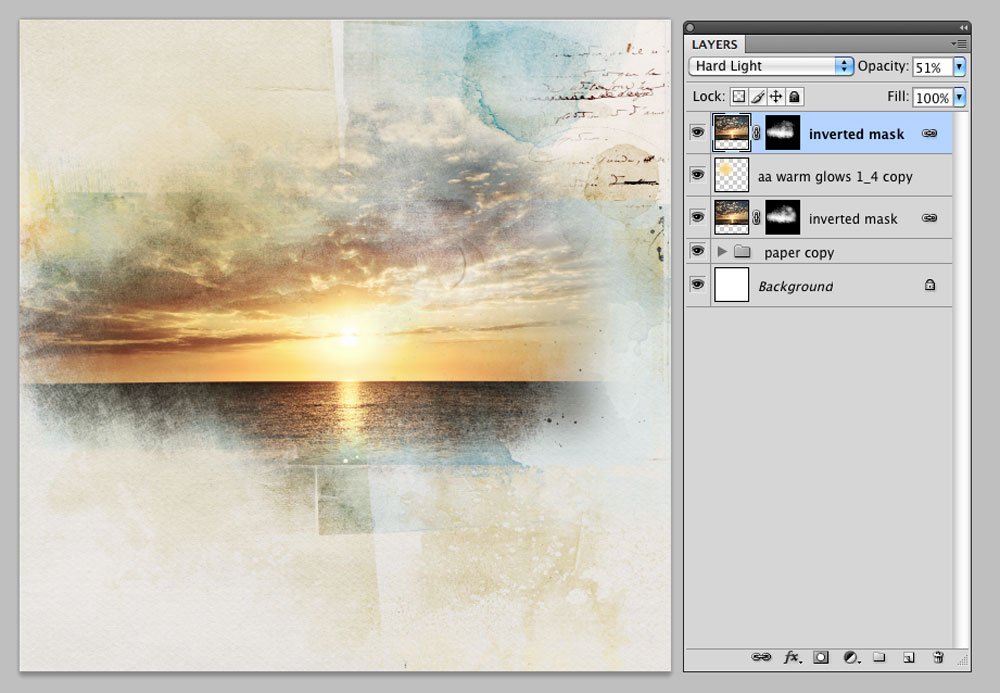
2. Create an Inverted Mask. Apply a layer mask to the photo layer. Make sure the foreground color is BLACK and the background color is WHITE. Click on the layer mask thumbnail in the Layers Panel to select. Go to Edit >Fill, and notice the photo disappears.
Select the brush of your choice (a soft pastel brush was used). Change to foreground to WHITE and the background to BLACK. Click on the layer mask thumbnail in the Layers Panel to select and paint the image back into view.
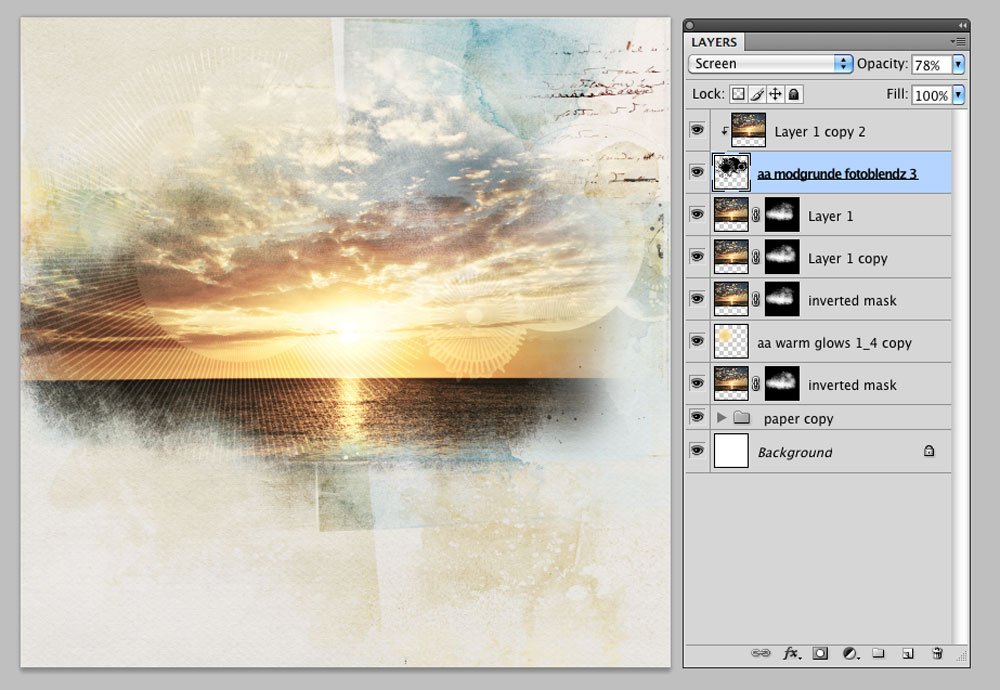
3. Add Some Rays. A ModGrunge FotoBlendz No. 3 mask was layered over the page with the Blending Mode changed to Screen and with a reduced opacity. The original photo was duplicated and clipped to the mask. Play around with different Blending Modes to get the desired effect.
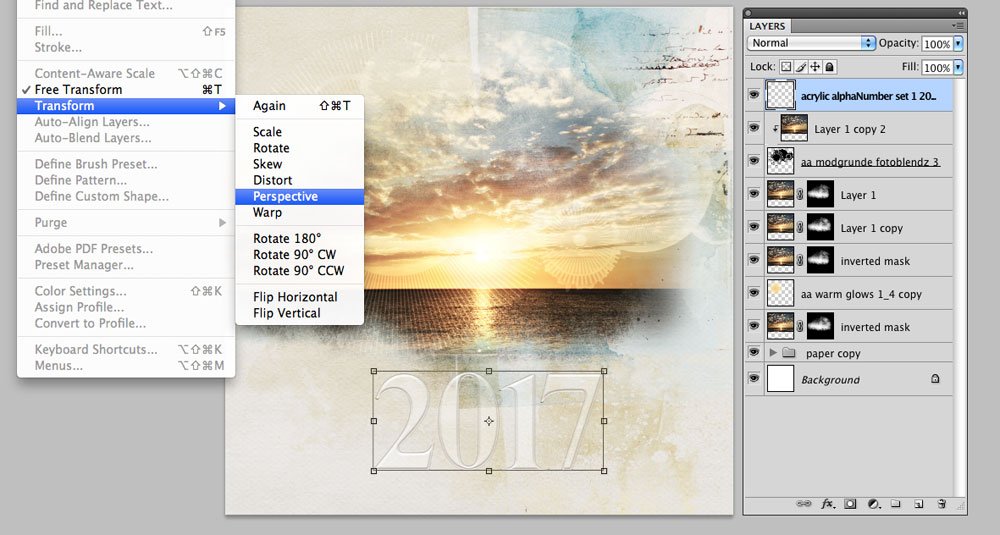
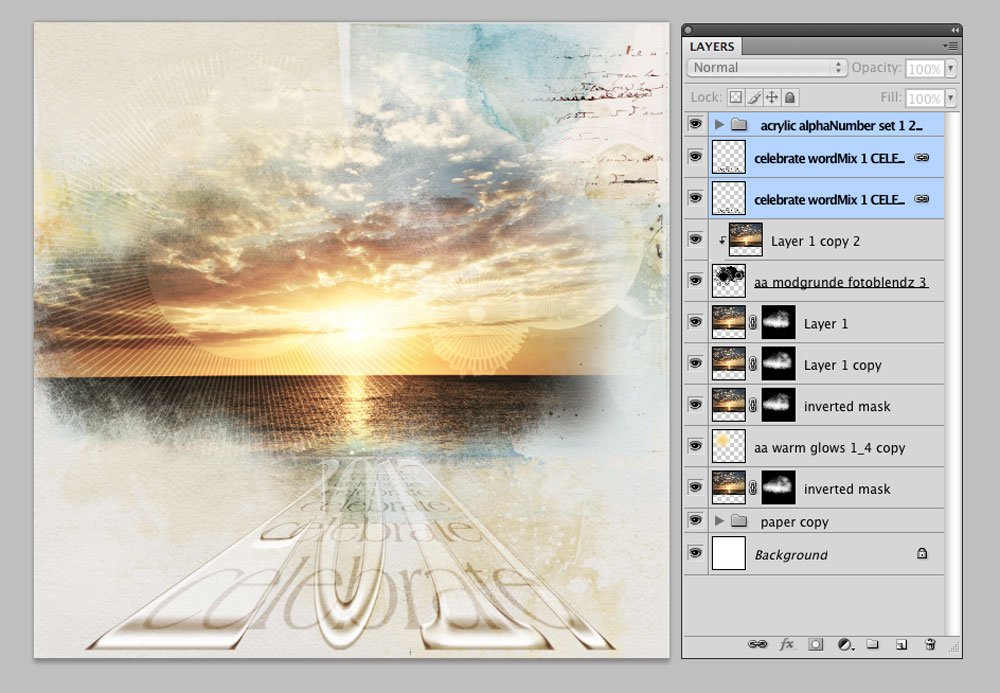
4. Create Perspective. Using the Transform Tool, create a leading line to a focal point. (Edit >Transform >Perspective or CMD/CTR T). Click on an anchor point of the bounding box and drag to change the width of the text. Pulling the anchor point out makes the text wider, pushing the anchor point in makes the text narrower. Play around with Blending Modes to add more dimension and transparency.
Acrylic AlphaNumber Set No. 1 was used for the date with the Blending Mode changed to Color Burn to darken the edges.
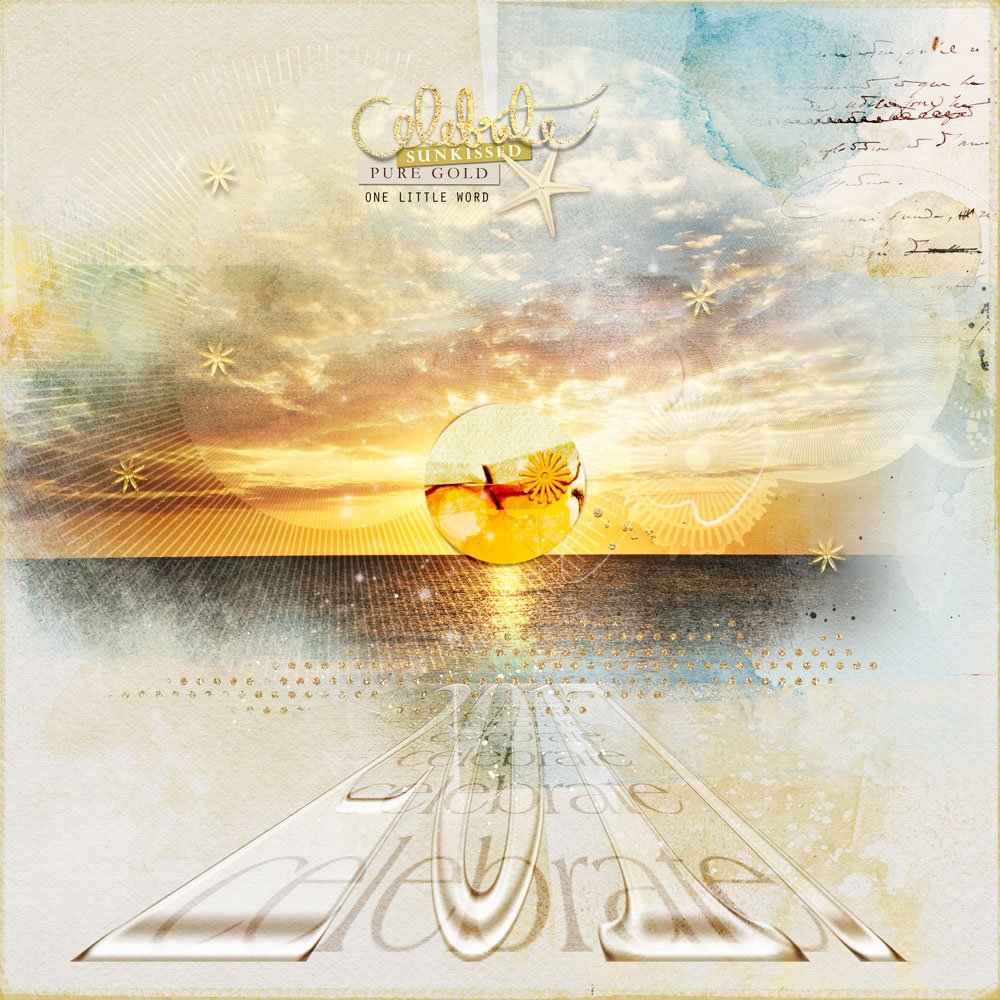
5. Embellish. Finish the page with WordART, Textures, Stitching, ArtsyTransfers, Overlays and Brushes from the aA store.
Invitation. We would love to see you create a layout with this Arsty One Little Word Tutorial and are offering a 20% Discount on WordART to help inspire you.
Use the following coupon code:
WordaART20
Expires 01/17/2017
Hope to see you in the Gallery.


Great tut, will have to try it. Congrats on your golden anniversary, Miki! Wishing you many, many more years of wedded bliss.
Thanks, Christy!