

Today, Creative Team Member, Ulla-May, is sharing her Embellish Photos with ArtsyTransfers tutorial conducted in Adobe Photoshop.
Note that this tutorial can also be conducted in versions of Adobe Photoshop Elements.
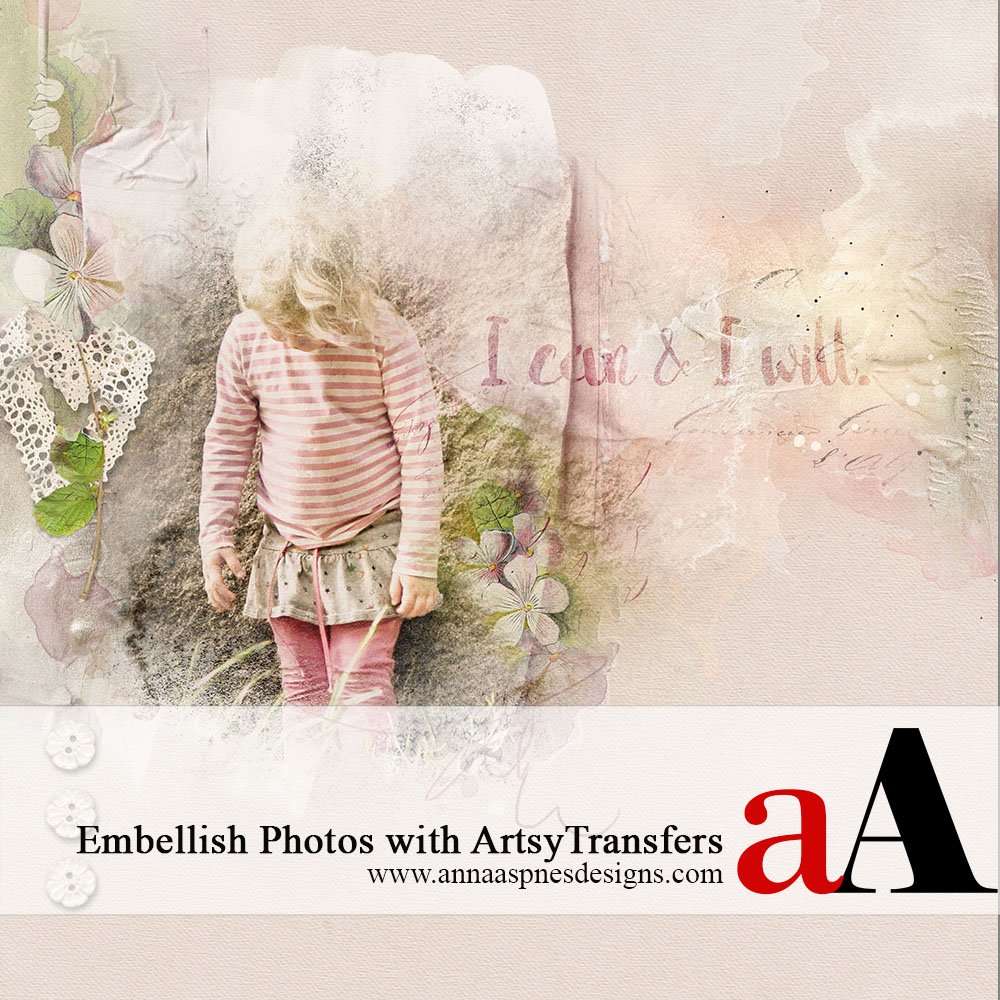
 Embellish Photos with ArtsyTransfers
1. Create a foundation. Create a new 12 x 12 layout at 300 dpi in Adobe Photoshop or Elements. Go to File> New Files and set specifications in the dialogue box accordingly. Open and move an artsy or solid paper of your choice onto the new layout using the Move tool from the Tools panel to create your layout foundation.
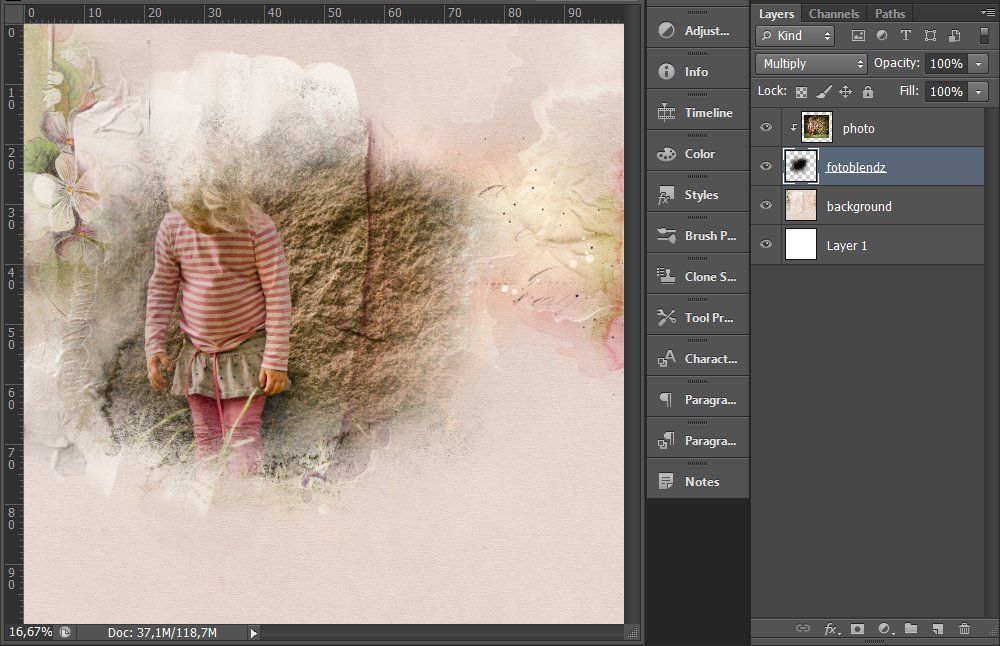
2. Blend your Photo with a FotoBlendz. Open a FotoBlendz Clipping Mask of choice. I chose a FotoBlendz from Watercolor FotoBlendz No 6. Move the FotoBlendz clipping mask and place onto the layout foundation using the Move tool from the Tools panel. Open and move a photo, placing this image layer on top of the FotoBlendz mask layer in the Layers panel.
Clip the photo layer to the FotoBlendz mask layer using the clipping mask function in Adobe Photoshop or Elements. Press the CMD/CTRL+ALT+G (Adobe Photoshop) or CMD/CTRL (Adobe Photoshop Elements) simultaneously on your keyboard.
Apply the Multiply Blending Mode to the FotoBlendz mask layer. Select the FotoBlendz mask ayer in the Layers panel, click on ‘Normal’ at the top of the Layers panel and select Multiply from the fly-out menu.
Note: Applying the Blending Mode to Multiply makes the image more transparent. If your image is too dark, you can add an Adjustment Layer for Levels or/and Brightness/Contrast to brighten your image.
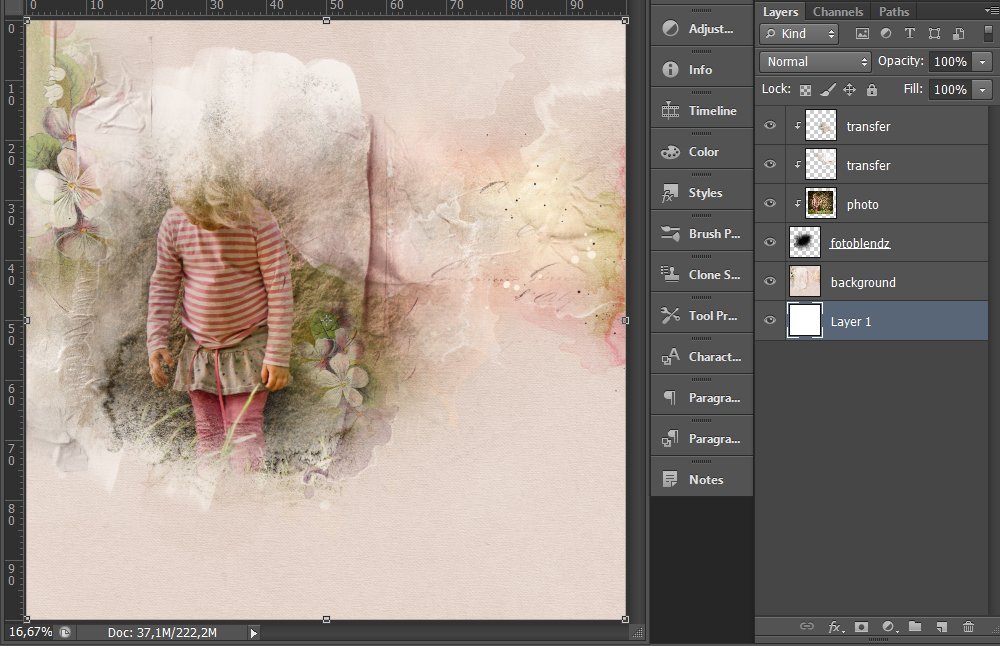
3. Embellish the Photo With ArtsyTransfers. Open one or more ArtsyTransfers of choice. I used two transfers from ArtsyTransfers Love Letters. Place the layers from the ArtsyTransfers above the photo in the Layer panel. Clip the Transfers to the photo as described above to increase the visual interest of your artsy digital scrapbooking layout. Experiment by applying different Blending Modes to the various layers to yield the desired result.
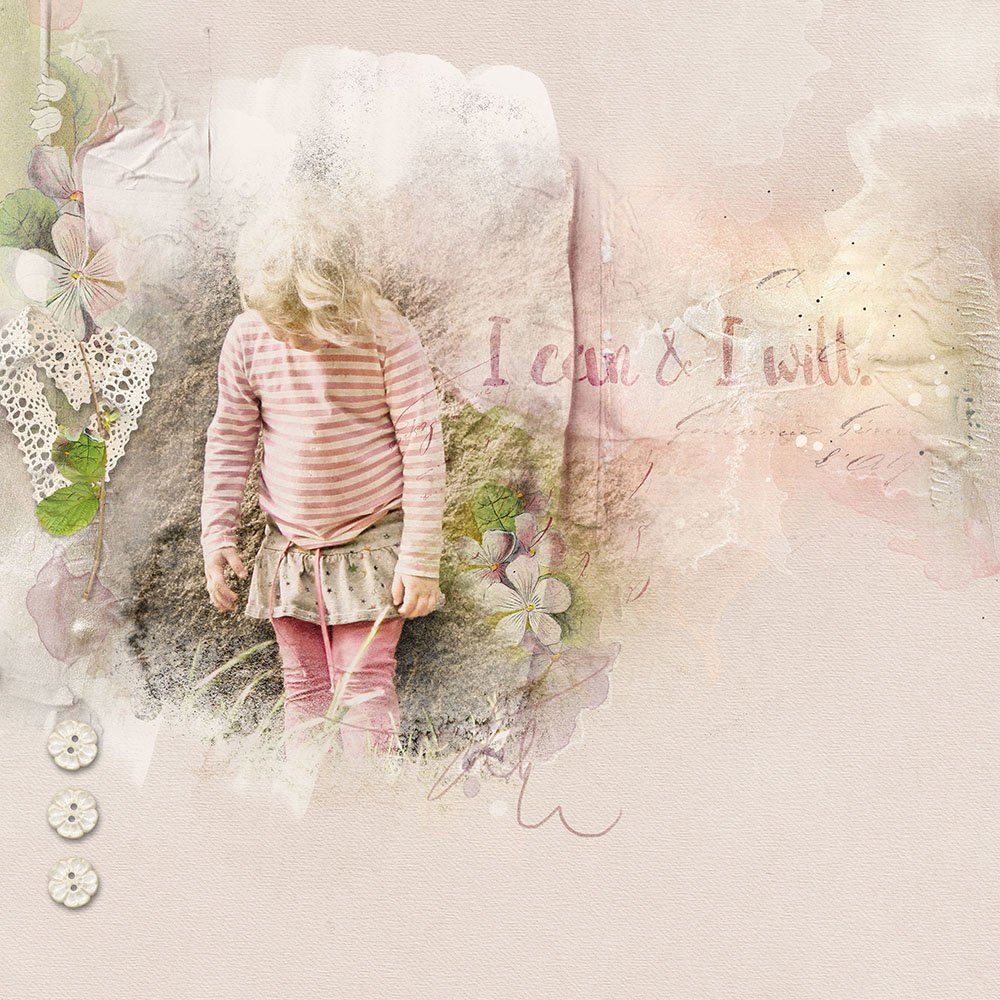
Click on the above photo for additional process notes and supplies used.
View the videos on the aA Youtube channel for further tutorials, and guidance on everything you need to know about Using ArtsyTransfers in Adobe Photoshop and Elements.


Thanks Ulla-May. What blending mode did you decide to use on the main transfer over the photo?
I´m not sure if I understand your question, so please let me know if not. The only transfers on my page are both placed on the right side of my granddaughter and both were set to blend mode Normal. I used some adjustment layers, also clipped to the fotoblendz and placed above the transfers, for Hue/Saturations, Levels and Brightness/Contrast to lighten up the photo. So there is no transfer covering my granddaughter. I hope this is an answer to your question.