
Today, Joan Robillard is sharing a tutorial on how to Interweaved Cluster Elements.
This tutorial is demonstrated in Photoshop CC but can also be followed in Adobe Photoshop Elements.
Interweaved Cluster Elements
Introduction
You will learn how to:
- Layer elements in a Group.
- Interweave elements using the Eraser Tool.
- Create an interesting Embellishment Cluster
1. Layer Elements
Place elements and group together so that they are overlapping.
- Go to File> Open to import ALL the elements into your work space.
- Use the Move Tool from the Tools Panel to Click-Drag-Release each element onto your digital scrapbooking or photo artistry Layout Foundation.
- Reposition the elements using the Move Tool so that they are overlapping and in close Proximity to one another.
- These element are essentially ‘on top of one another’ both in the layout design and Layers Panel.
- In this case a rose is placed over a wooden number.
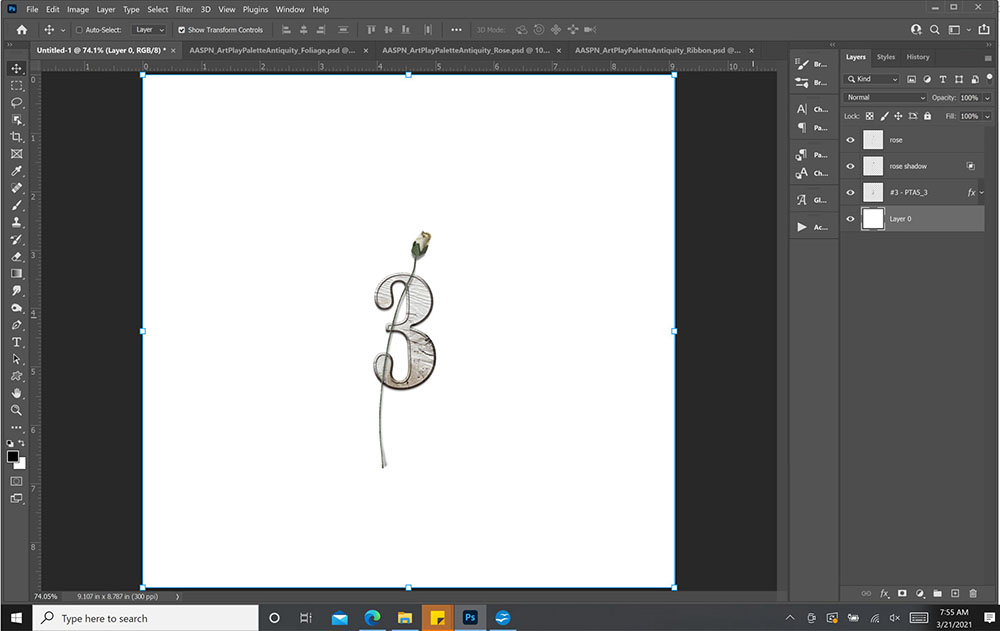
2. Interweave Elements
Create greater Visual Interest by interweaving your elements.
- The idea is to create the illusion that the rose Interwoven with the wood number element.
- This means part of the rose will appear as though it is On Top Of the number while another part may be Underneath.
Note. If your element has a Drop Shadow on a separate layer, turn off the Visibility of this layer by clicking on the ‘eye’ icon to the left of the layer in the Layers Panel.
3. Create a Selection
Create a Selection around the wooden number.
- Right-click on the ‘wood number’ layer in the Layers Panel.
- Make sure you click on the actual layer thumb and NOT the name of the layer.
- This will activate a ‘fly-out’ menu.
- Choose Select Pixels.
- Notice the ‘marching ants’ around the edges of the element.
- This is called a Selection.
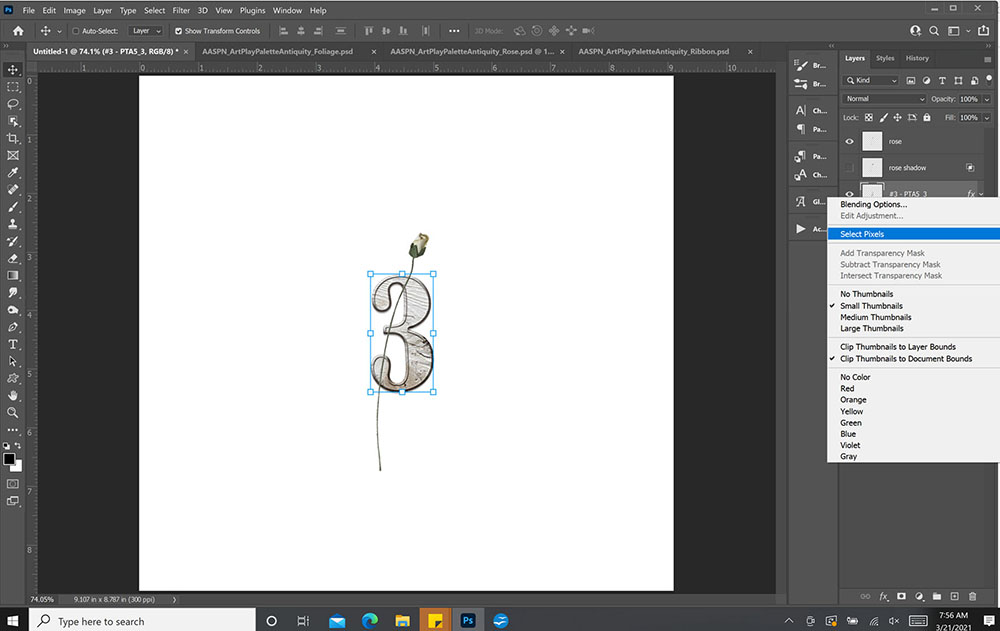
4. Erase Flower
Use the Eraser Tool to remove areas of the flower to create the interwoven effect.
- Click on the ‘flower’ in the Layers Panel.
- The ‘number’ Selection will remain visible.
- Select the Eraser Tool from the Tools Panel.
- Choose a Hard Round Brush and adjust the Size proportionately to the the element.
- Erase areas of the ribbon that you want to appear Under the wood number.
Note.
- The Selection will Constrain the area to be Removed from the ‘flower’ layer.
- This means the Eraser Tool will only remove areas of the flower Inside the Selection.
- Sometimes there will be areas of an element within the selection that you DO NOT want to remove.
- Zoom In and pay close attention to the pixels you are erasing.
- Modify your use of the Eraser Tool appropriately.
Tip.
- Ensure the Eraser Tool moves over the Selection Edge to remove all pixels.
- You can also use a Layer Mask with the Paint Brush Tool for a non-destructive approach.
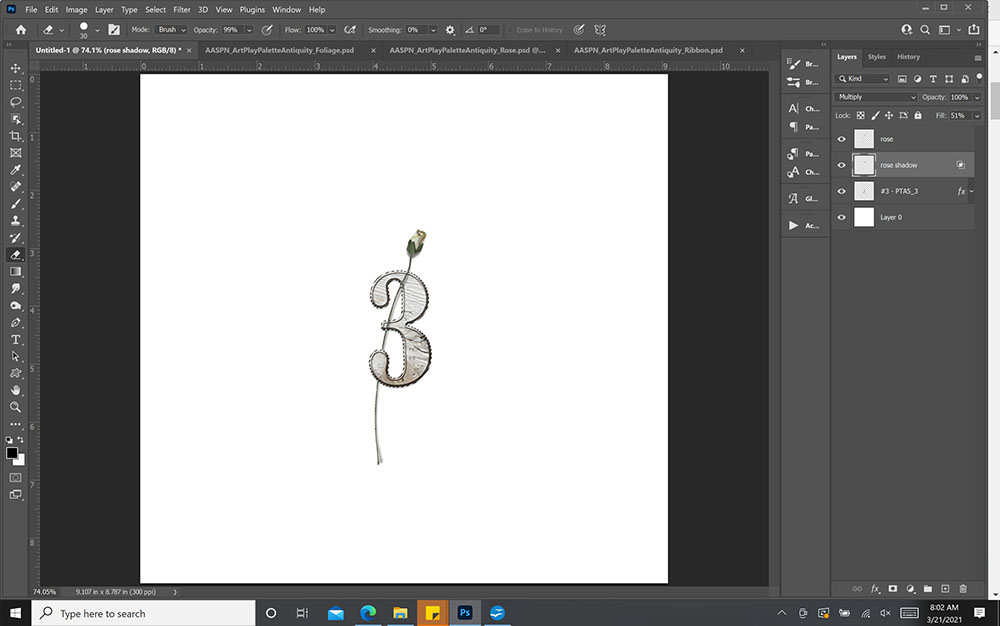
5. Drop Shadow Layer
Interweave the separate Drop Shadow Layer.
- If your element does NOT have a shadow on a separate layer, deselect your selection by pressing the CTRL/CMD + D buttons on your keyboard.
- If there is a shadow layer, then continue with the next step.
- Turn on the visibility of the ‘shadow’ layer in the Layers Panel.
- Turn off the visibility of the ‘rose’ layer.
- Repeat the same steps above for the ‘rose’ layer using the Eraser Tool on the ‘shadow’ layer.
- Deselect the wood number selection.
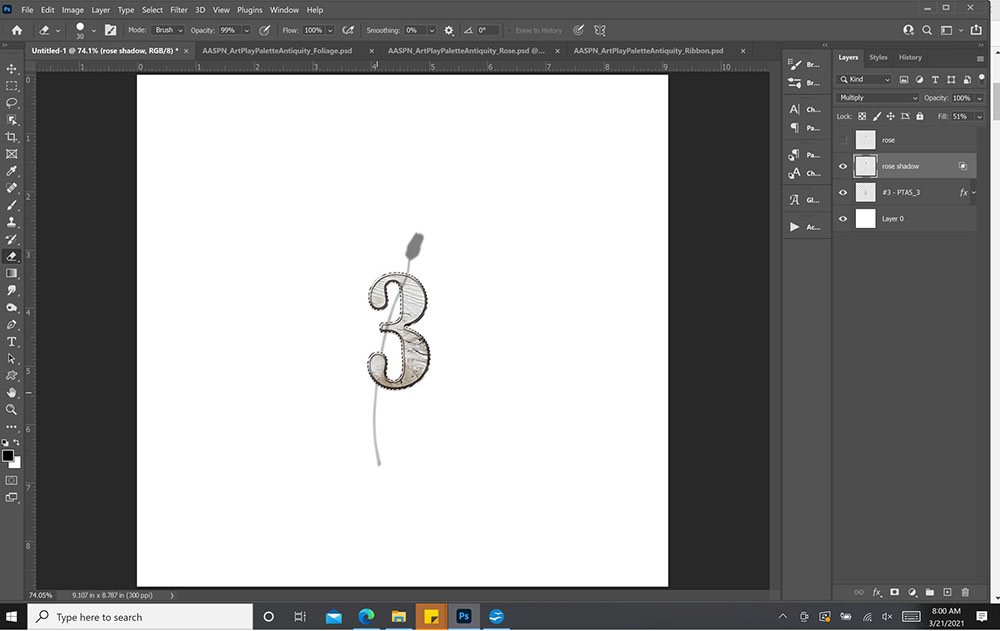
6. Cluster Trio
Add a third element to the cluster for added visual interest.
- You can also intertwine this element with the wooden number.
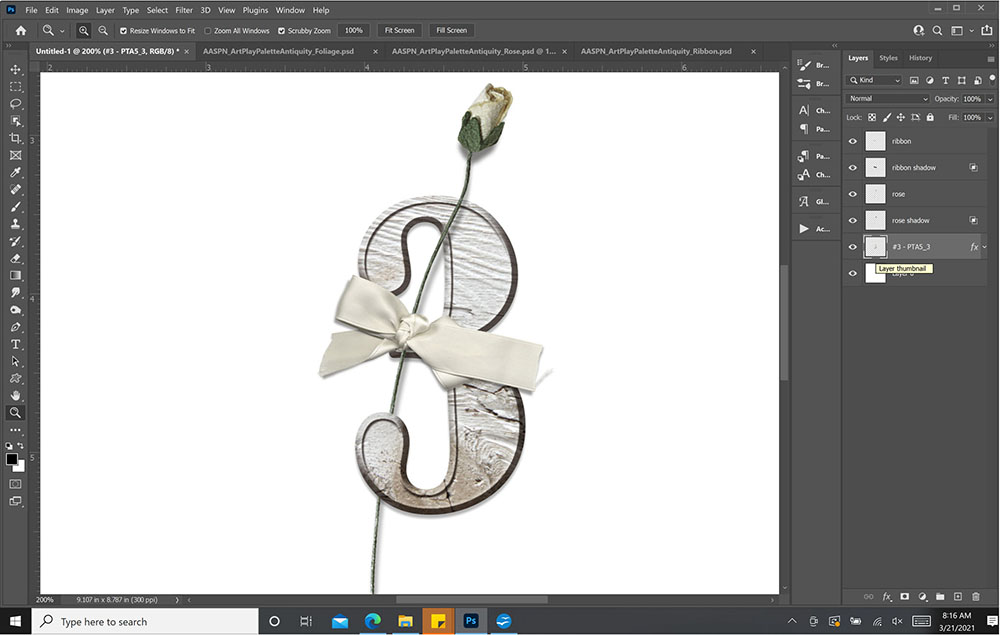
- Move a third element, in this case a ribbon, on top of both other elements.
Note.
- In my example, the ribbon will be partly under the number.
- You may also choose to have part of the ribbon go under the the rose element.
7. Remember ‘Bottoms Up’
Make the selection on bottom layer and move ‘upwards’ to erase areas of element on top.
- The Selection is applied to the wood number, which is the Bottom layer.
- Turn off the visibility of Separate ‘drop shadow’ layer of the element you want to erase, in this case the ribbon.
- Click on the ‘ribbon’ layer in the Layers Panel.
- Use the Eraser Tool to remove the area of the ribbon that overlaps the wood number.
- This will provide the illusion that the ribbon is beneath the number.
- Repeat with the ‘drop shadow’ layer.
Tip.
- This technique creates Unity in your element cluster design.
- You can apply this technique to different Types of elements such as UrbanThreadz, Strings or Foliage elements.
- Interweaving more than 1-2 elements can create a cluster with TOO MUCH visual interest.
Summary
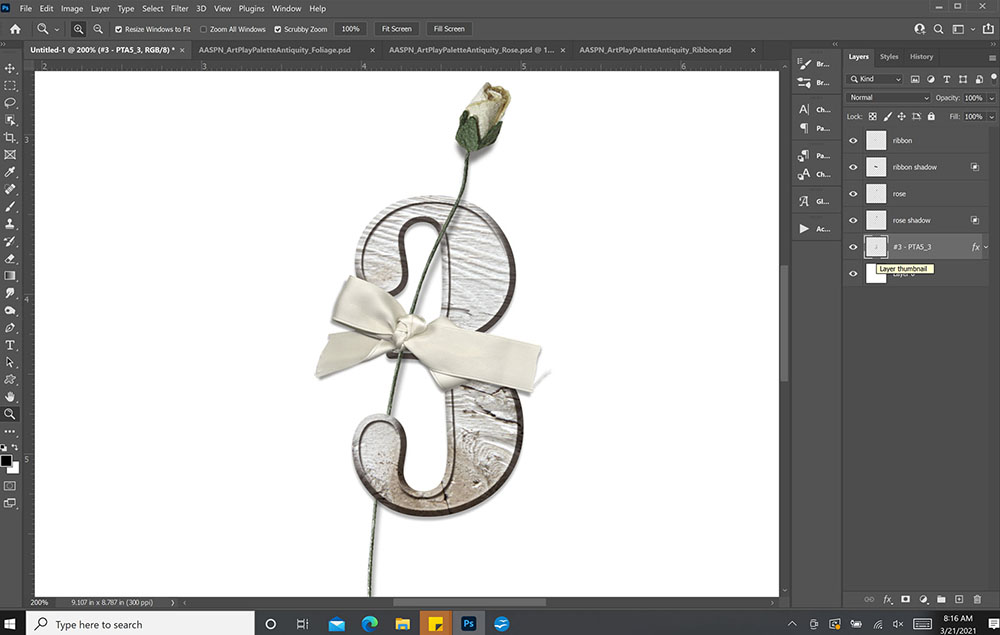
Intertwine Elements to create greater visual interest in your Custom Element Clusters.
- Move Multiple elements and make sure they Overlap to create a single Cluster in your photo artistry or digital scrapbooking foundation.
- Use Selections and the Eraser Tools to strategically remove parts of the elements to provide the illusion of Interweaving.
- Repeat with any separate Drop Shadow layers.
See also:





Recent Comments