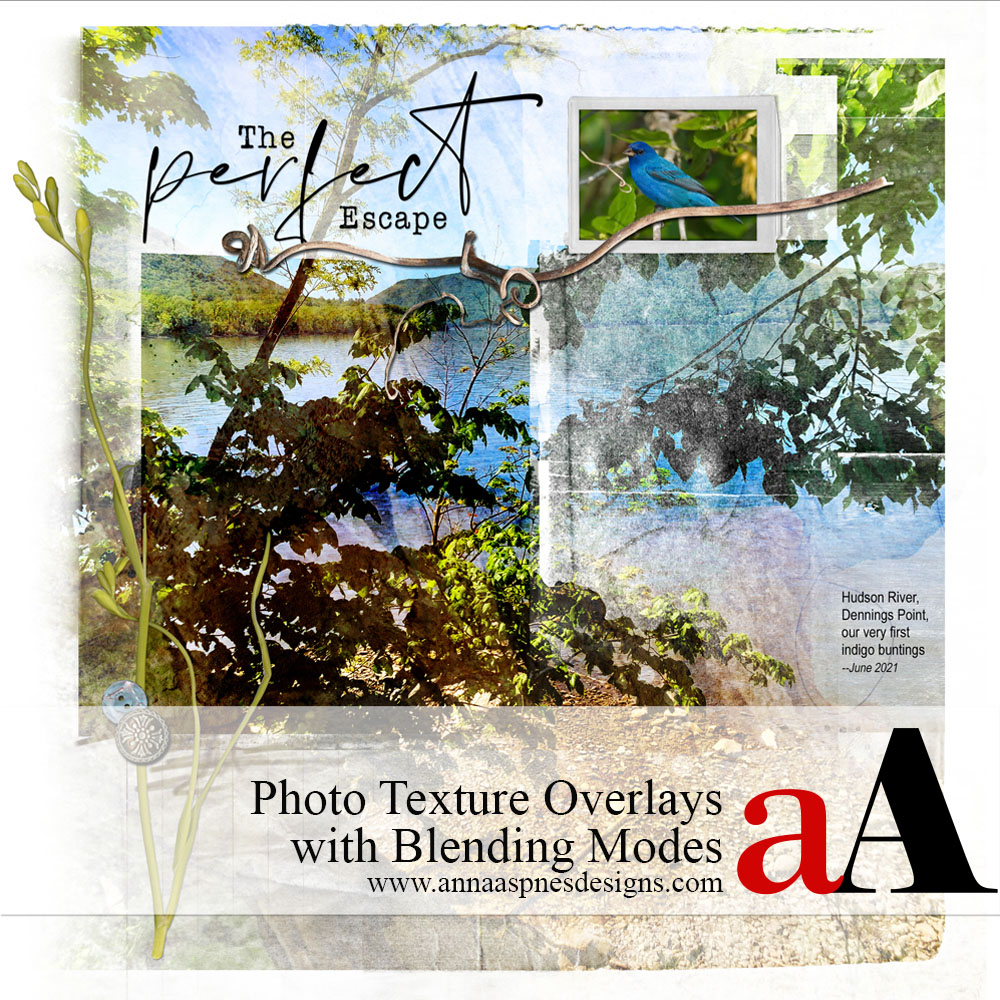
Today, I’m excited to share an Photo Texture Overlays with Blending Modes tutorial by Laura Tringali-Holmes.
This tutorial is written for Photoshop Elements, but may also be followed in Adobe Photoshop.
Photo Texture Overlays with Blending Modes
Introduction
Learn how to use close-up photos of everyday objects as photo overlays.
- Any close-up photo can be used as a Photo Texture.
- Think wooden textures, old papers, and the variety of ‘surfaces’ around you to elevate your artistry.
- A photo texture becomes an Overlay when blended with other images and aA DigitalART supplies.
- Blending is achieved by applying different Blending Modes to the photo texture layer.
The Story
The outdoors has always been our happy place, but it became even more so when Covid ravaged New York.
- Everybody knew it was safer to be outside, and this prompted us to discover many local hidden gems.
- Most recently we were birding in a nearby state park—one we had discovered only weeks before despite living in the area our whole lives—and I was struck by the texture of the bark on the trees alongside the Hudson River.
- I snapped photo after photo with my cell phone, and when back at home found myself wondering what the heck to do with them.
- My easy texture overlay technique was born.
1. Establish Foundation
Create the foundation for your photo artistry or digital scrapbooking layout design.
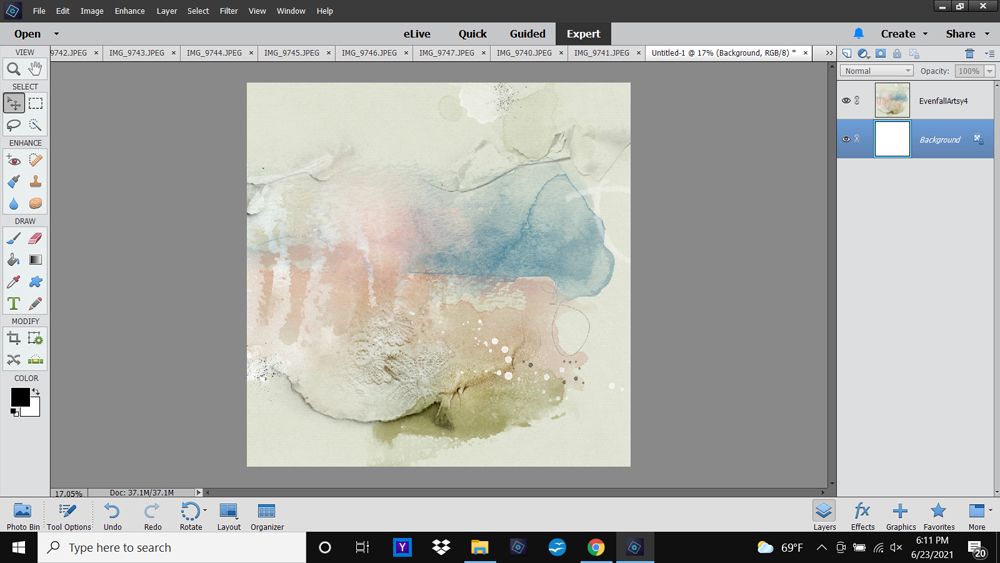
- Go to File> New (Layout) to create a new canvas for your layout design.
- Select an Artsy Paper from the ArtPlay Palette of your choice.
- Use the Move Tool from the Tools Panel to ‘drag’ the Artsy Paper onto your New Layout.
- In this layout, Artsy Paper #4 was used from the Artplay Palette Evenfall.
2. Blend Photo
Use Blending Modes and to ‘blend’ your image with the Artsy Paper.
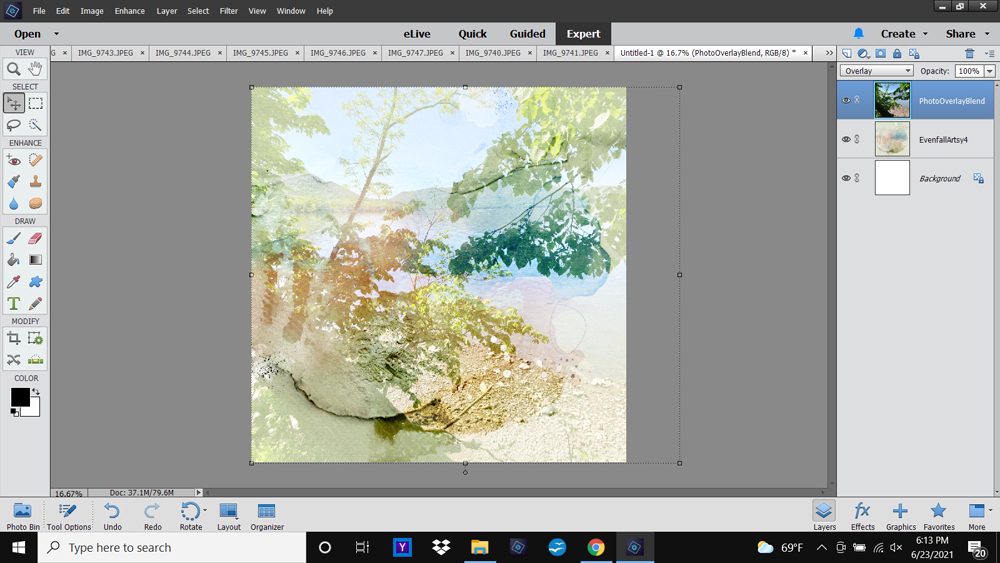
- Go to File> Open to select and open a large-size photo of your choice.
- You image should cover the ENTIRE canvas without too much enlargement.
- Use the Move Tool from the Tools Panel to ‘drag’ the photo onto your photo artistry New Layout.
- Select the photo layer and click on the ‘Normal’ tab at the top of the Layers Panel to activate the menu options.
- Scroll through the Blending Mode options in the Layers Panel using the arrow buttons on your keyboard.
- Select a Blending Mode from the options to apply to the photo layer, thus ‘blending’ your photo with the Artsy Paper design.
3. Duplicate Layer
Create a copy of the photo layer to perfect and intensify the effect.
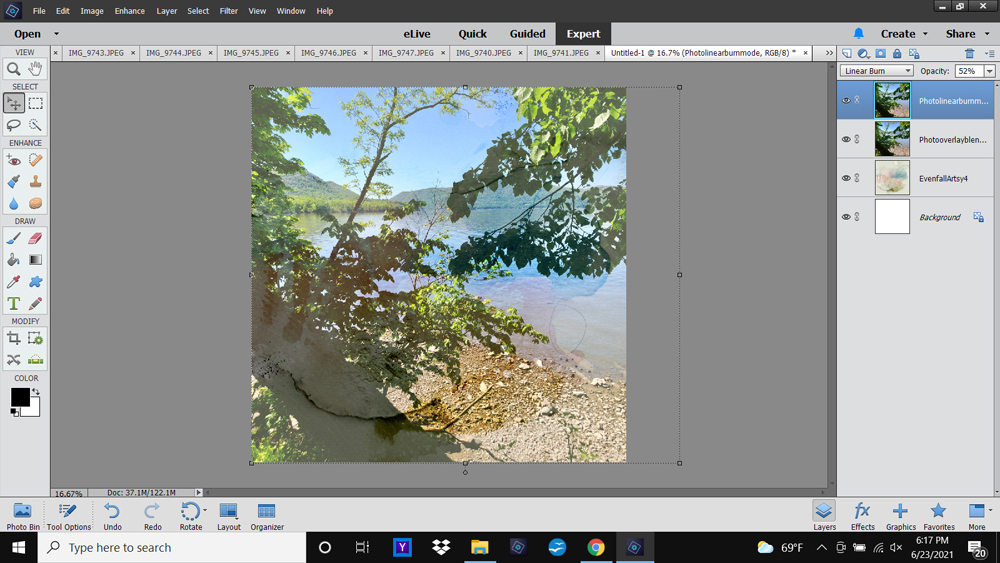
- Drag the photo layer to the ‘New Layer’ icon at the top (Elements) or bottom (Photoshop) of the Layers Panel.
- This creates a ‘copy’ of the layer to create 2 identical photo layers with the same Blending Mode applied.
- Color and/or Contrast is often intensified.
Note.
- You can keep the Blending Mode the SAME or adjust the Blending Mode of the duplicate ‘copy’ layer as preferred.
- Overlay at 100% Opacity was applied to the ‘original’ layer while Linear Burn at 52% Opacity was was applied to the duplicate ‘copy’ layer.
- Repeat as needed.
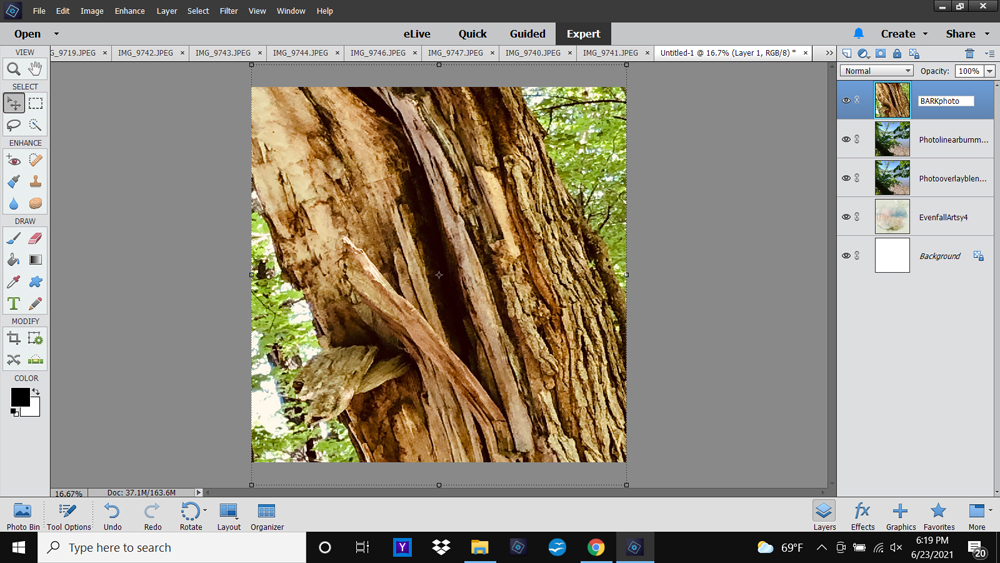
4. Add Photo Texture
Open a photo texture and add to the photo artistry or digital scrapbooking composition.
- Go to File> Open to select and open a large-size photo of your choice.
- Move it onto your layout foundation using the Move Tool from the Tools Panel.
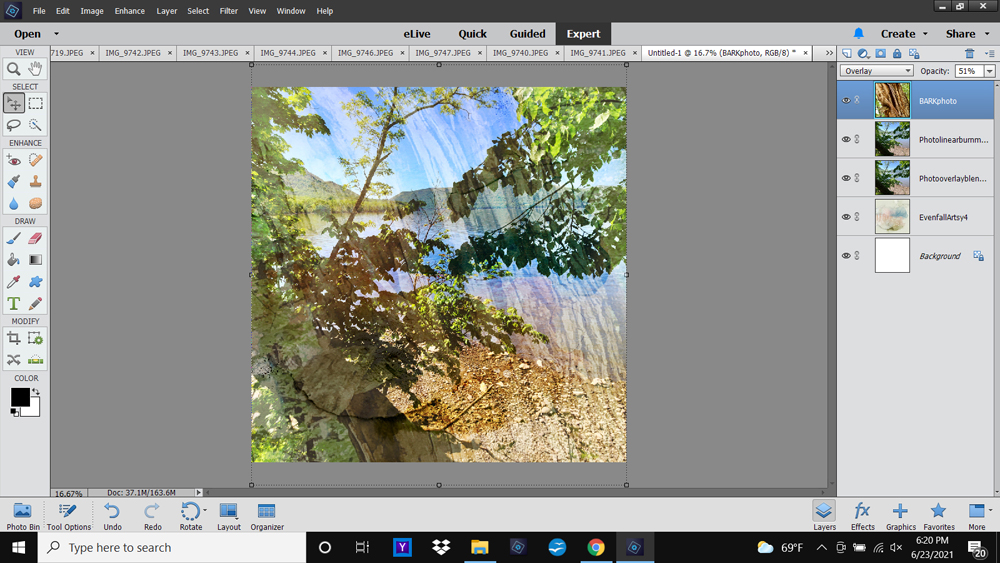
- Apply the Blending Mode of choice to ‘blend’ with the composition.
Note.
- Overlay Blending Mode at 51% Opacity was applied to the wood photo texture ‘overlay.’
5. Mask Texture
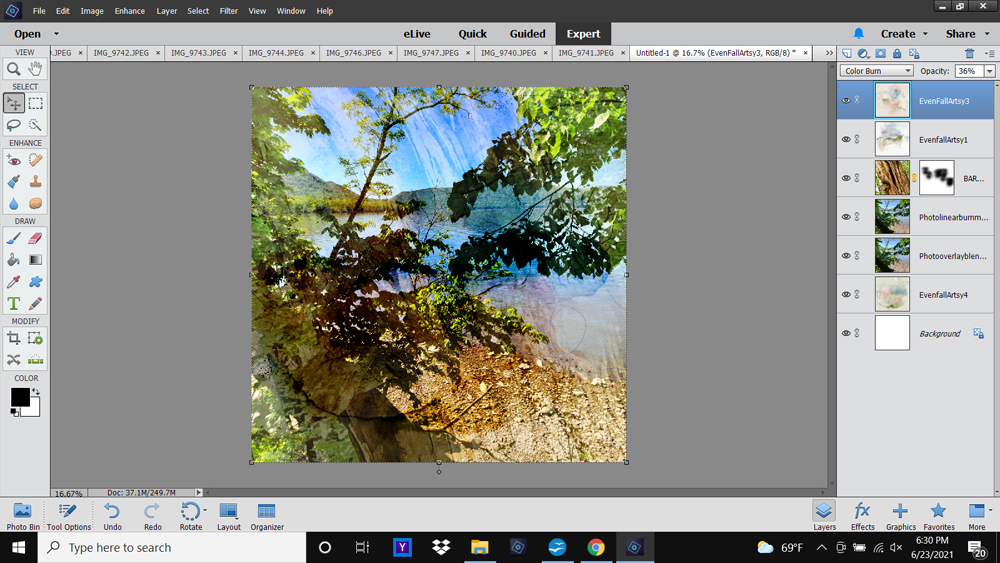
Use a Layer Mask and brushes to remove parts of the photo texture layer.
- Apply a Layer Mask to the photo texture layer from the Layers Panel.
- Click on the ‘filled square with hollow circle’ at the top (Elements) or bottom of the Layers Panel.
- Notice the white ‘thumbnail’ appear next to the photo texture layer.
- Select the Paint Brush Tool from the Tools Panel.
- Set the Fore and Background Colors in the Tools Panel to default settings.
- Paint on the Layer Mask using the brush of your choice to remove or ‘mask’ areas of the photo texture image that does not working with your photo composition.
Tip.
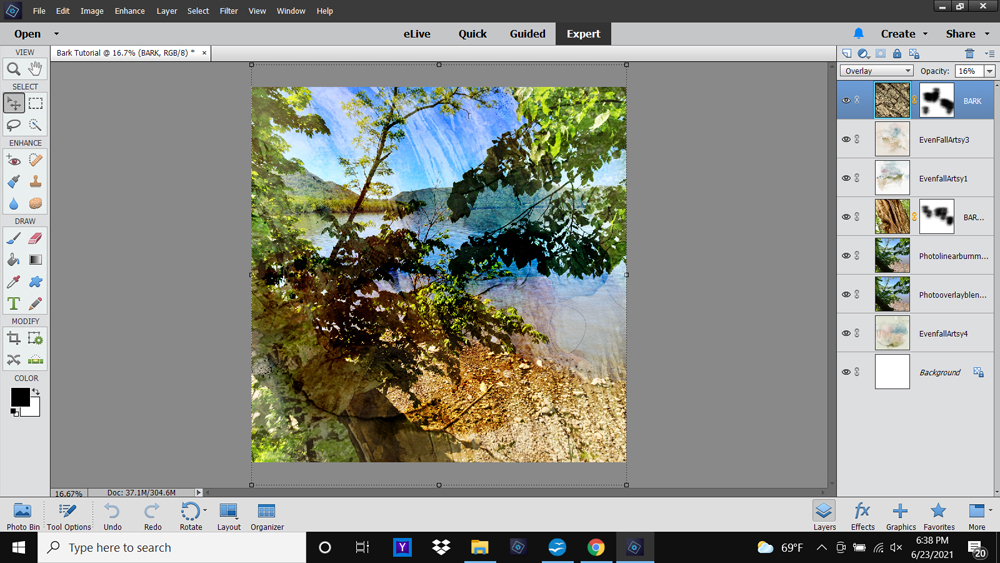
- Add more Artsy Papers to improve Color and Texture.
- Color Burn Blending Modes were applied to Artsy Papers #1 and #3 from ArtPlay Palette Evenfall.
- More texture photos were added to improve Visual Interest.
6. Create Composite
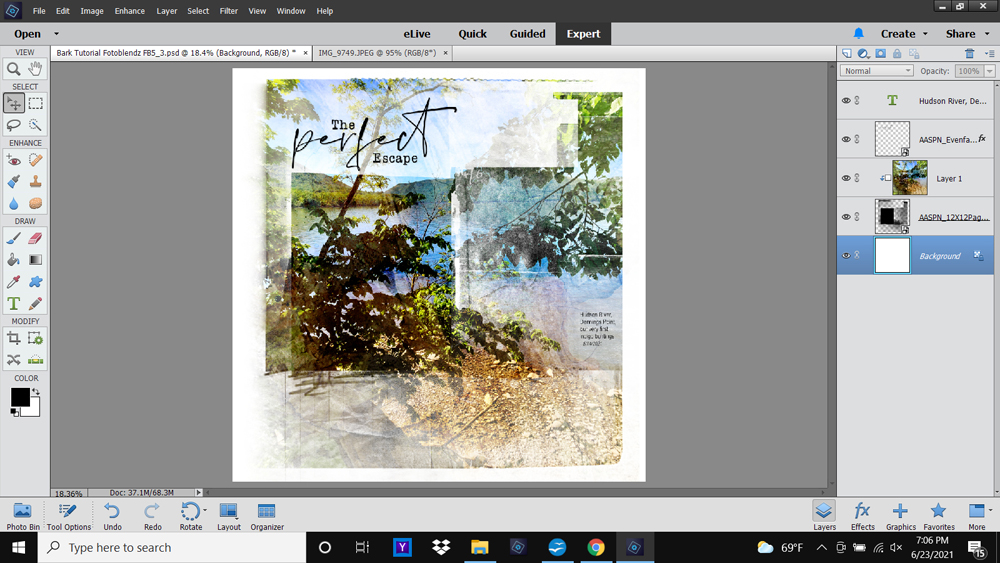
Flatten your image or create a composite layer before clipping to a Fotoblendz elements.
- Go to Layer> Flatten layers, or press SHIFT + CTRL/CMD + ALT/OPT + E to create a composite layer.
- Go to File> Open to select and open a FotoBlendz Clipping Mask of choice into your workspace.
- Clip the composite to the FotoBlendz Clipping Mask to the mask layer.
- Embellish your blended Focal Point with aA DigitalART of your choice.
Note.
- 12 x 12 Page Fotoblendz Set No 5 (#3.), Evenfall WordART and elements from ArtPlay Palette Evenfall were added to the digital scrapbooking composition.
Digital Supplies
A full list of aA DigitalART products can be found here.
Summary
Create a quick and easy layout by blending multiple photos with aA DigitalART using Blending Modes.
- Select an Artsy Paper from an ArtPlay Palette to create your Layout Foundation.
- Place your Focal Image plus Photo Texture layers on top of the Artsy Paper.
- Apply different Blending Modes to the photo layers adjusting the Opacity as preferred.
- Use a Layer Mask + Brushes to perfect the artistry.
- Clip to a FotoBlendz Clipping Mask of choice
- Embellish with aA DigitalART
Try This:
- Create interesting effects easily by using ordinary, everyday photos.
- Don’t forget the items around your house—my texture library now includes snapshots of my knitting and gardening supplies, baskets, and even items in my silverware drawer.
See also:
- Evenfall into Layers of Blending Modes Video
- Finding and Using Photo Resources
- Using Blending Modes with FotoBlendz






Such a v\Very fun technique Laura! Thank you for sharing your new inspiration.