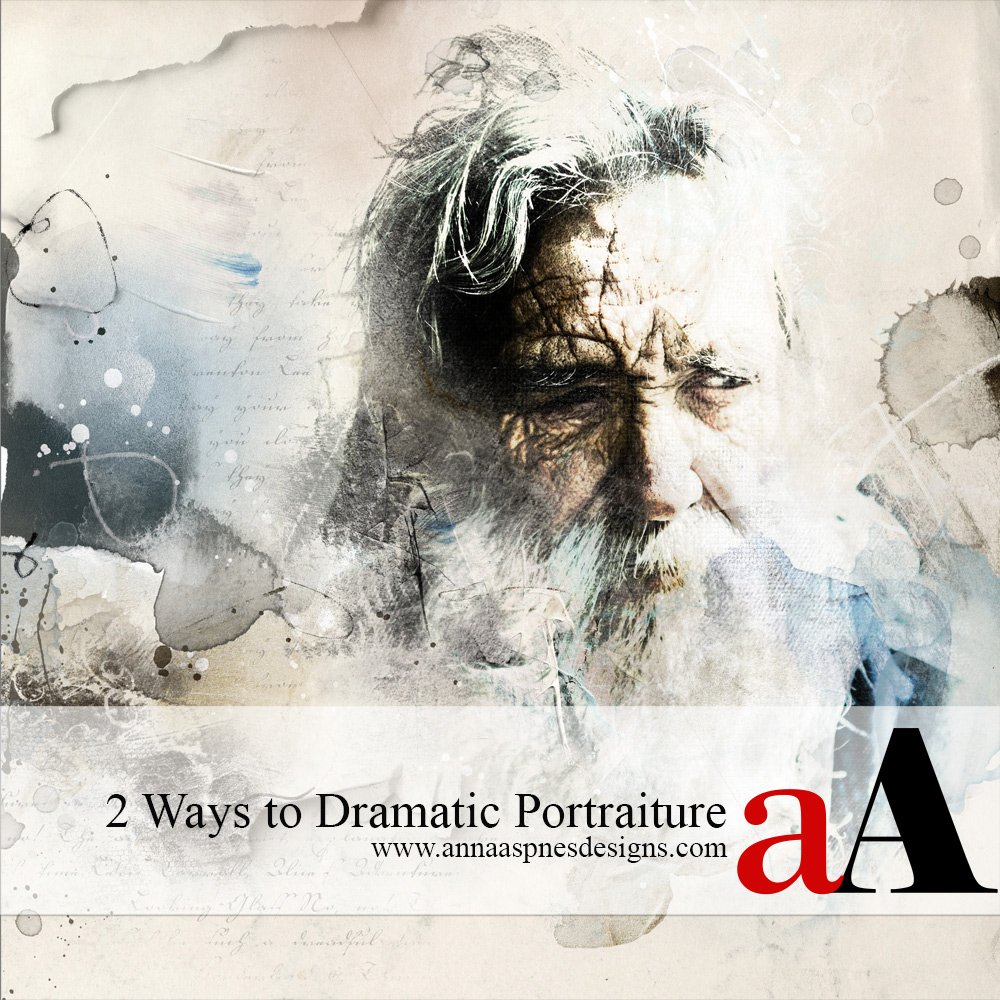
Today, Creative Team Member, Nancy Adams is sharing 2 Ways to Dramatic Portraiture.
Follow this tutorial in Adobe Photoshop Elements.
2 Ways to Dramatic Portraiture
Introduction
Create a Chiaroscuro-style dramatic portrait in Photoshop Elements.
- Establish a painterly portrait with a dramatic Focal Point using FotoBlendz Clipping Masks/Overlays.
- Use the Hard Light Blending Mode to create CONTRAST and yield striking blending effects.
- Create a Visual Triangle with paint and ArtsyStain brushes to frame the Focal Point.
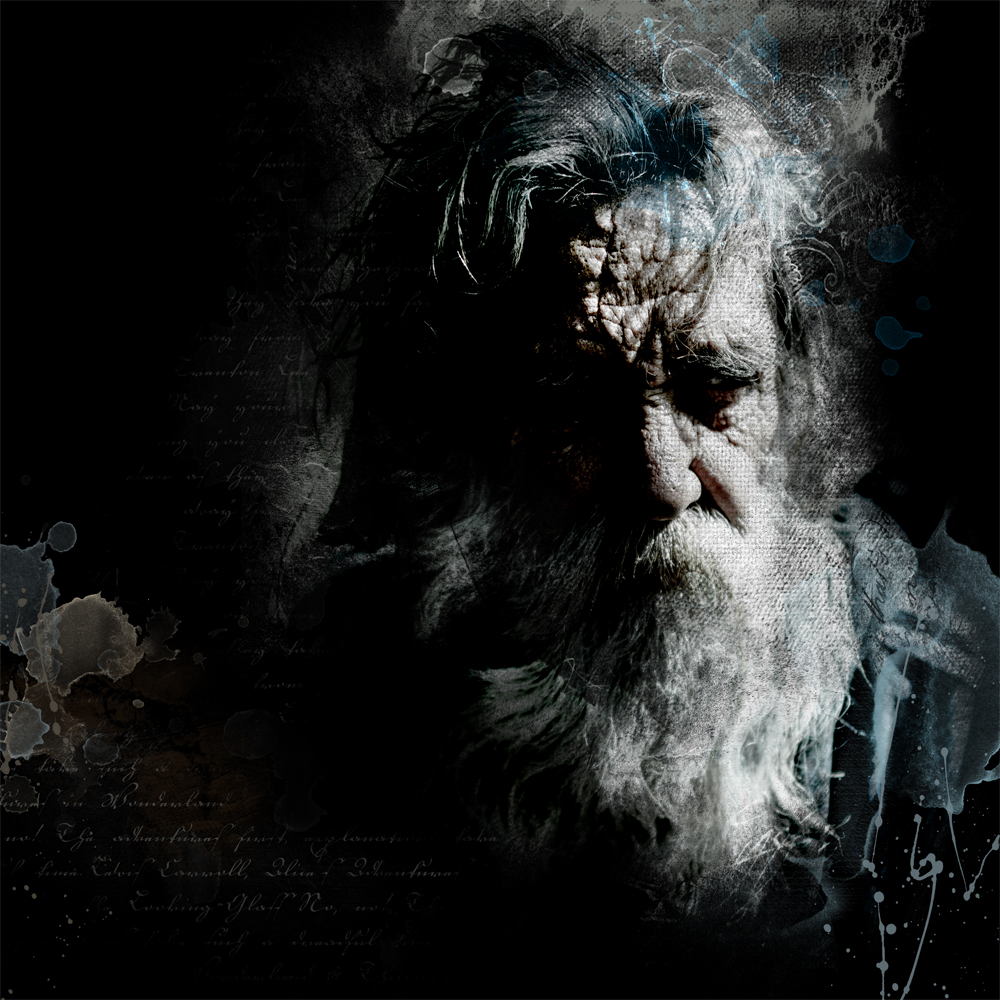
- Adjust the STYLE by adding an alternative BLACK background layer.
Note. Chiaroscuro is an Italian term which translates as light-dark. The style of painting is associated with DaVinci, Rembrandt and the exaggerated form-tenebrism associated with Caravaggio and Artemisia Gentileschi.
1. Establish Foundation
Create a new layout foundation using an Artsy Paper and photo clipped to a FotoBlendz Clipping Mask/Overlay.
- Go to File> Blank File> New Document.
- Enter 12 X 12 inch with a Resolution of 300 PPI.
- Open and move the Artsy Paper of choice onto the Layout Foundation using the Move Tool from the Tools Panel.
- Position the FotoBlendz Clipping Mask/Overlay using the Artsy Paper design as guide for placement.
- The design on the Artsy Paper will guide placement of the blended photo and create the Focal Point of the photo artistry.
- Select a FotoBlendz Overlay/Clipping Mask to coordinate with Portrait or Landscape photo Orientation.
- Move the photo onto the photo artistry design ensuring the edges of the image layer extend beyond those of the FotoBlendz Clipping Mask/Overlay.
- Clip the photo to the FotoBlendz layer via Layer> Create Clipping Mask or press CTRL/CMD + G.
- The photo layer will assume the same SHAPE as the underlying FotoBlendz layer and become a Clipping Set.
2. Apply Blending Mode
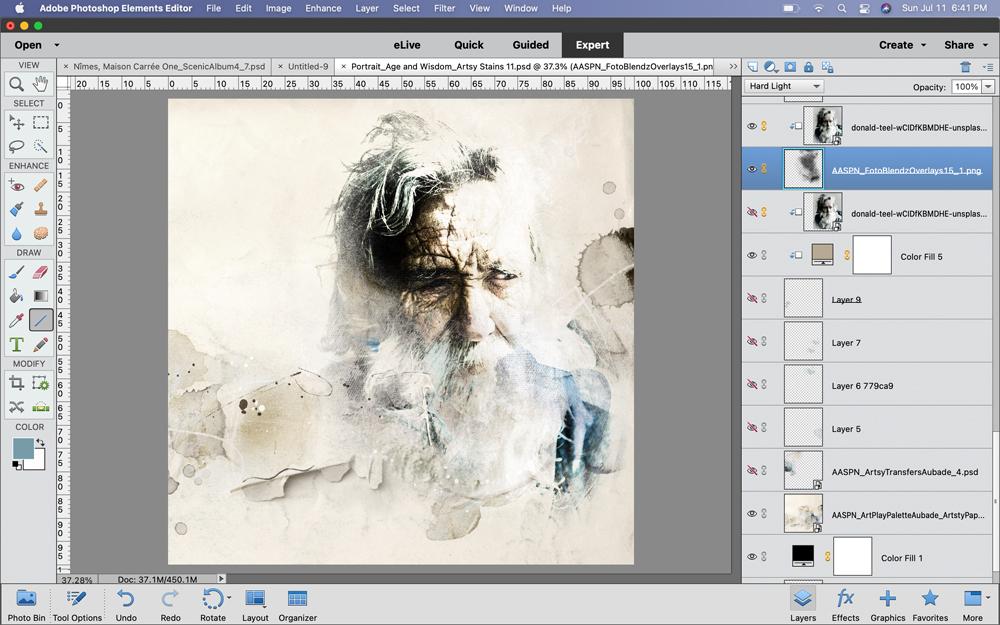
Use the Hard Light Blending Mode to blend the lighter edges of the photo and make them disappear into the background.
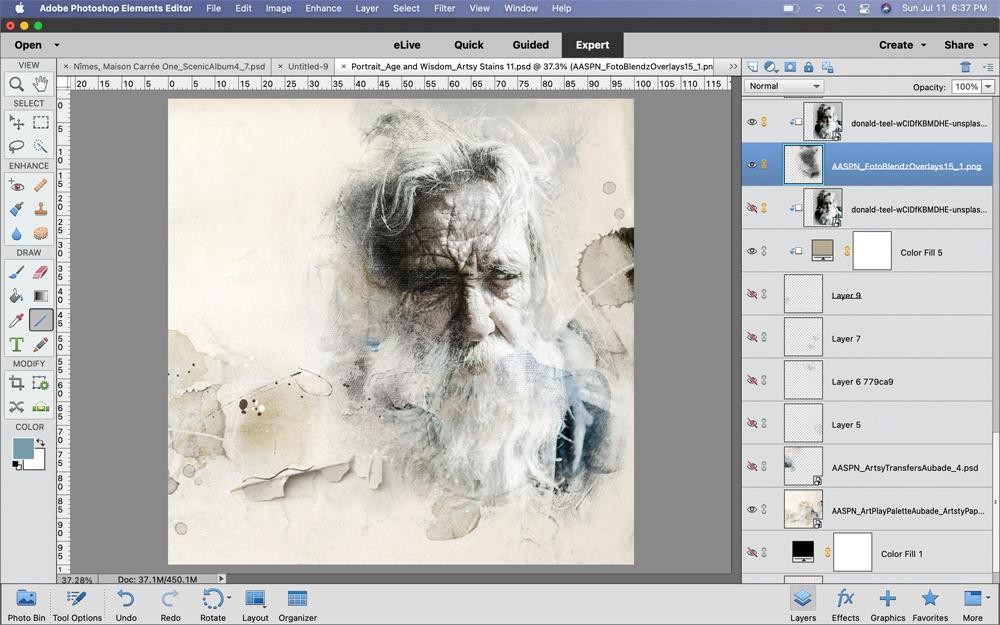
- Select the FotoBlendz layer in the Layers Panel and apply a Hard Light Blending Mode.
- The Blending Modes menu is accessed by clicking the ‘Normal’ tab in the Layers Panel.
- Ensure you apply the Blending Mode to the mask layer as opposed to the photo layer.
- Go to Image> Transform and using the Bounding Box to reposition the Clipping Set.
Tips.
- Consider the Rule of Thirds design principle in placing to blended photo to yield and interesting composition.
- Note that the photo may be blended in such as way with the dark background that the Focal Point may lie in just ONE feature of the face such as the eyes.
Note. You can also Design Custom Masks using a variety of Photoshop Brushes from Tools and ArtPlay Palettes instead of using a Clipping Mask.
3. Add Photoshop Brushes
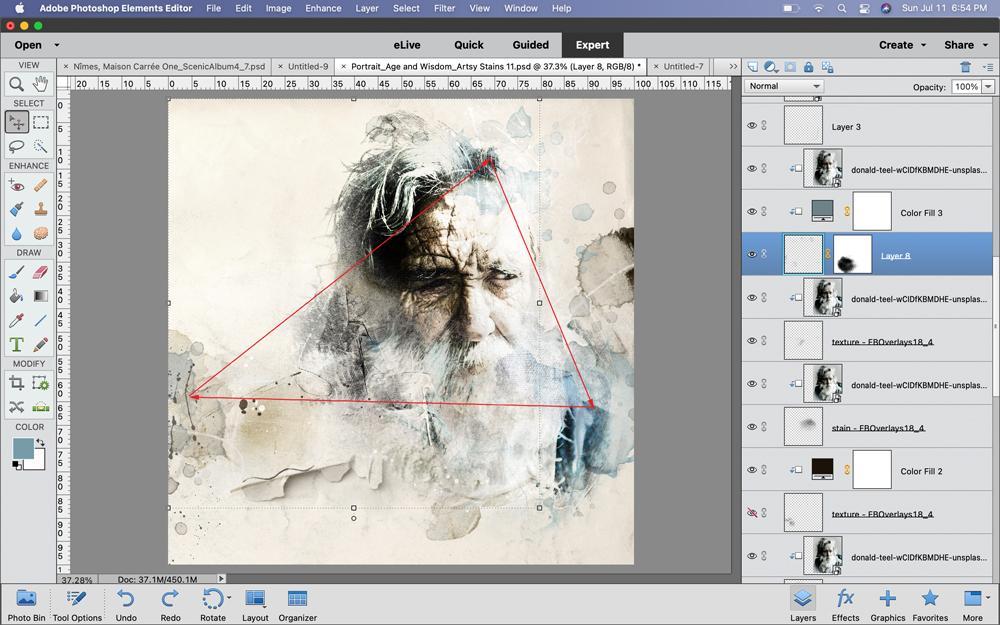
Create a Visual Triangle to move the eye and yield visual interest.
- Select the Paint Brush Tool from the Tools Panel.
- In the Tools Panel click on the Foreground Color box under Color to activate the Color Picker.
- Click on an area of your photo to SAMPLE a specific color from the photo layer.
- From the Tools Options dialogue box access the Brush Options.
- Click on the ‘bar’ next to Brushes to active another dialogue box.
- Click on the icon with ‘3 horizontal lines’ in the top right corner and choose Load Brushes from the menu.
- Navigate to the brushes you wish to load, select the .abr file and double click to load into the Brushes Panel.
- Select a brush and modify Size and Rotation as preferred.
- Create a New Layer for each brush imprint or stroke via Layer> New Layer.
- Stamp the brush onto the New Layer to create a digital imprint.
Tips.
- Use a Variety of ArtsyStains, Splatters and Textures.
- Stamp brushes with common Element Properties in 3 different areas of the photo artistry design.
- These 3 elements create a Visual Triangle, framing the Focal Point and leading the eye around the design.
- Repeat the same Color or Shape of brush for example.
- Embellish the photo artistry with additional ArtsyTransfers, ScriptTease brushes or other DigitalART elements to improve Texture and depth of Color.
4. An Opposing Background
Create a black background for an alternate dramatic effect.
- Turn off the visibility of the Artsy Paper layer in the Layers Panel.
- Select Color Mode> RGB Color with a Transparent Background.
- Add a Black Fill Layer above the transparent background via Layer> New Fill Layer> Solid Color.
- Choose Black using the Color Picker Tool.
- The ‘drama’ of the portrait is derived from the CONTRAST between light and dark elements.
- Click on the ‘eye’ icon next to any layer to Toggle visibility.
- The Hard Light Blending Mode makes the lighter colors in the composition much brighter and darker tones disappear into the background.
Note. In this photo artistry layout design, the Artsy Paper and the ArtsyTransfer layers were turned off.
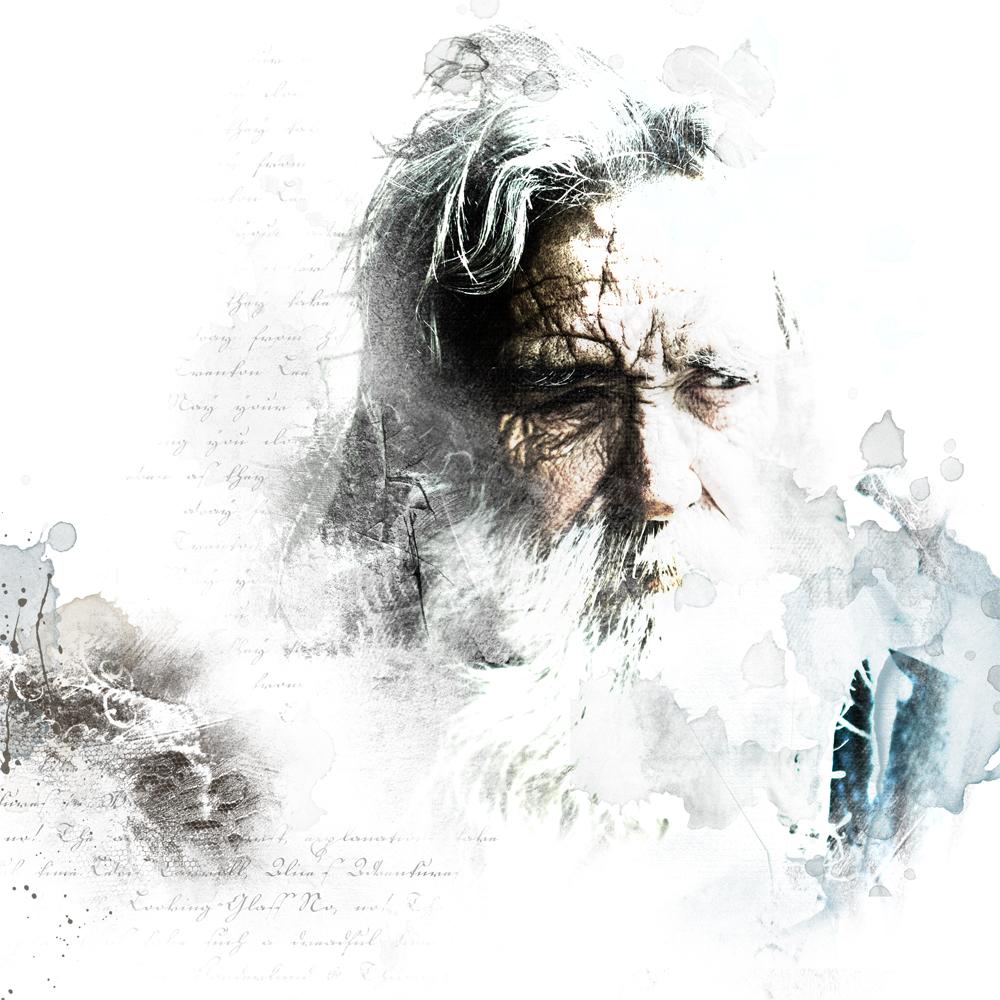
Tip. A white background will create an alternate dramatic effect.
DigitalART Supplies
See a complete list of aA DigitalART supplies HERE.
Summary
Create a dramatic portrait using FotoBlendz, Blending Modes and 2 diverse backgrounds.
- Blend your photo with a FotoBlendz Clipping Mask/Overlay over an Artsy Paper foundation to create a Focal Point.
- Apply the Hard Light Blending Mode to the MASK layer to yield dramatic CONTRAST in the blending.
- Add a trio of Photoshop brushes in the same Color, Style or Shape to frame the composition with a Visual Triangle.
- Experiment with a Black layout foundation to yield alternate dramatic effect.
See also:
- Another Example
- Light v. Dark Background Experimentation
- Design Principles and Design with Brushes Bundle
- Visual Triangle Design Principle




Recent Comments